Windows Autopilot enrollment
What is meant by Windows Autopilot?
Windows Autopilot is a cloud-based offering from Microsoft that automates the setup of new Windows 10/11 devices to prepare them for productive use. The Windows 10/11 device does not have to be reinstalled, but Windows Autopilot uses the existing image on the device.
Relution supports auto-enrollment via Windows Autopilot and Windows 10/11 devices can be quickly and easily inventoried in Relution via this path. Then, policies can be applied and apps can be installed on the Windows 10/11 devices via Relution.
What are the requirements to use Windows Autopilot?
Windows Autopilot can be used with Windows 10/11 Professional, Enterprise or Education version 1709 or later. It requires an Azure Instance with an Azure Active Directory (ADD) and Azure AD Premium P2 subscription is required. To set up in Azure, the user must have the role of global administrator possess. An Internet connection must be available when commissioning the Windows 10/11 devices.
How does Windows Autopilot work when commissioning a Windows 10/11 device?
When the Windows 10/11 device starts the Out-of-the-Box-Experience (OOBE), the system automatically detects that it is to be configured via Windows Autopilot if a network connection exists. The device submits its ID to Microsoft and checks to see if it has been registered in Autopilot for an Azure AD environment. The user must then log in to the Microsoft login page with their credentials. The sign-in completes the enrollment in Relution and creates a user account for the Azure AD user on the device.
What are the benefits of using Windows Autopilot?
The goal of Windows Autopilot is to avoid the cumbersome process of individually loading new Windows 10/11 devices with an internally created image. Instead, the devices should transform themselves into a pre-configured device as independently as possible. This minimizes the effort required for image creation and reduces the time required for physical registration and provisioning of the devices. Azure only needs to be set up once for this, and auto-enrollment works until the defined secret client key validity date expires (see below).
How to set up Azure to use Windows Autopilot in Relution?
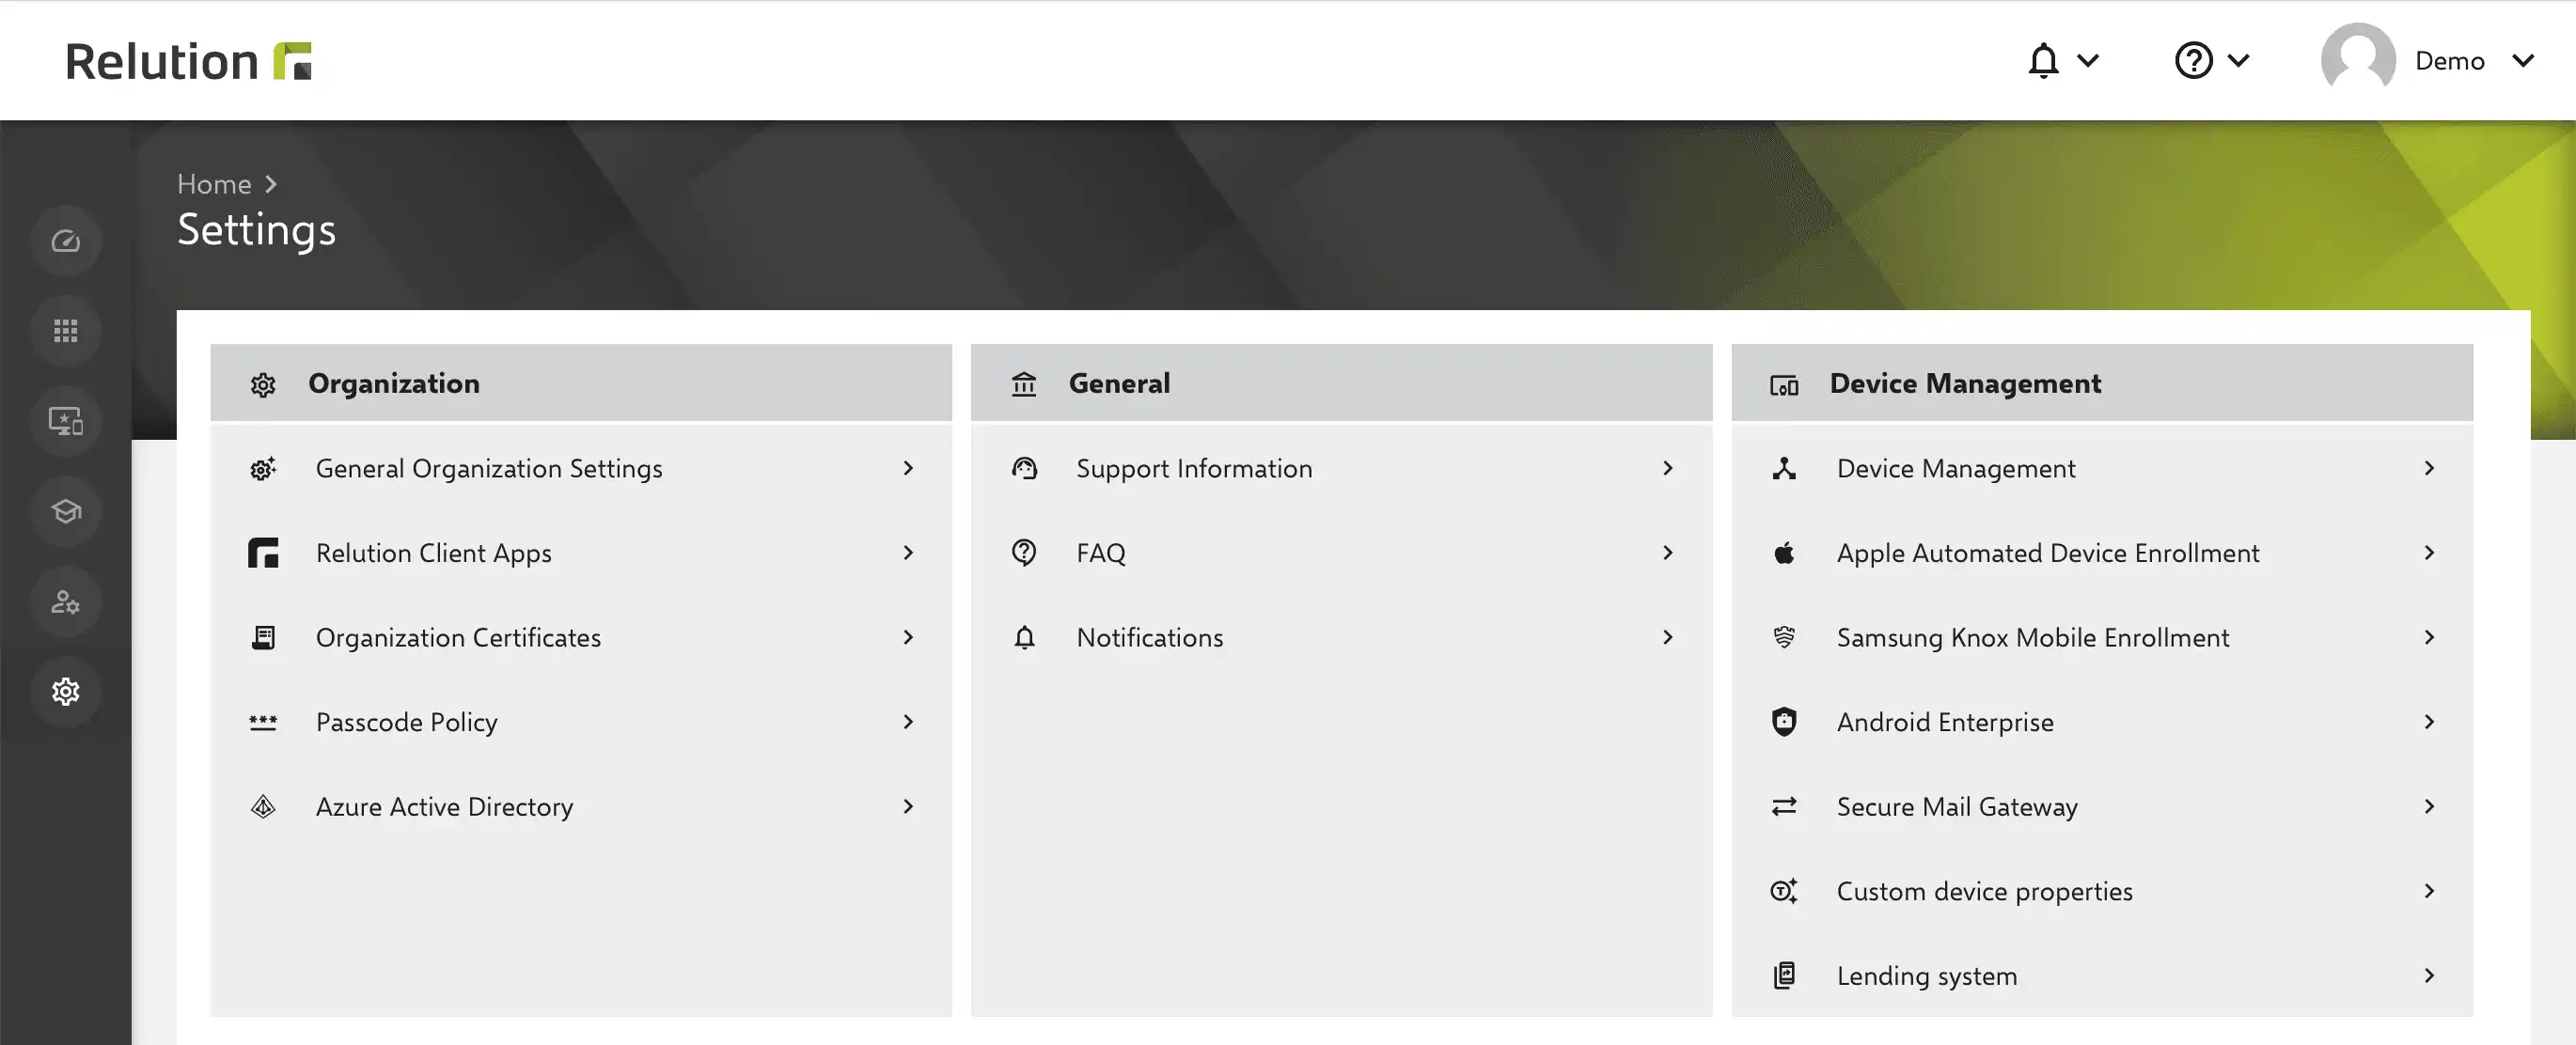
In the Relution settings under -> “Organization” -> “Azure Active Directory” a guide supports the setup and linking of Azure AD and Relution:

1. Add MDM application
Step 1 is to create a new MDM application in Azure and complete it with the details from the Relution guide.


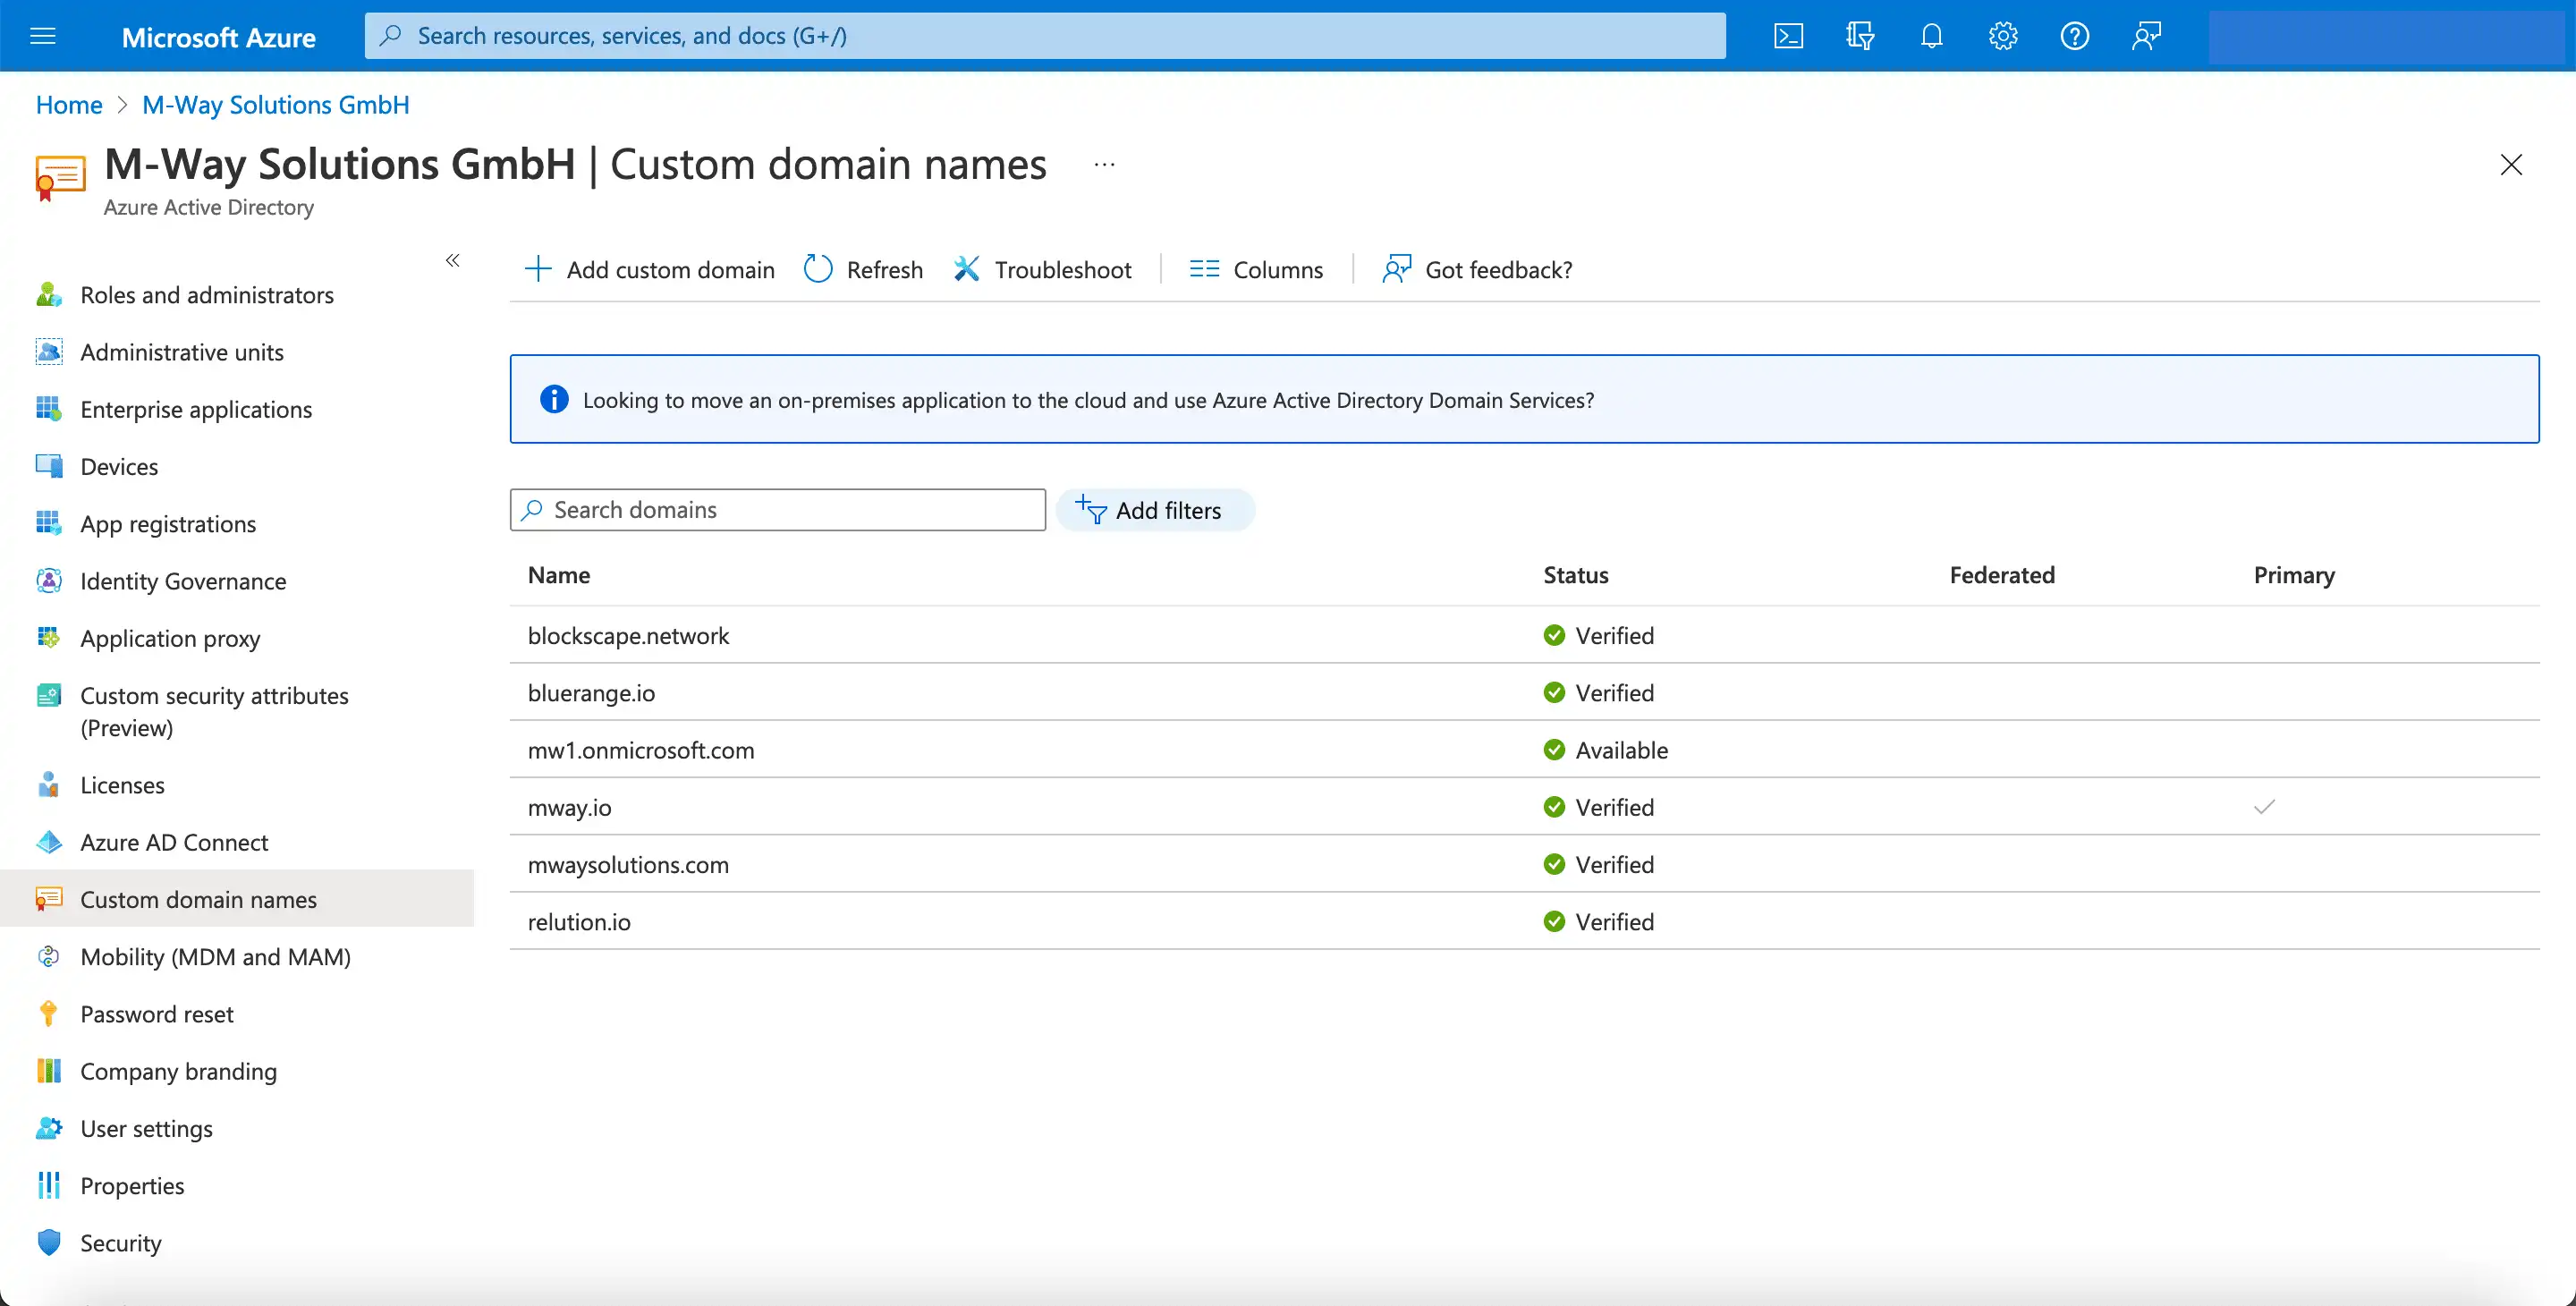
First, the domain of the corresponding relution server must be added in Azure AD under “Custom domain names”. This may take some time. For more information, see the Microsoft documentation.

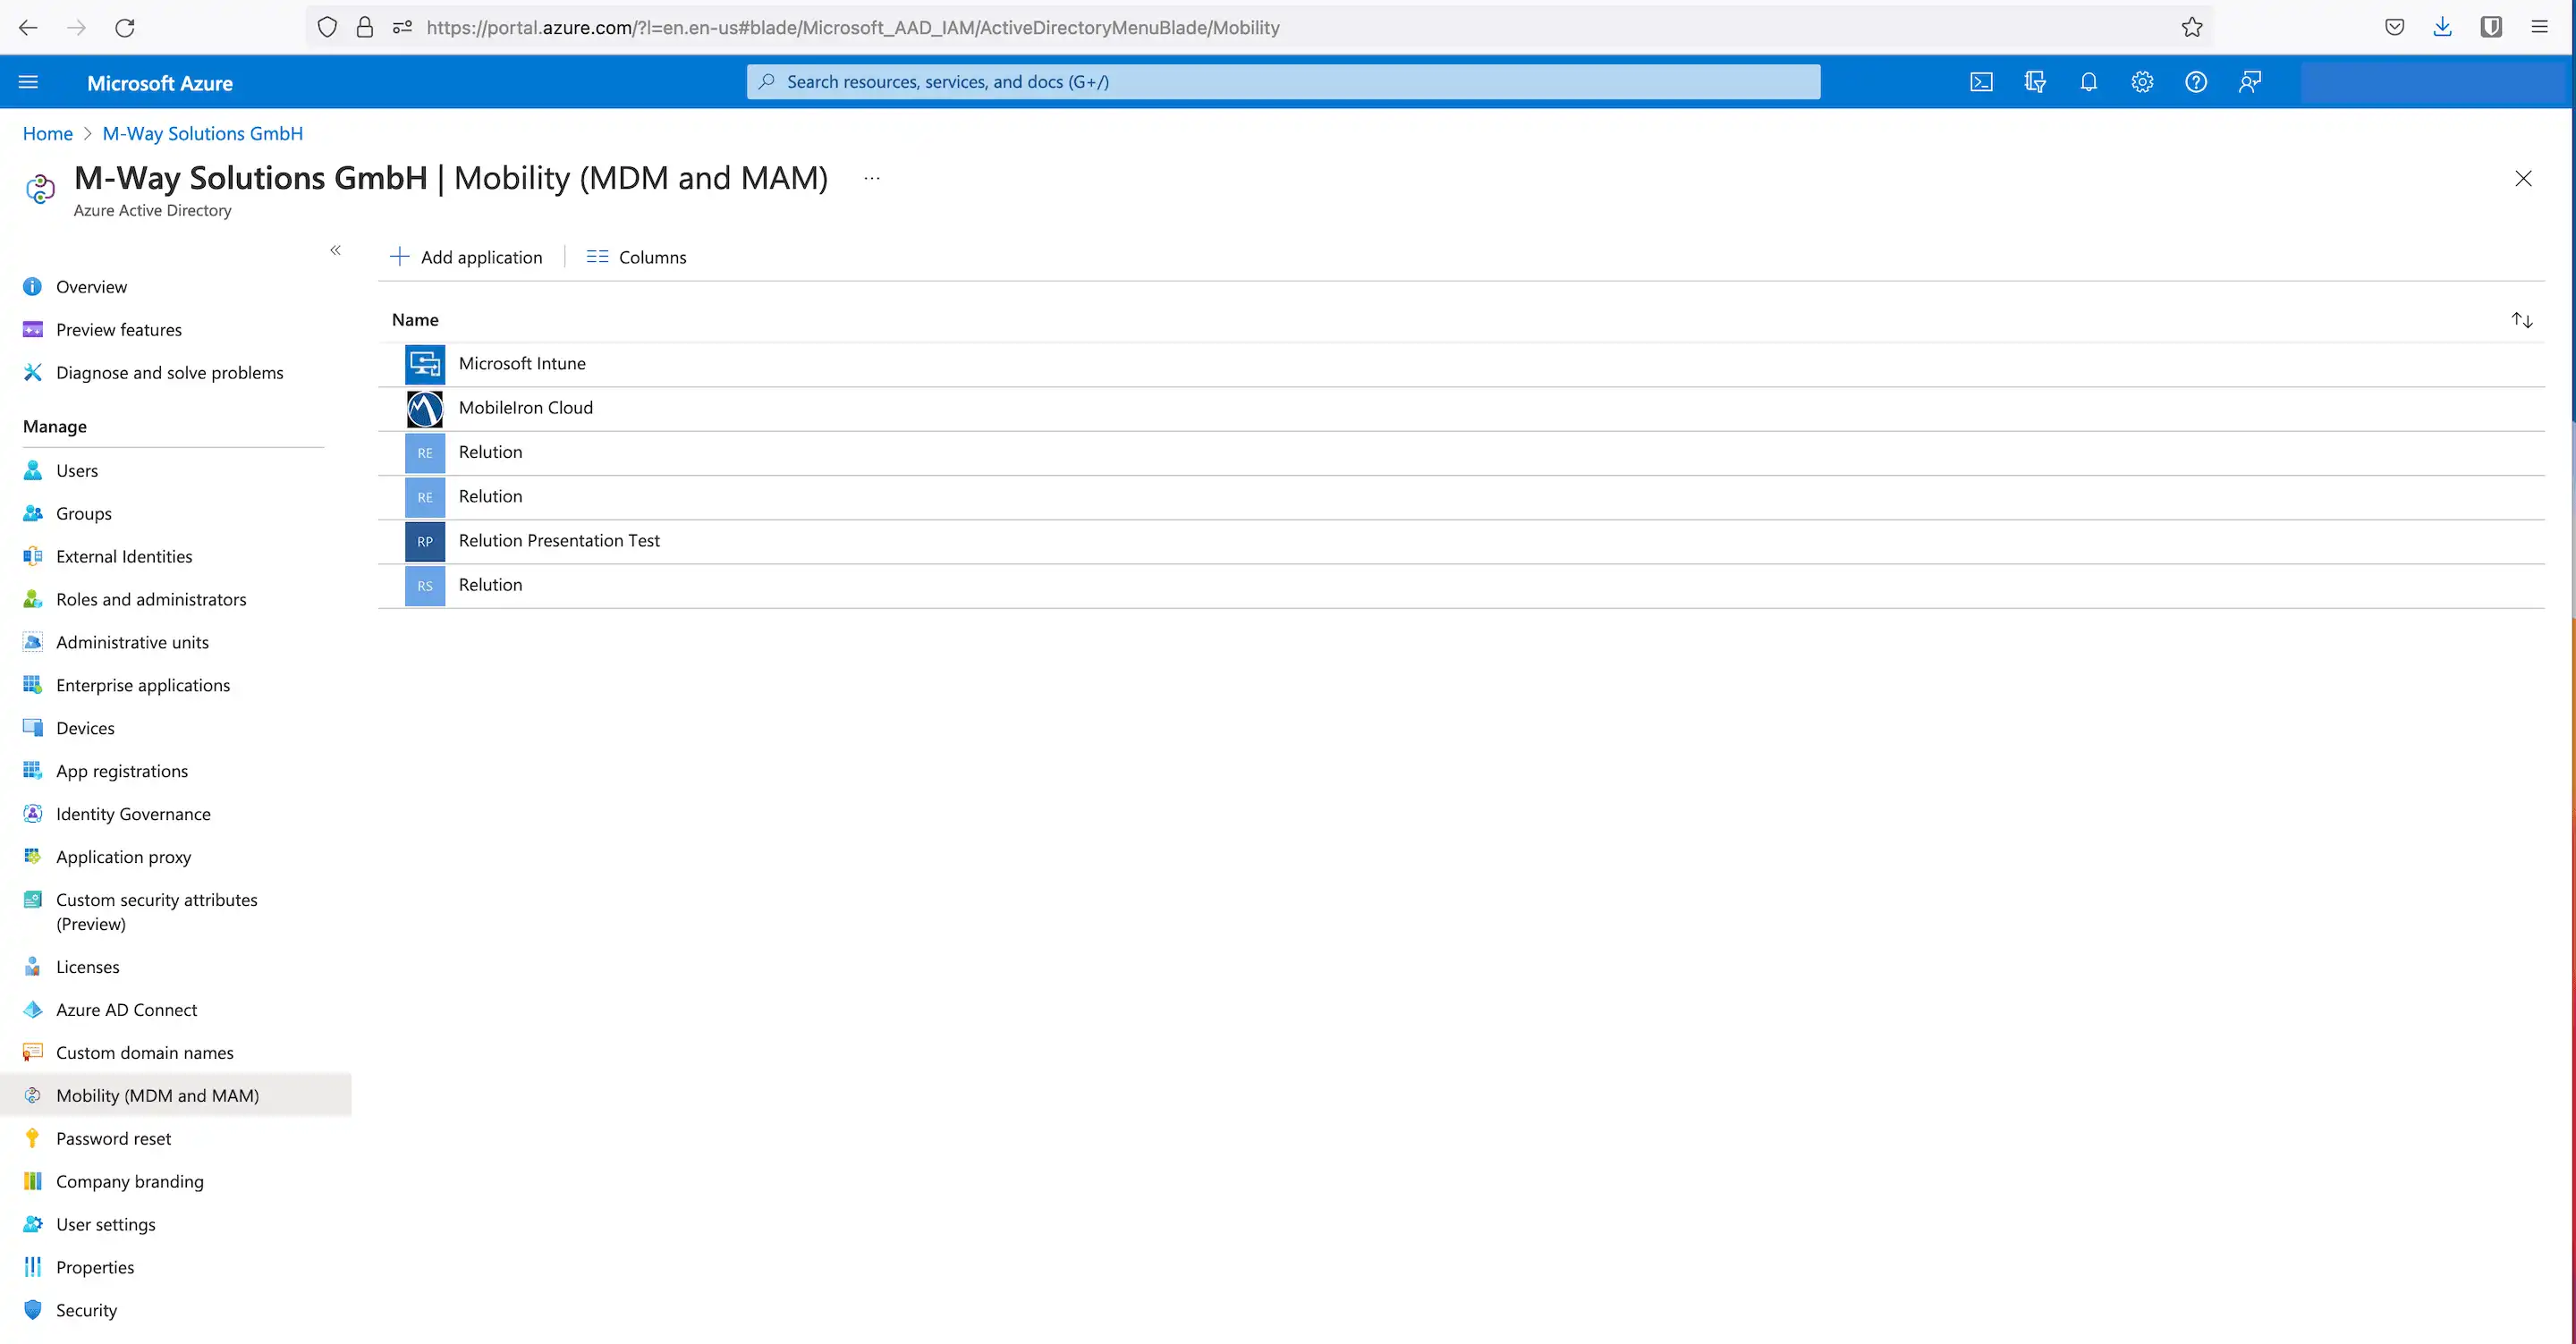
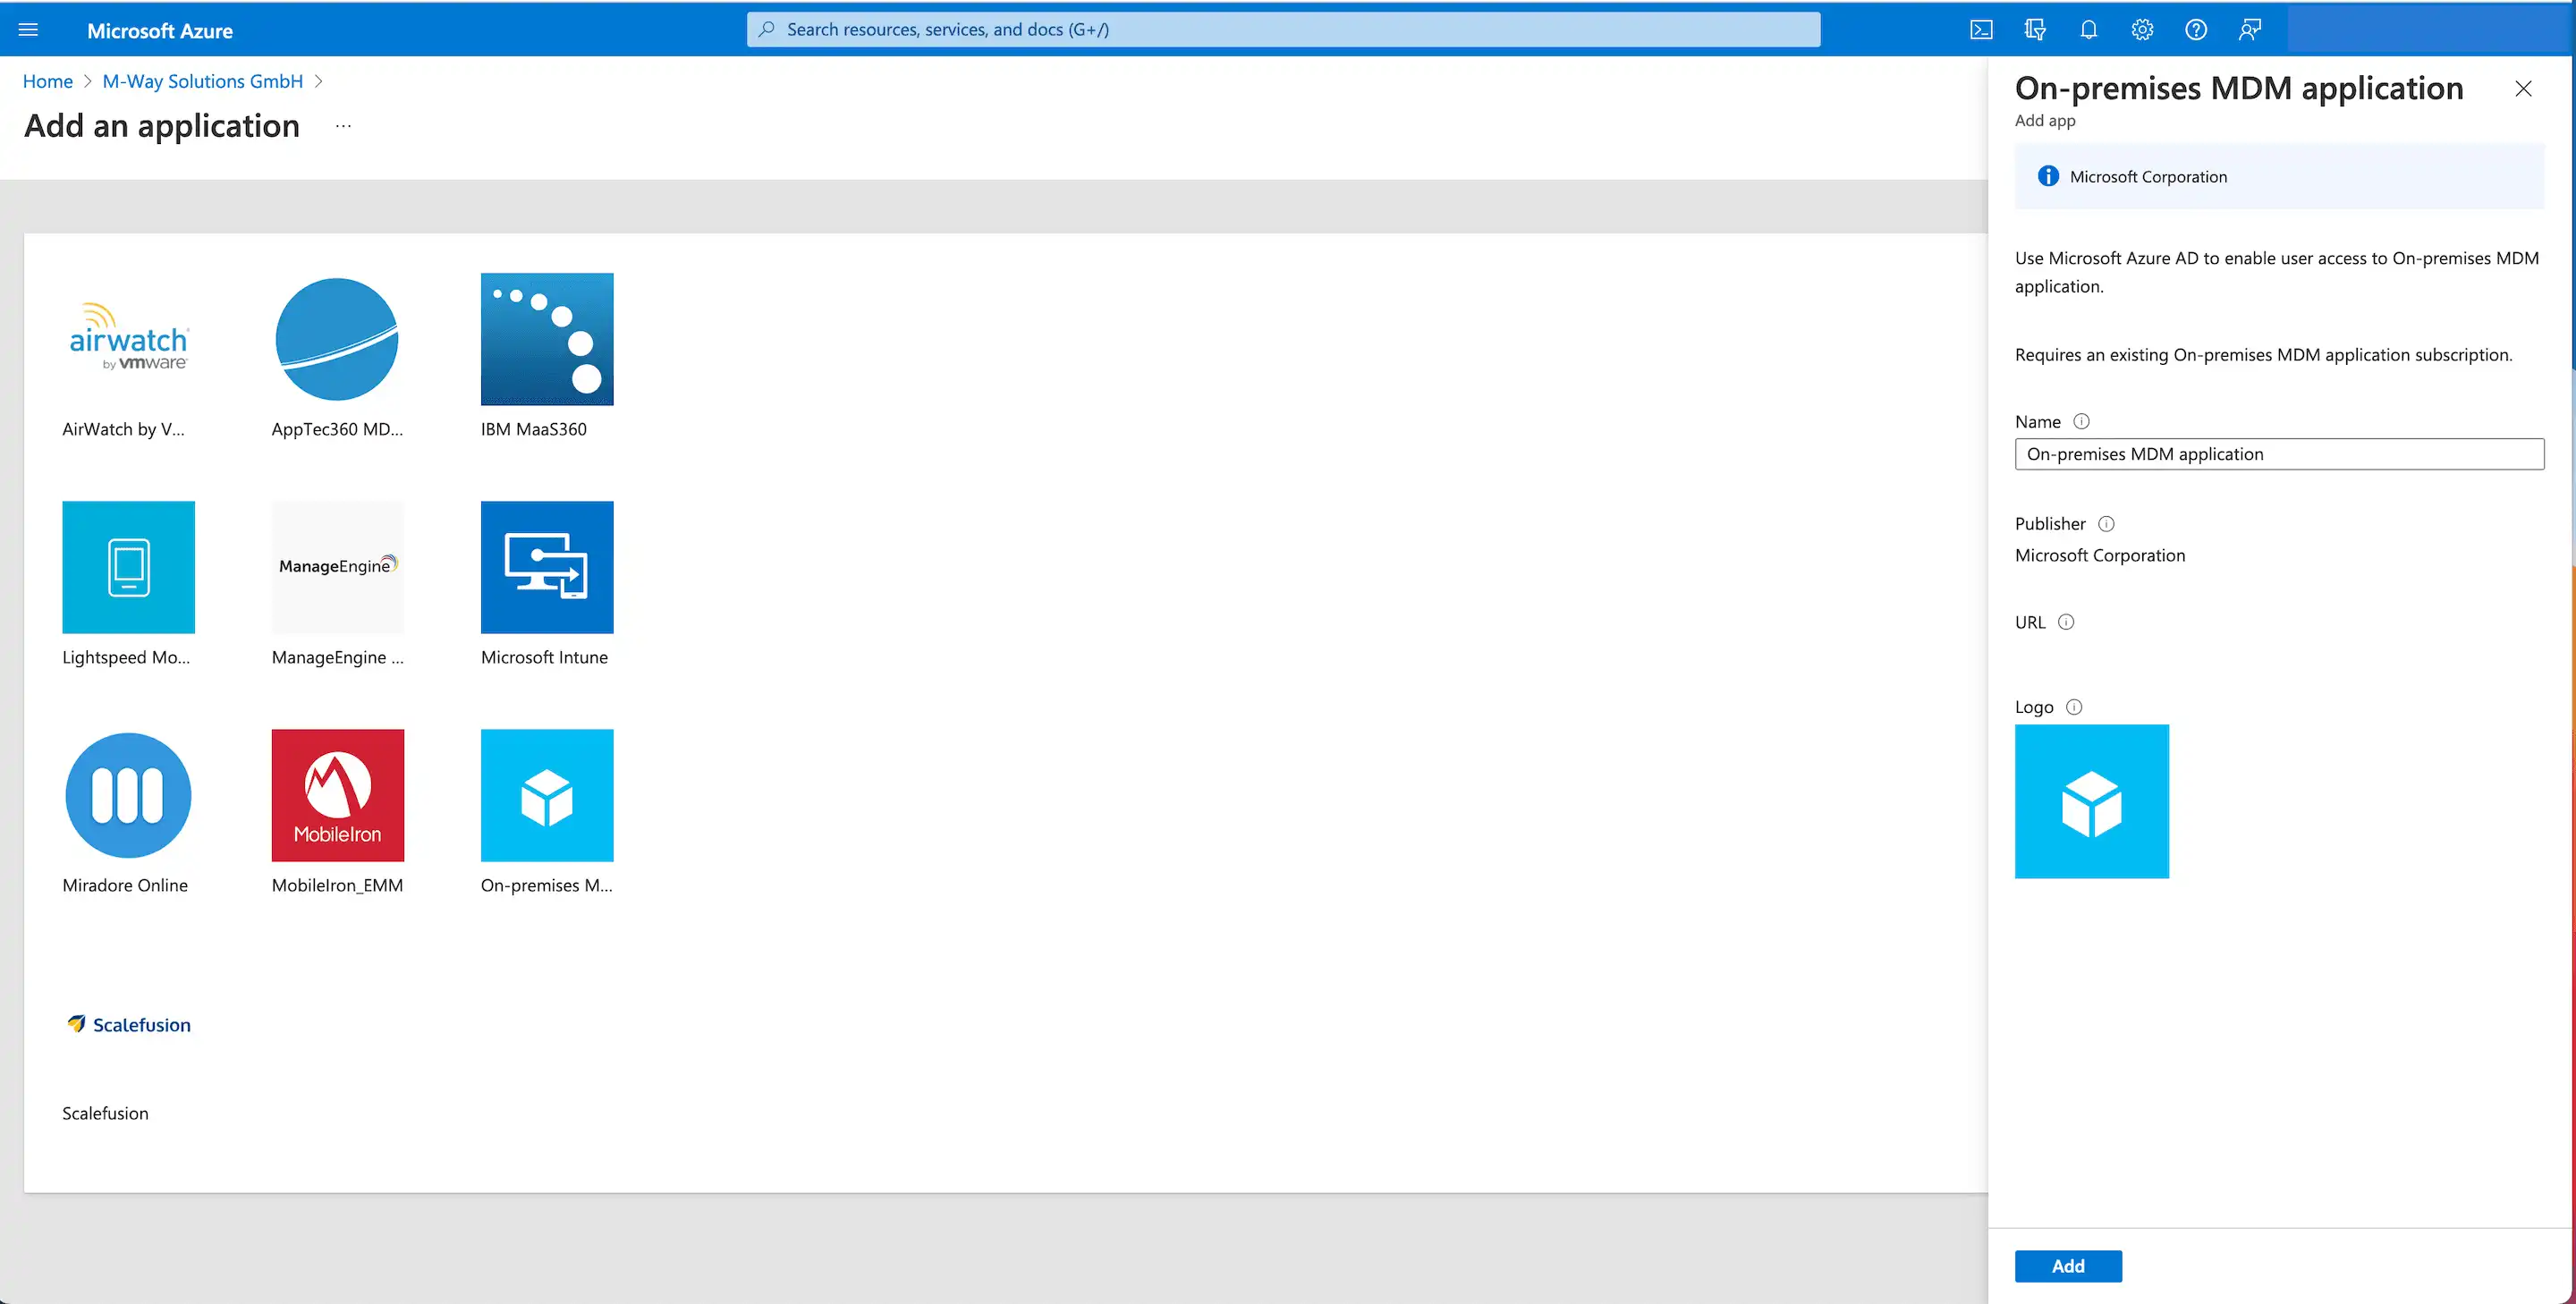
Under “Mobility (MDM and MAM)”, the desired MDM application is then added and activated:

-
Select the “On-Premises MDM Application” tile at the bottom right
-
Assign name
-
Click “Add”

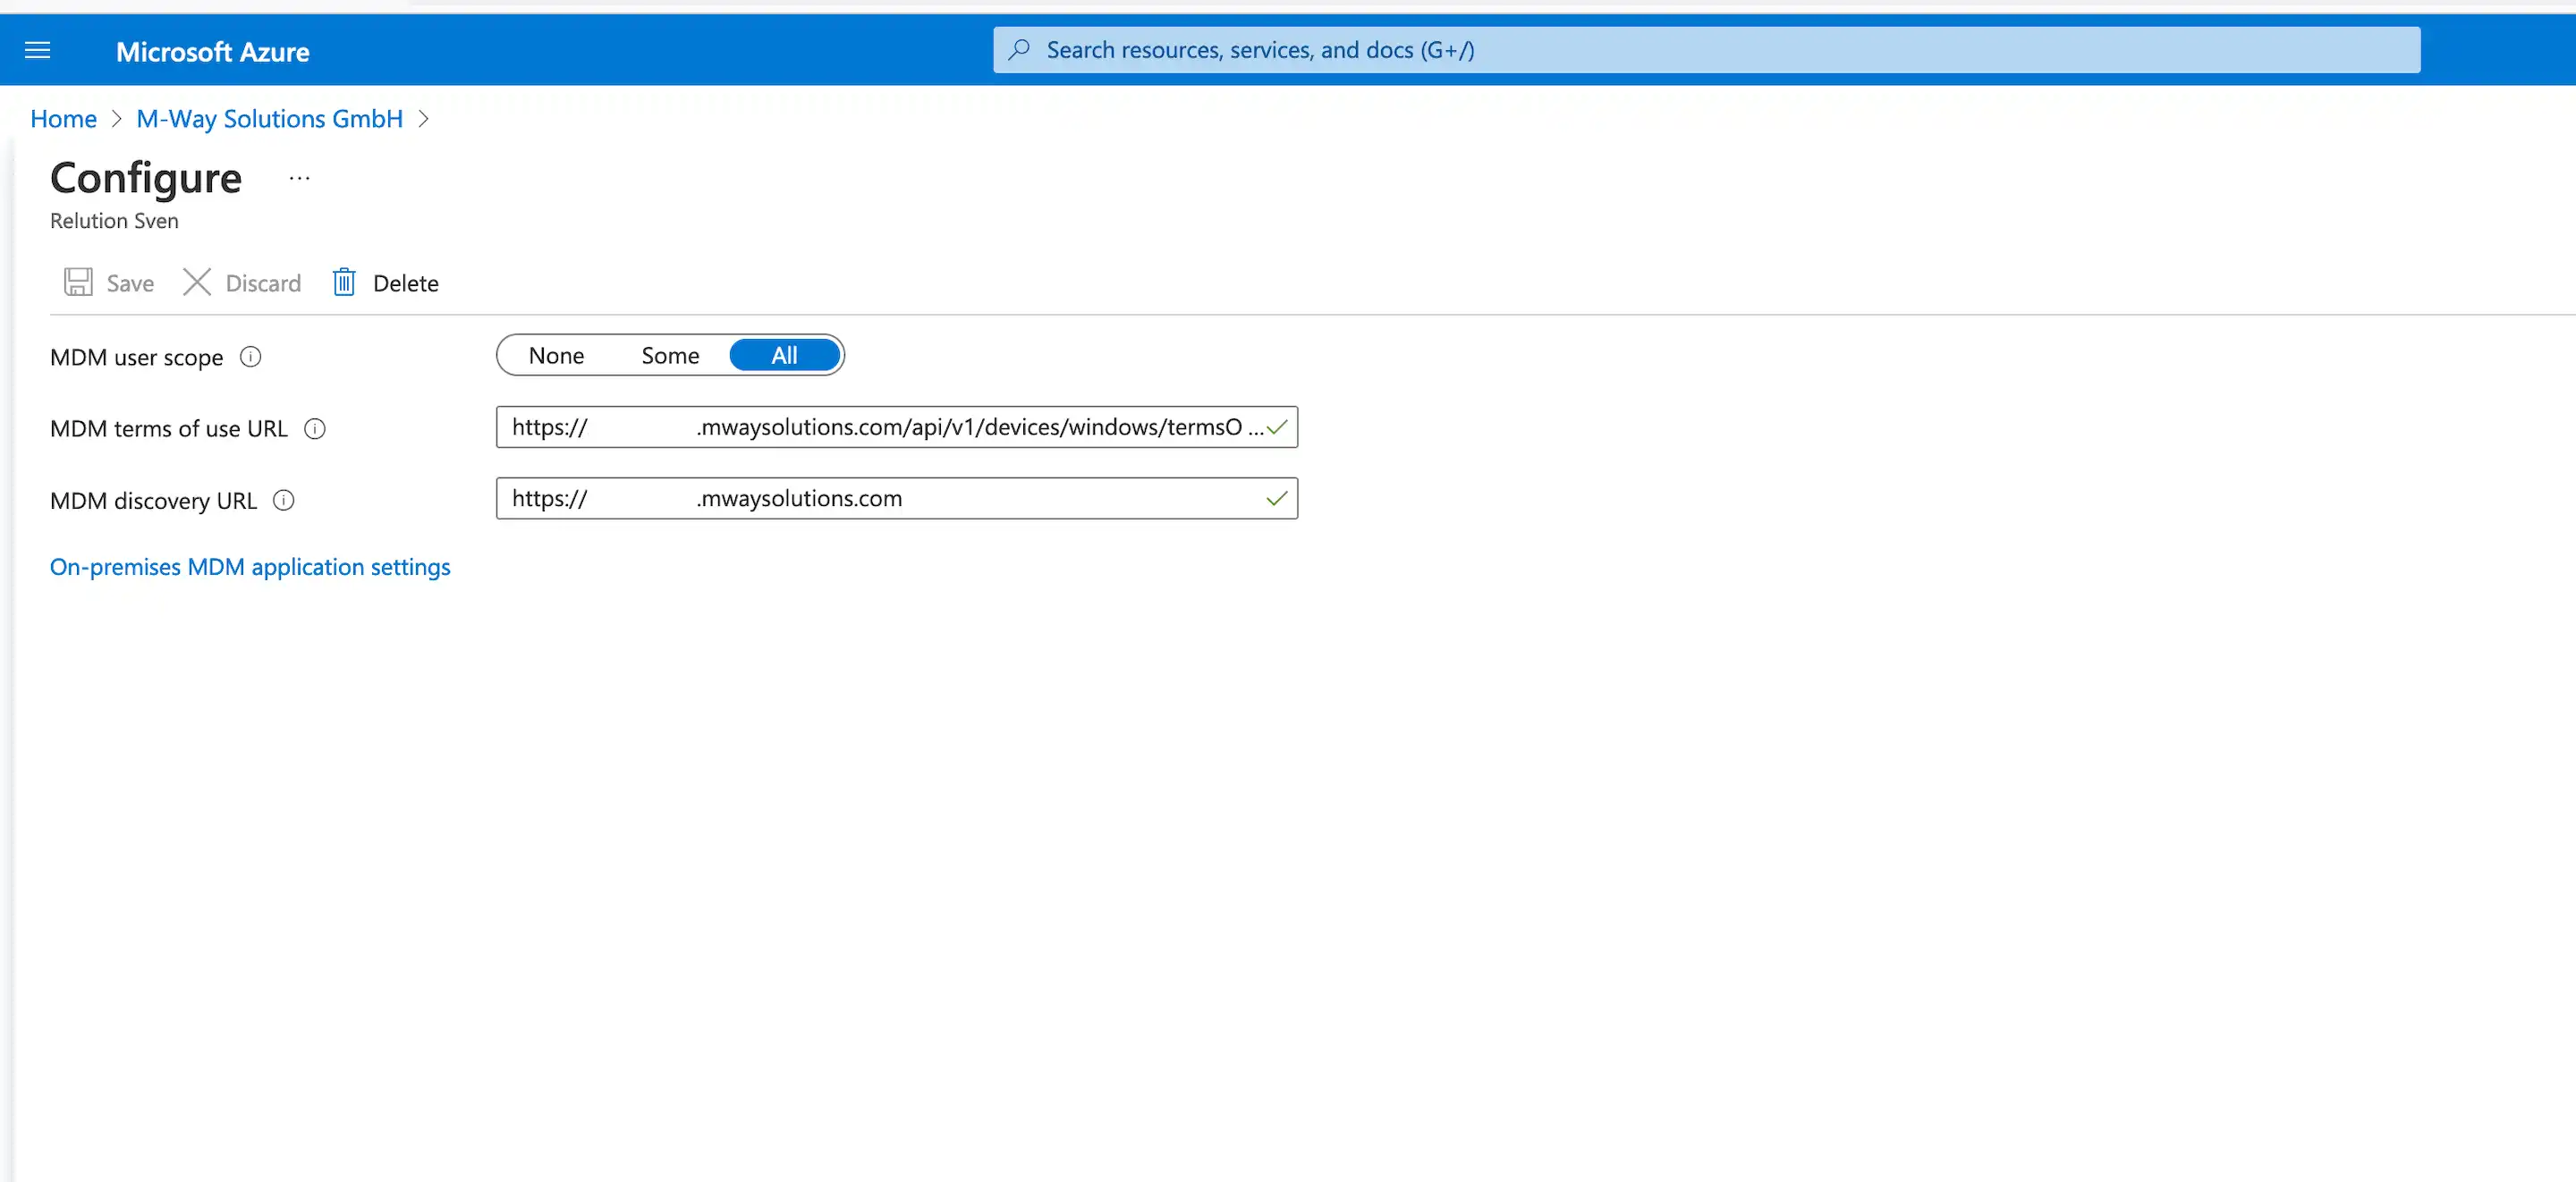
Now configure the new MDM application using the information from the Relution guide in step 1:
-
MDM user area -> select “All” (all users can perform an autopilot enrollment)
-
URL to MDM terms of use -> enter from Relution: https://serverurl/api/v1/devices/windows/termsOfUse (Microsoft asks for this URL before each enrollment, but no web page is called)
-
URL for MDM determination -> Enter server URL from Relution
-
Click “Save”

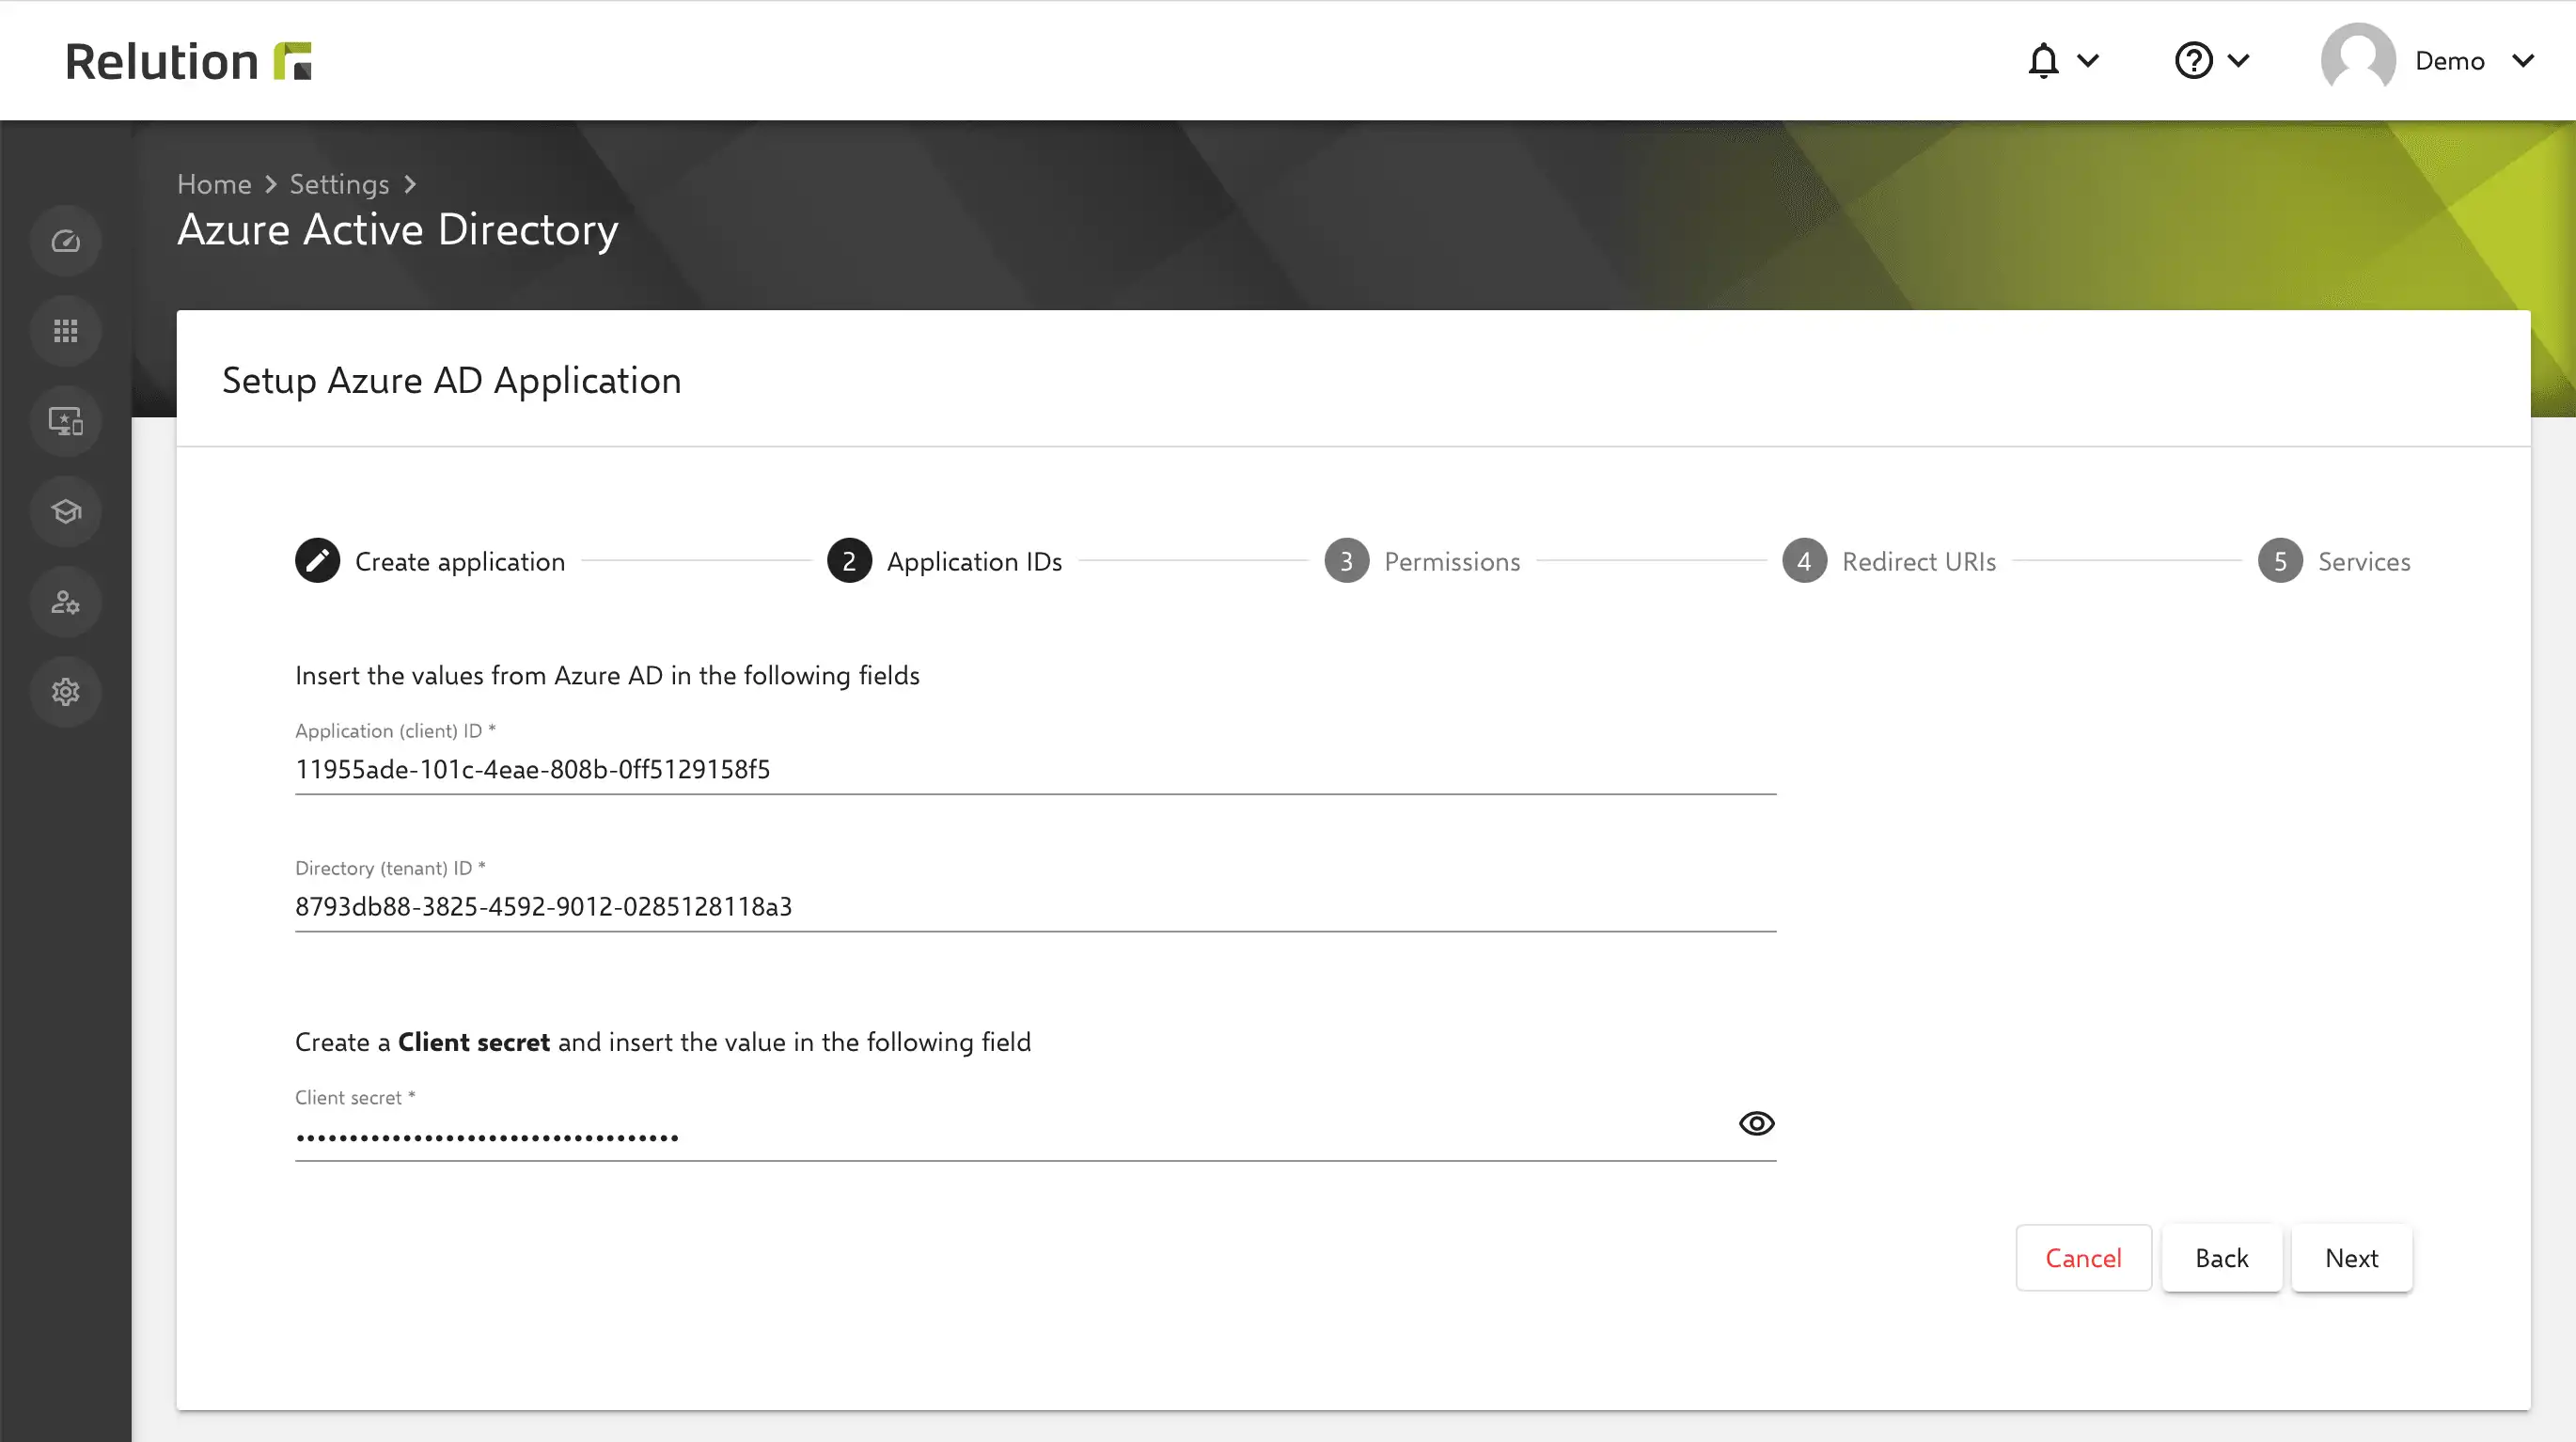
2. Make MDM application settings
After the new MDM application is created, the local MDM application settings can be made in Azure. Here, it is mandatory that the following details are transferred from Azure to the Relution guide in step 2:
-
Application (client) ID
-
Directory (tenant) ID
-
Value of the client secret key

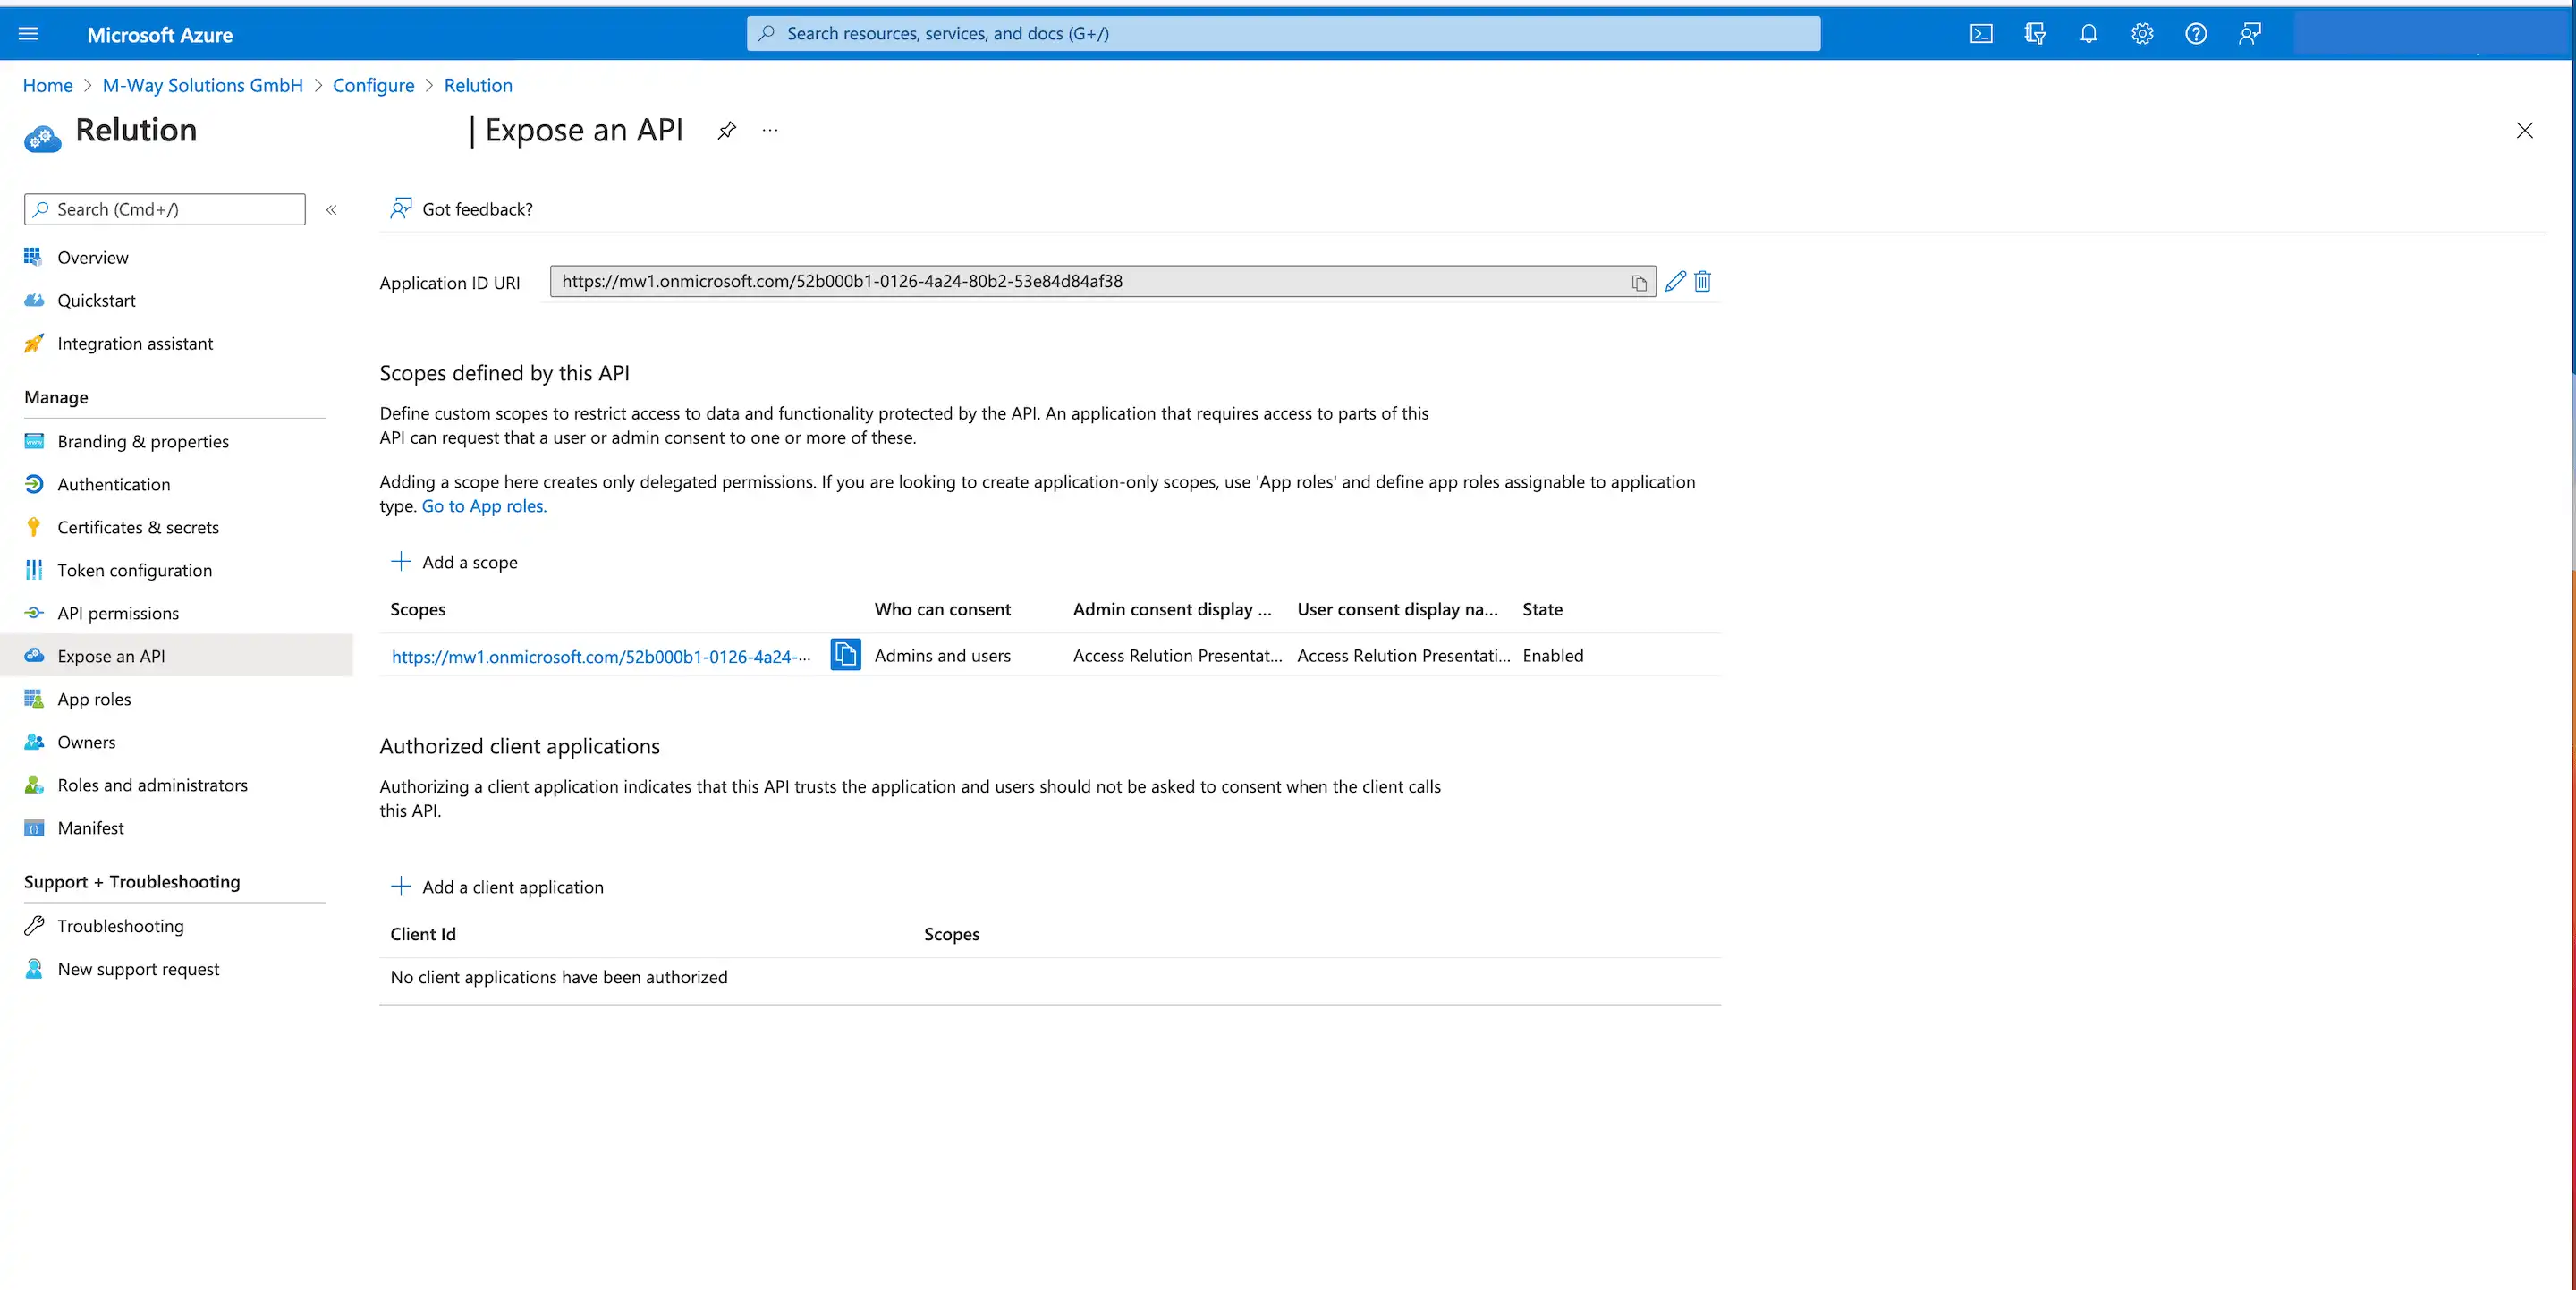
Now in the on-premises MDM application settings in Azure, click “Application ID URI” to edit:

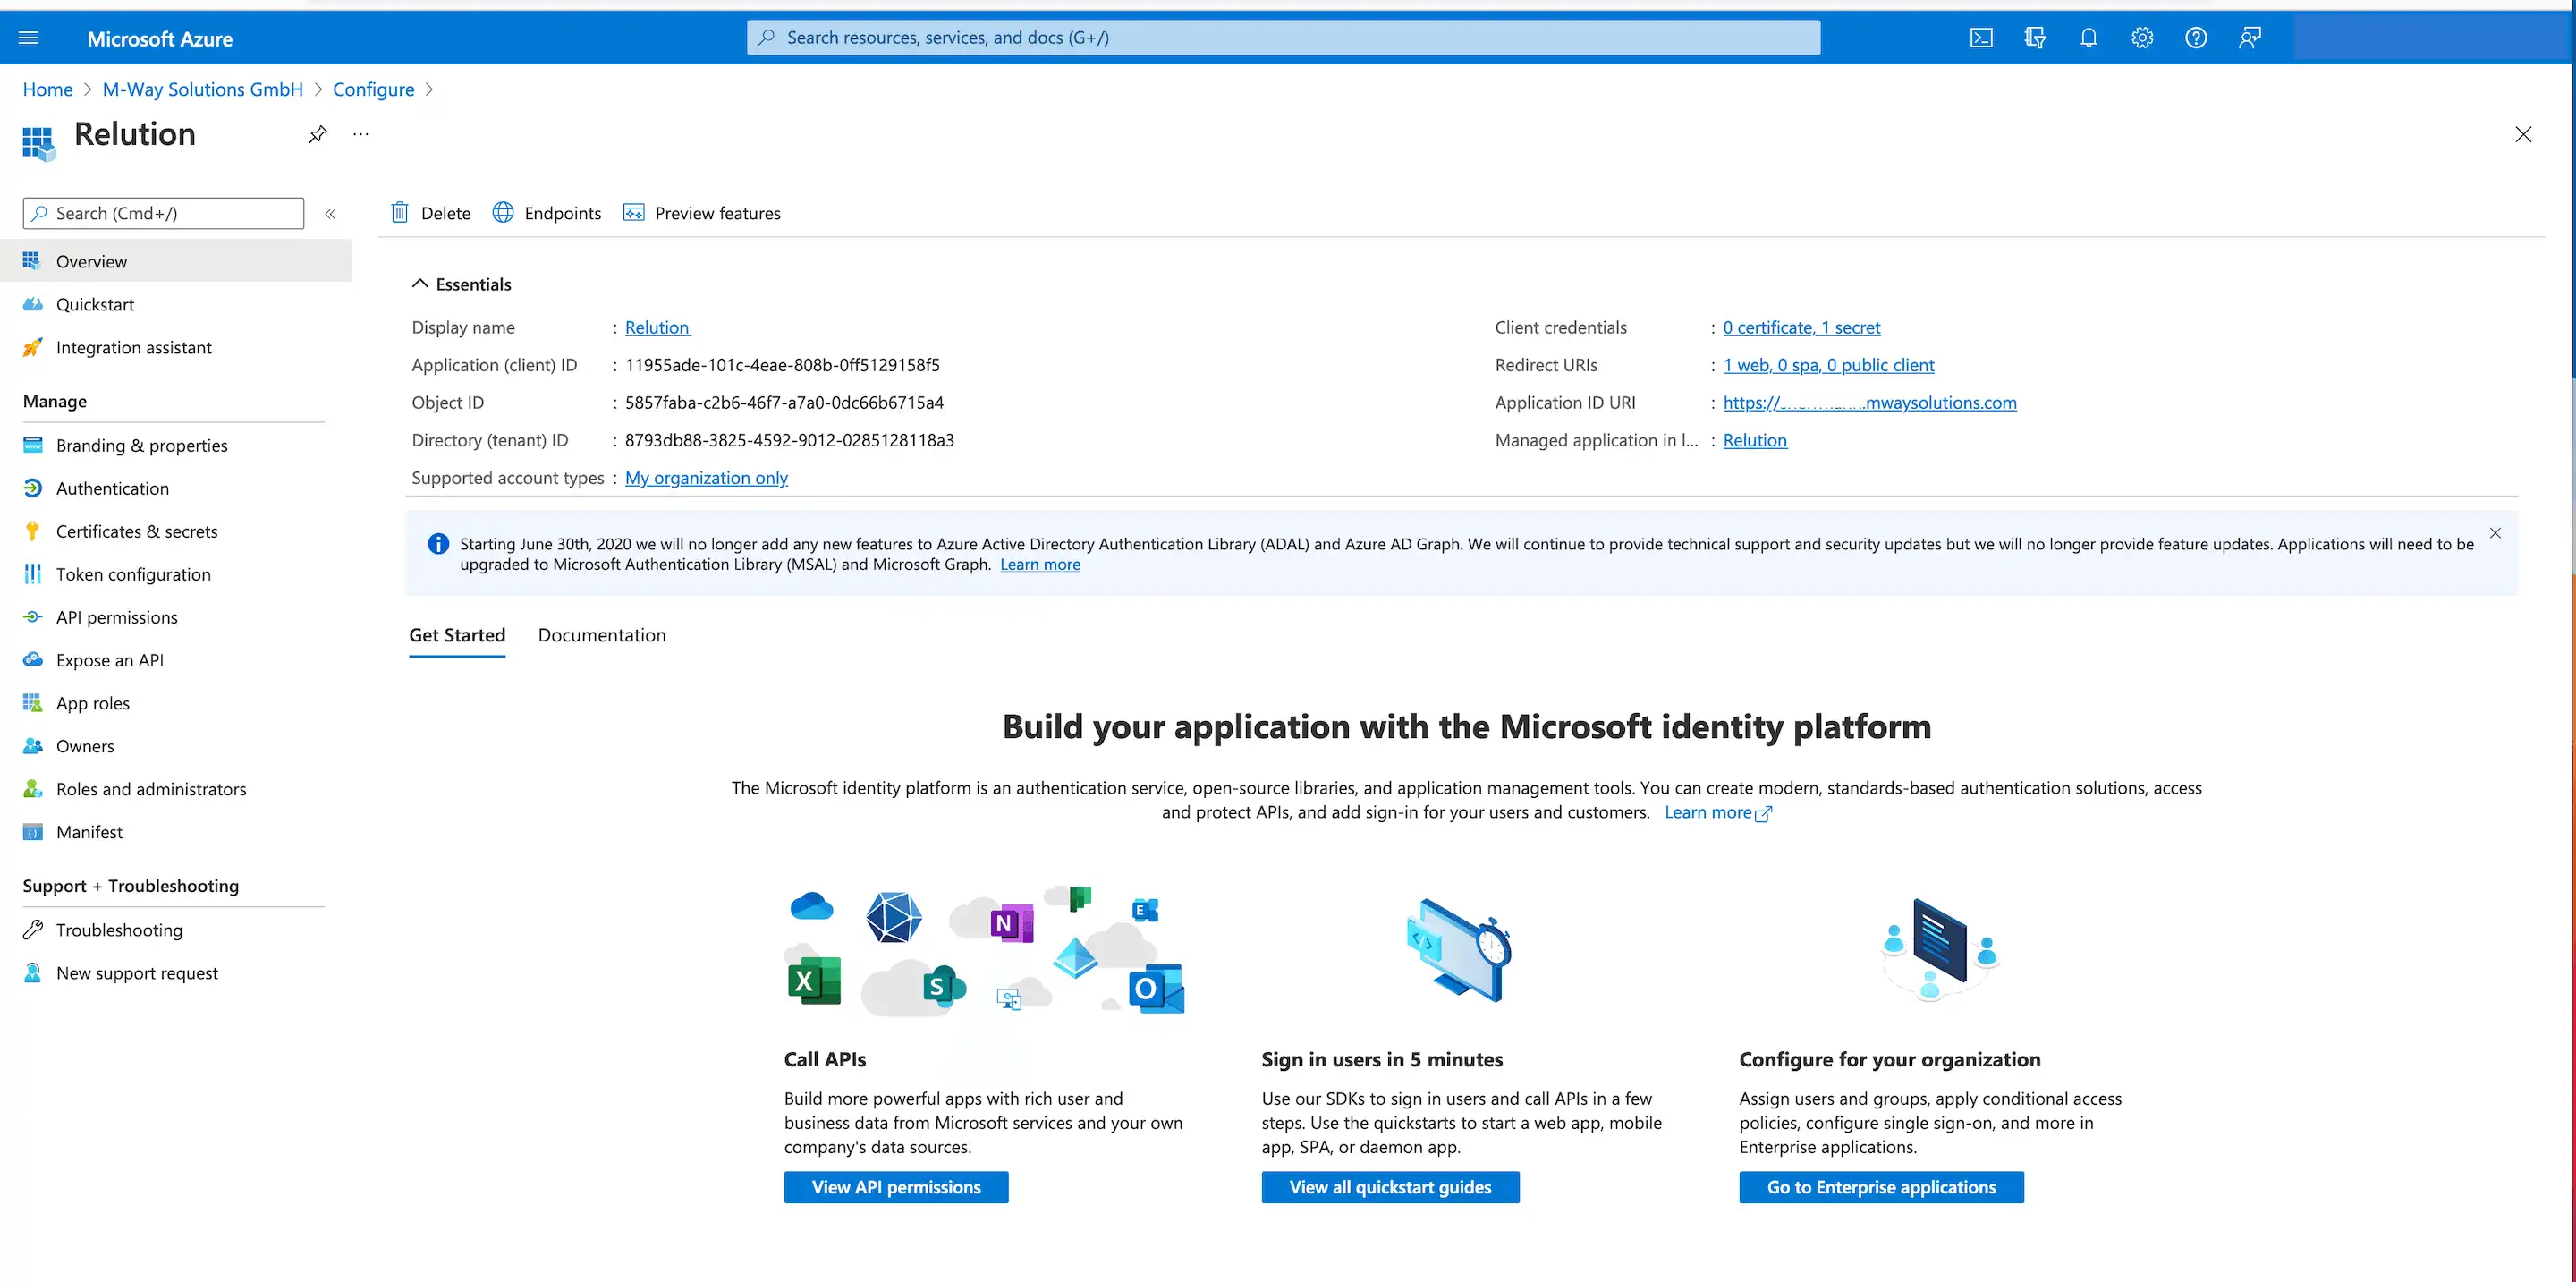
Then enter the corresponding server URL in the following view for “Application ID URI”:

Next, a “Secret client key (Client Secret)” must be added under “Certificates & Secrets”:
-
Click on “New secret client key” in the “Secret client keys” tab.
-
In the add secret client key dialog box, specify a description and the validity
-
Click “Add”
Note: When the validity period expires, there is no longer a connection and Relution can no longer communicate with Azure. In this case, a new secret client key must be generated for the application in Azure and transferred to Relution again.


After that, the new entry will be displayed in the listing under the “secret client keys” tab.
Note: The corresponding “value” is only displayed once now and must be copied and transferred to Relution.
3. Configure API permissions
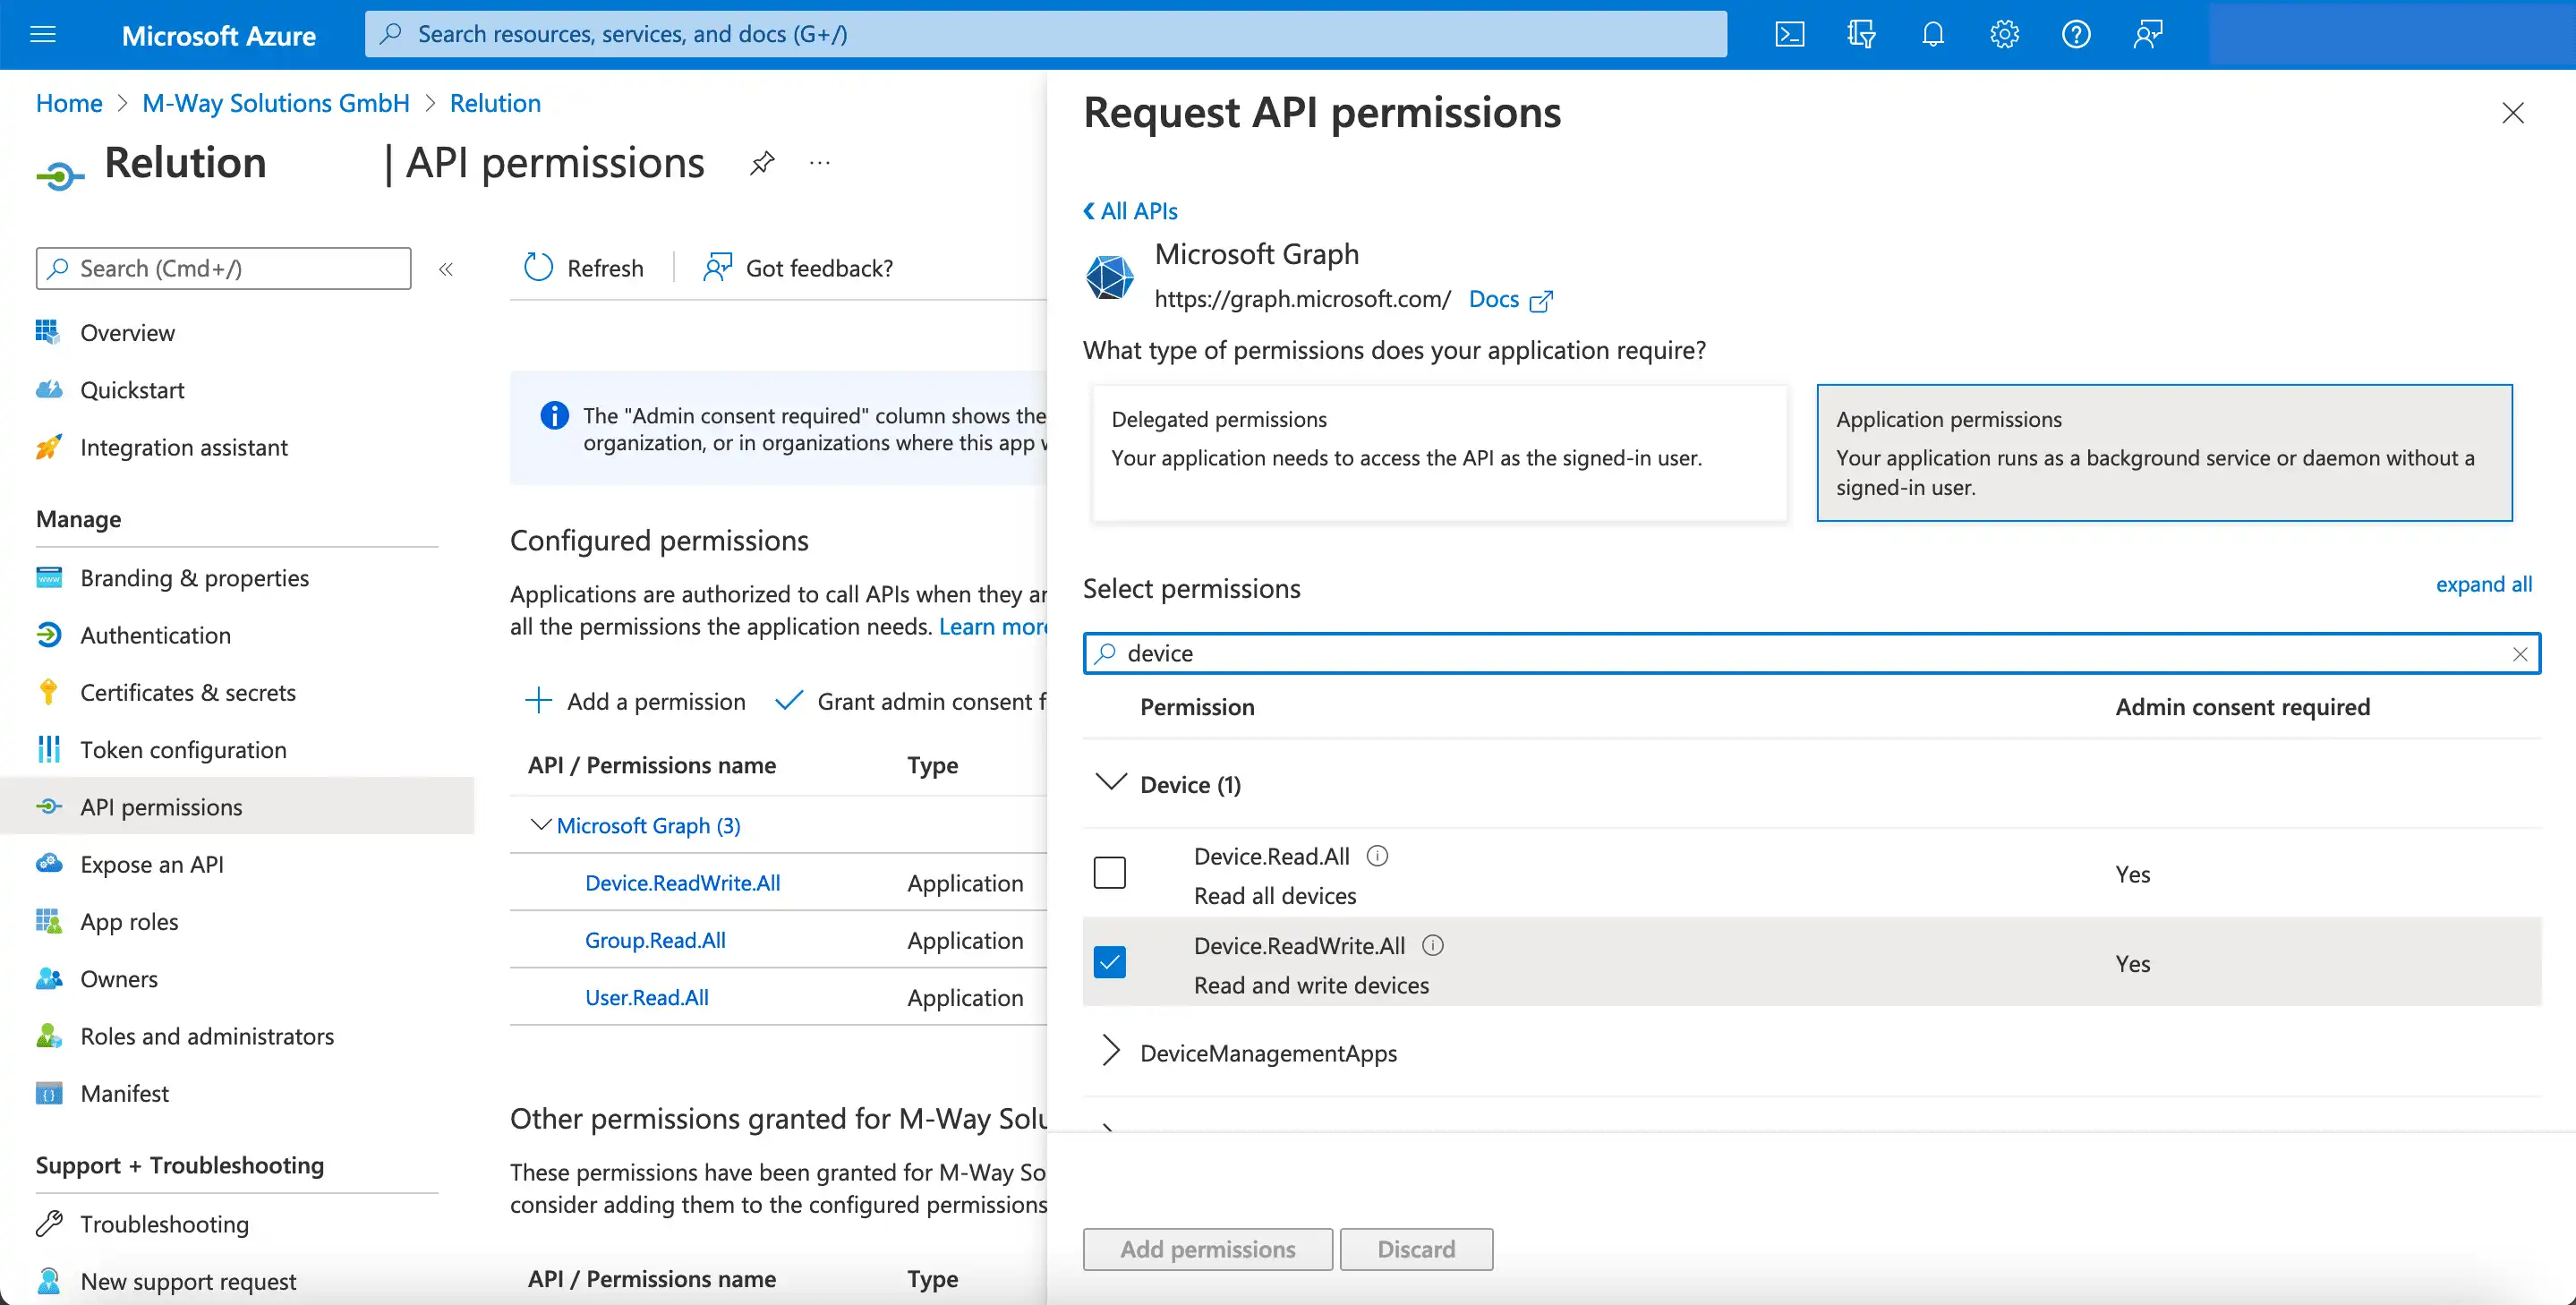
In step 3 of the Relution instructions, the API permissions are now configured:

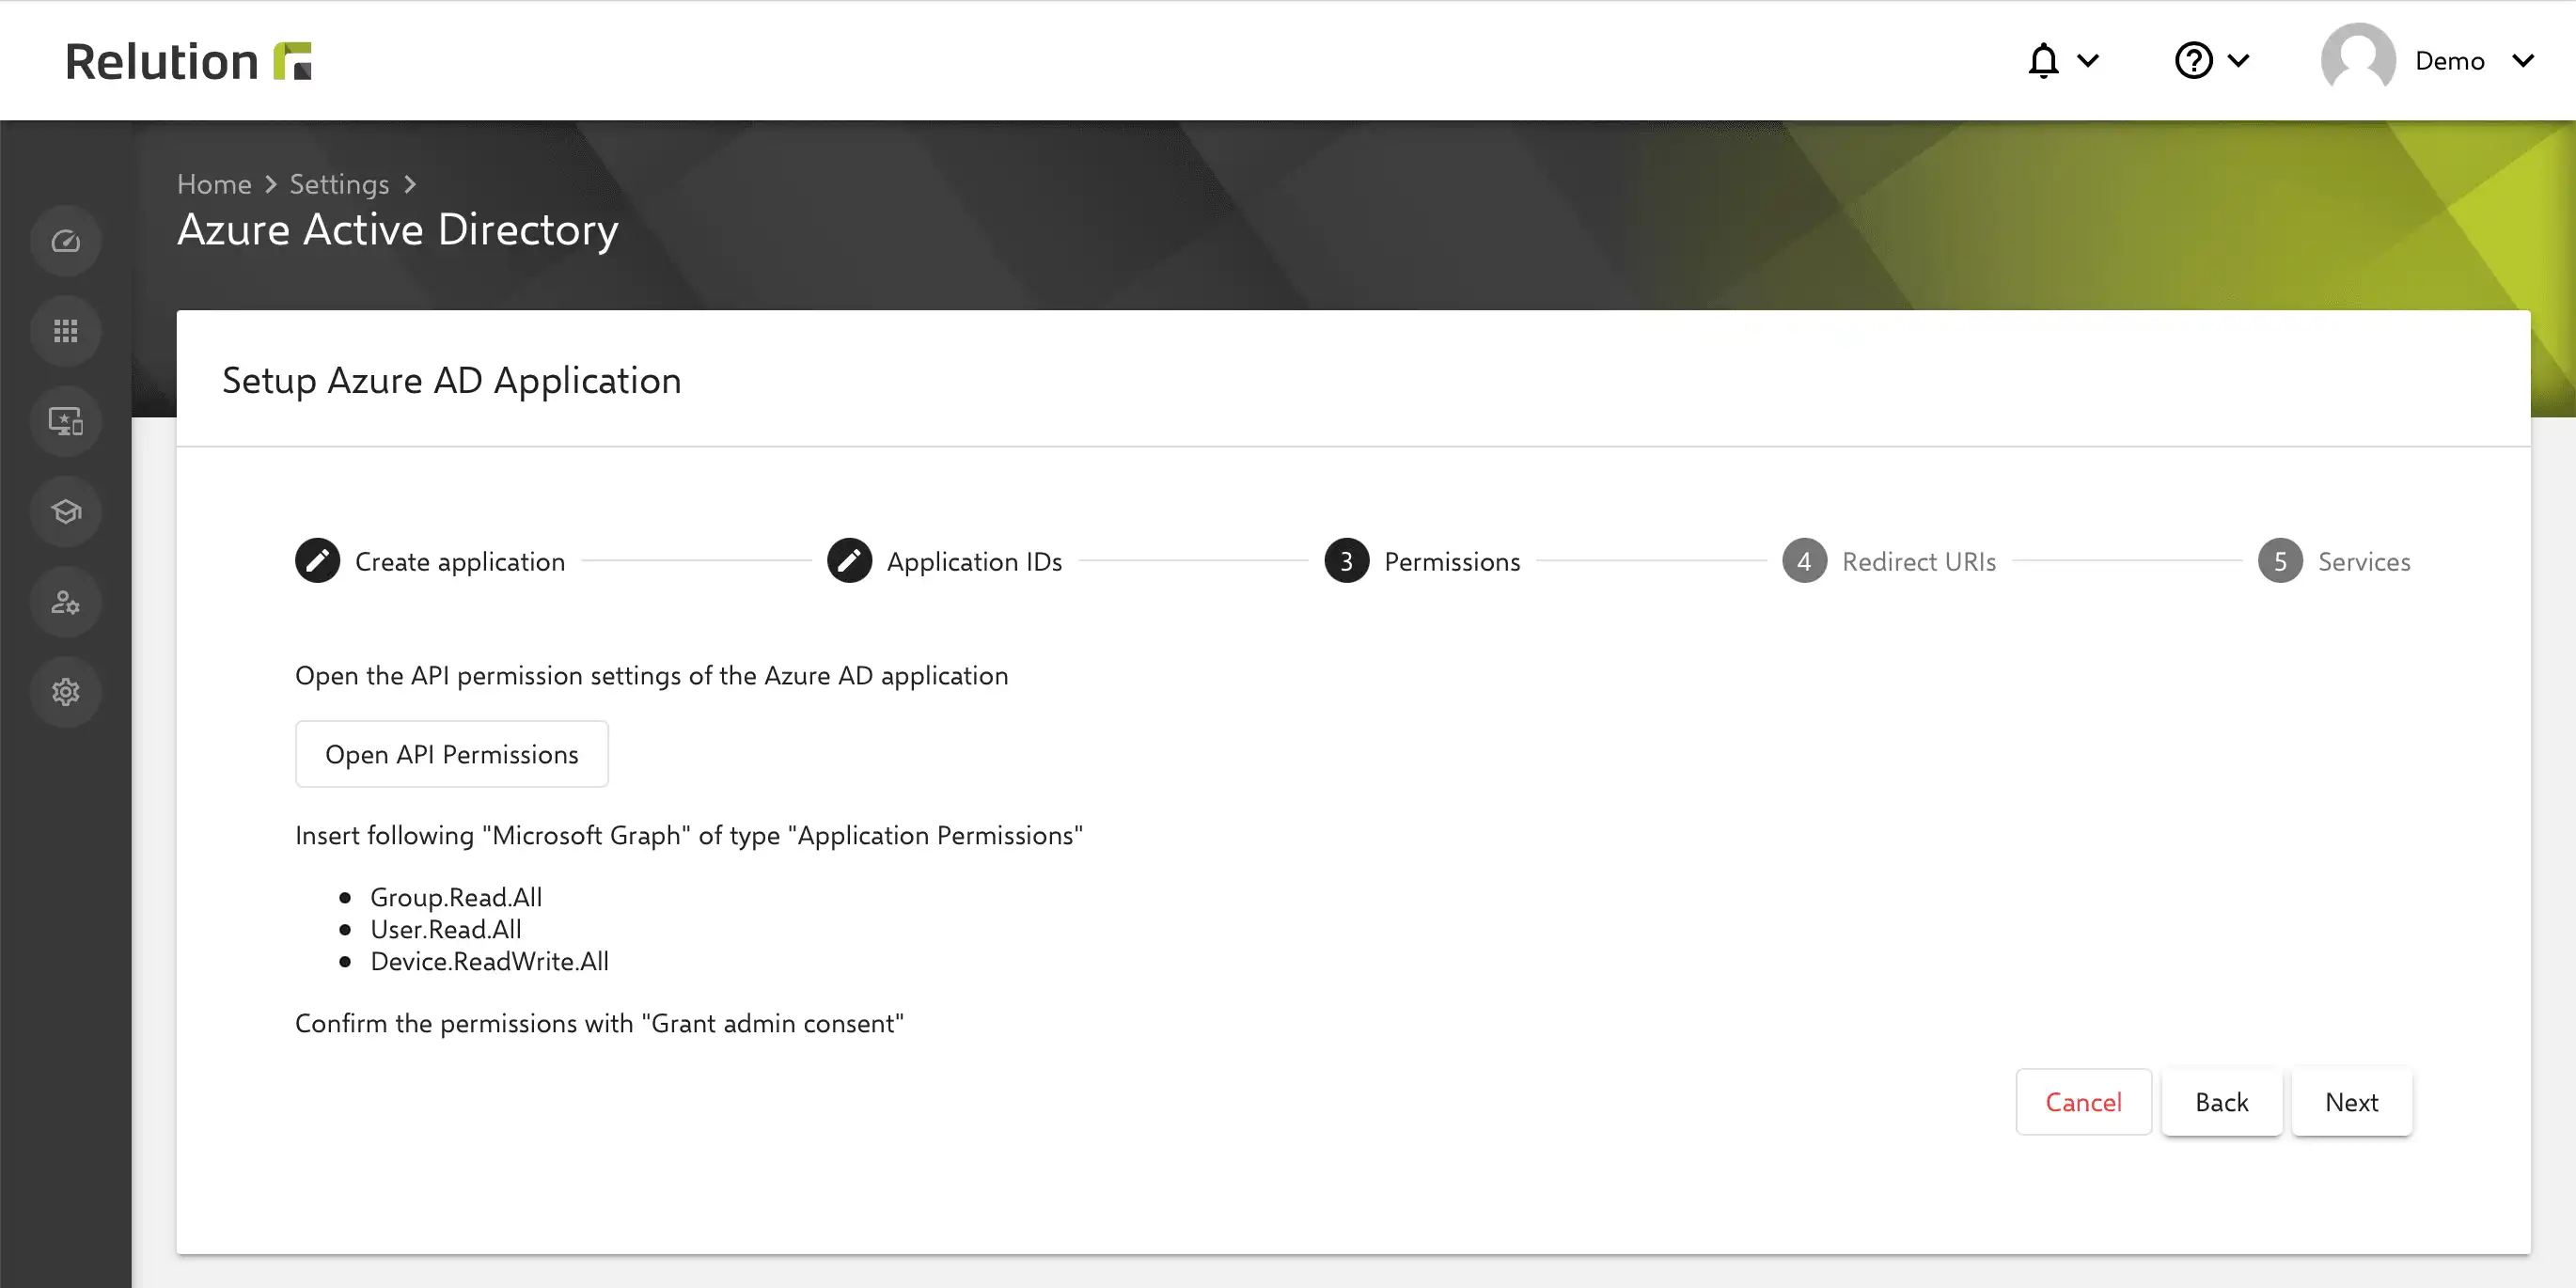
Note: New permissions may need to be added here later if new features are added by Microsoft for Windows Autopilot in the future.
The following settings must be made in Azure:
-
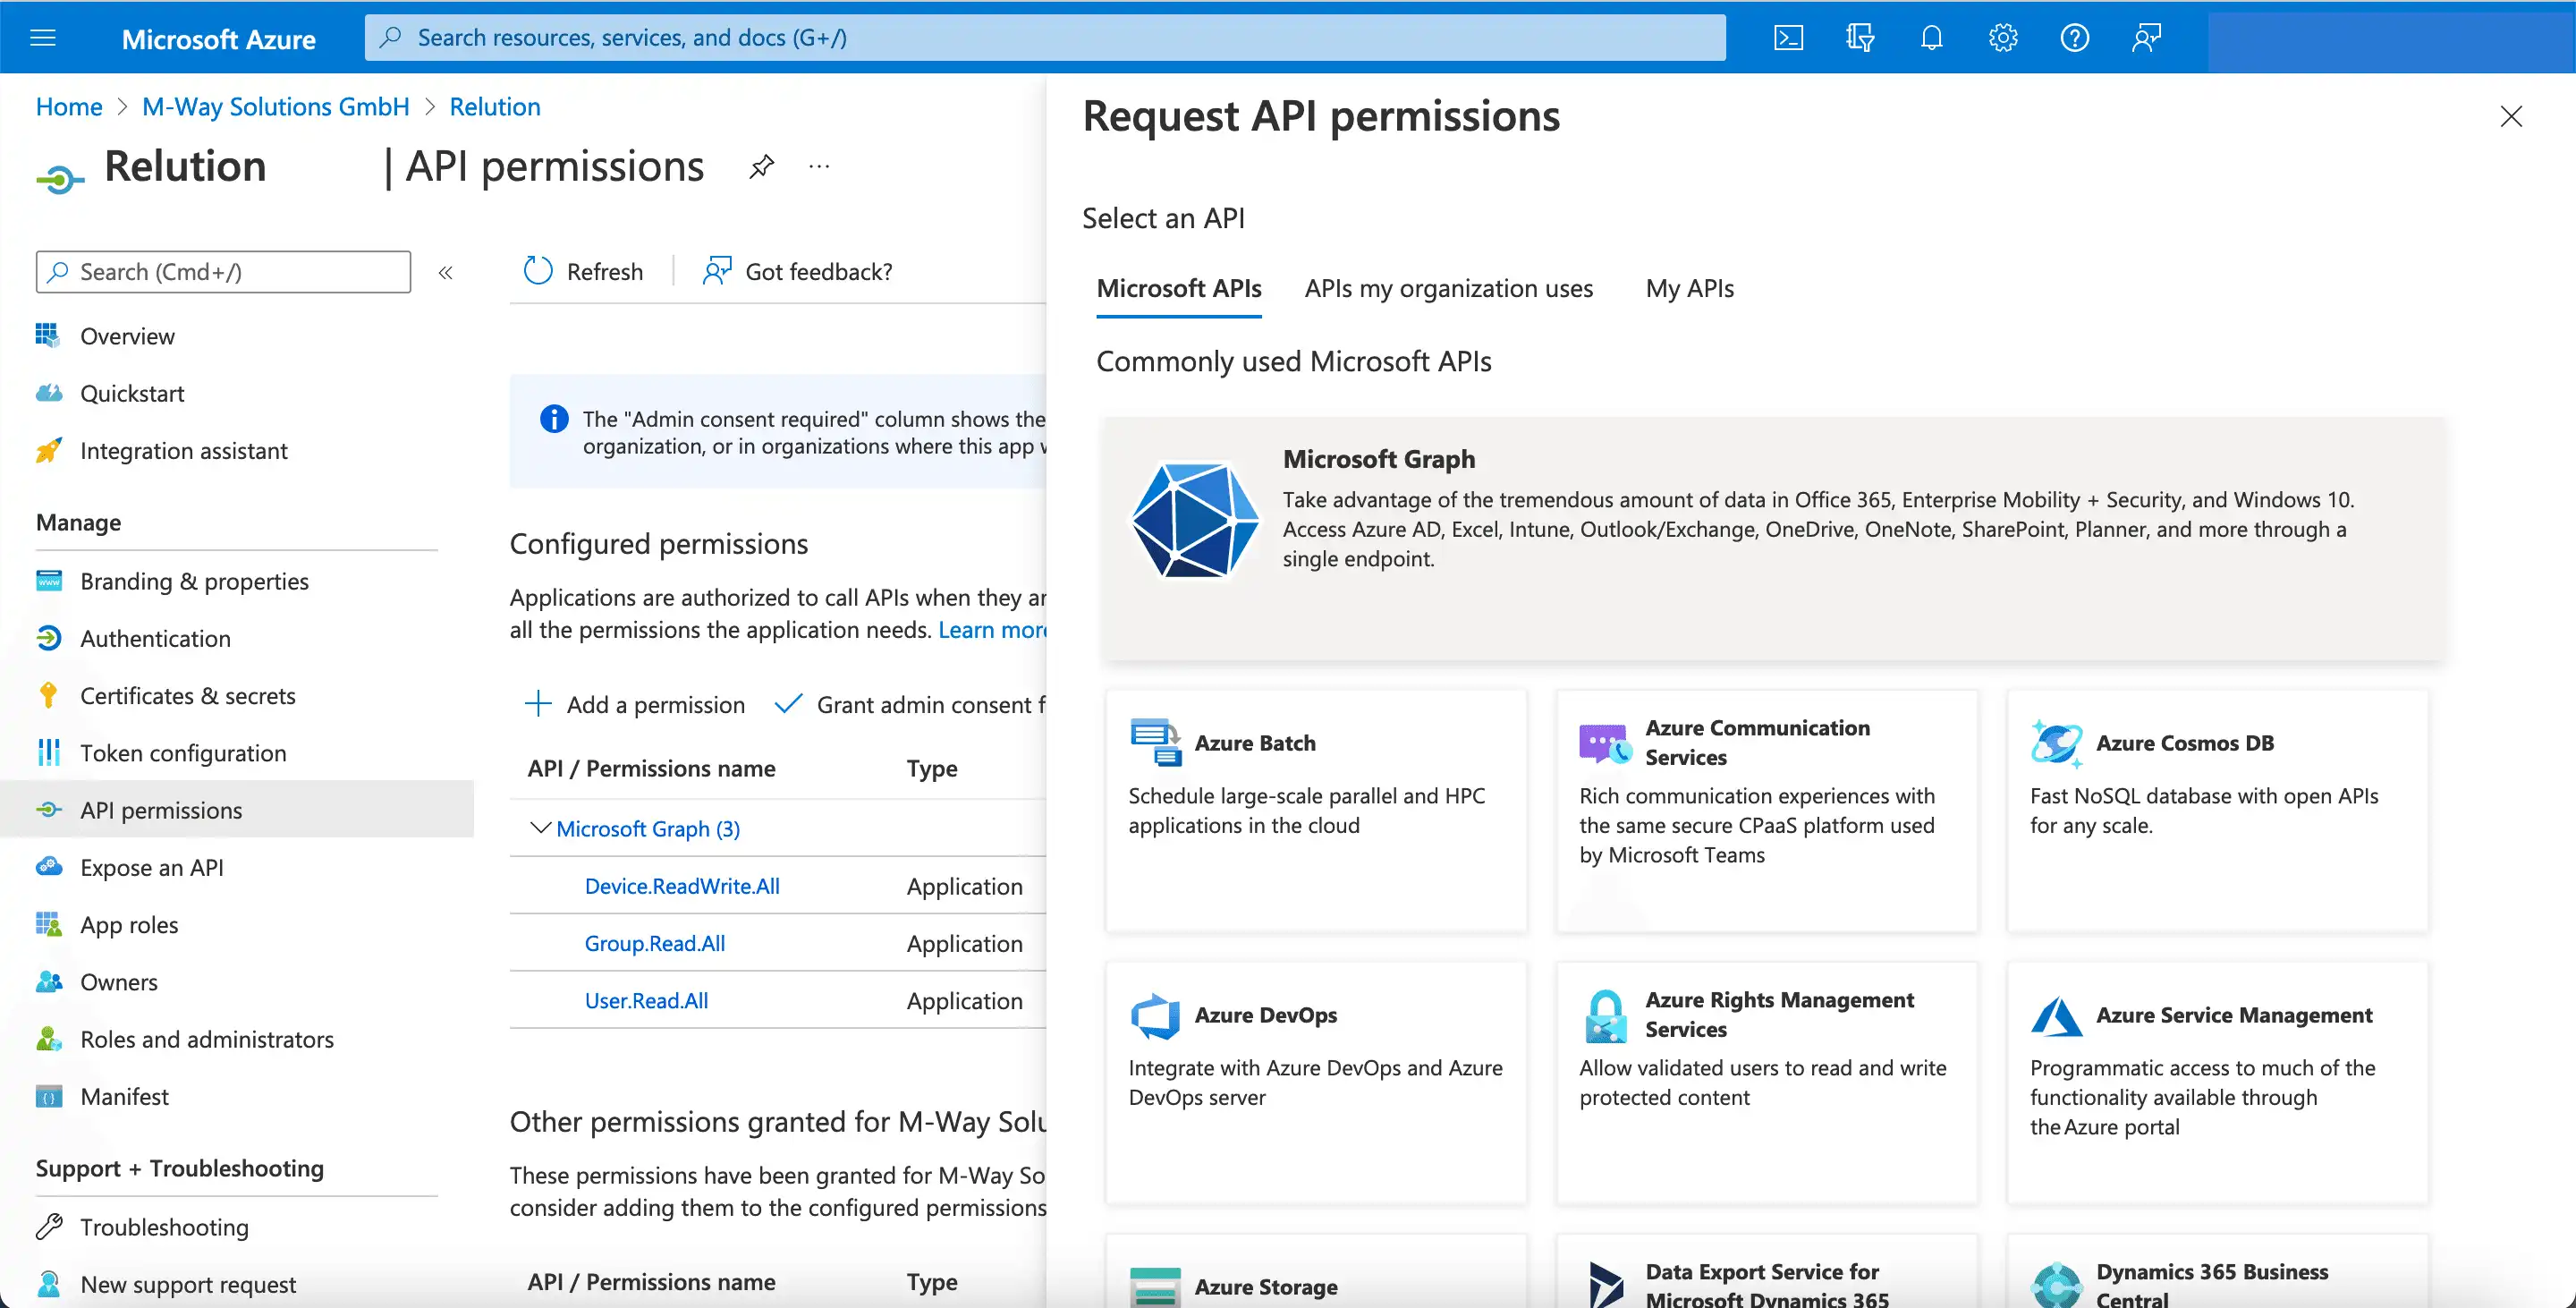
Under "API Permissions" -> "Configured Permissions" click "Add Permission"
-
In the dialog box "Request API permissions" under "Microsoft APIs" select "Microsoft Graph"

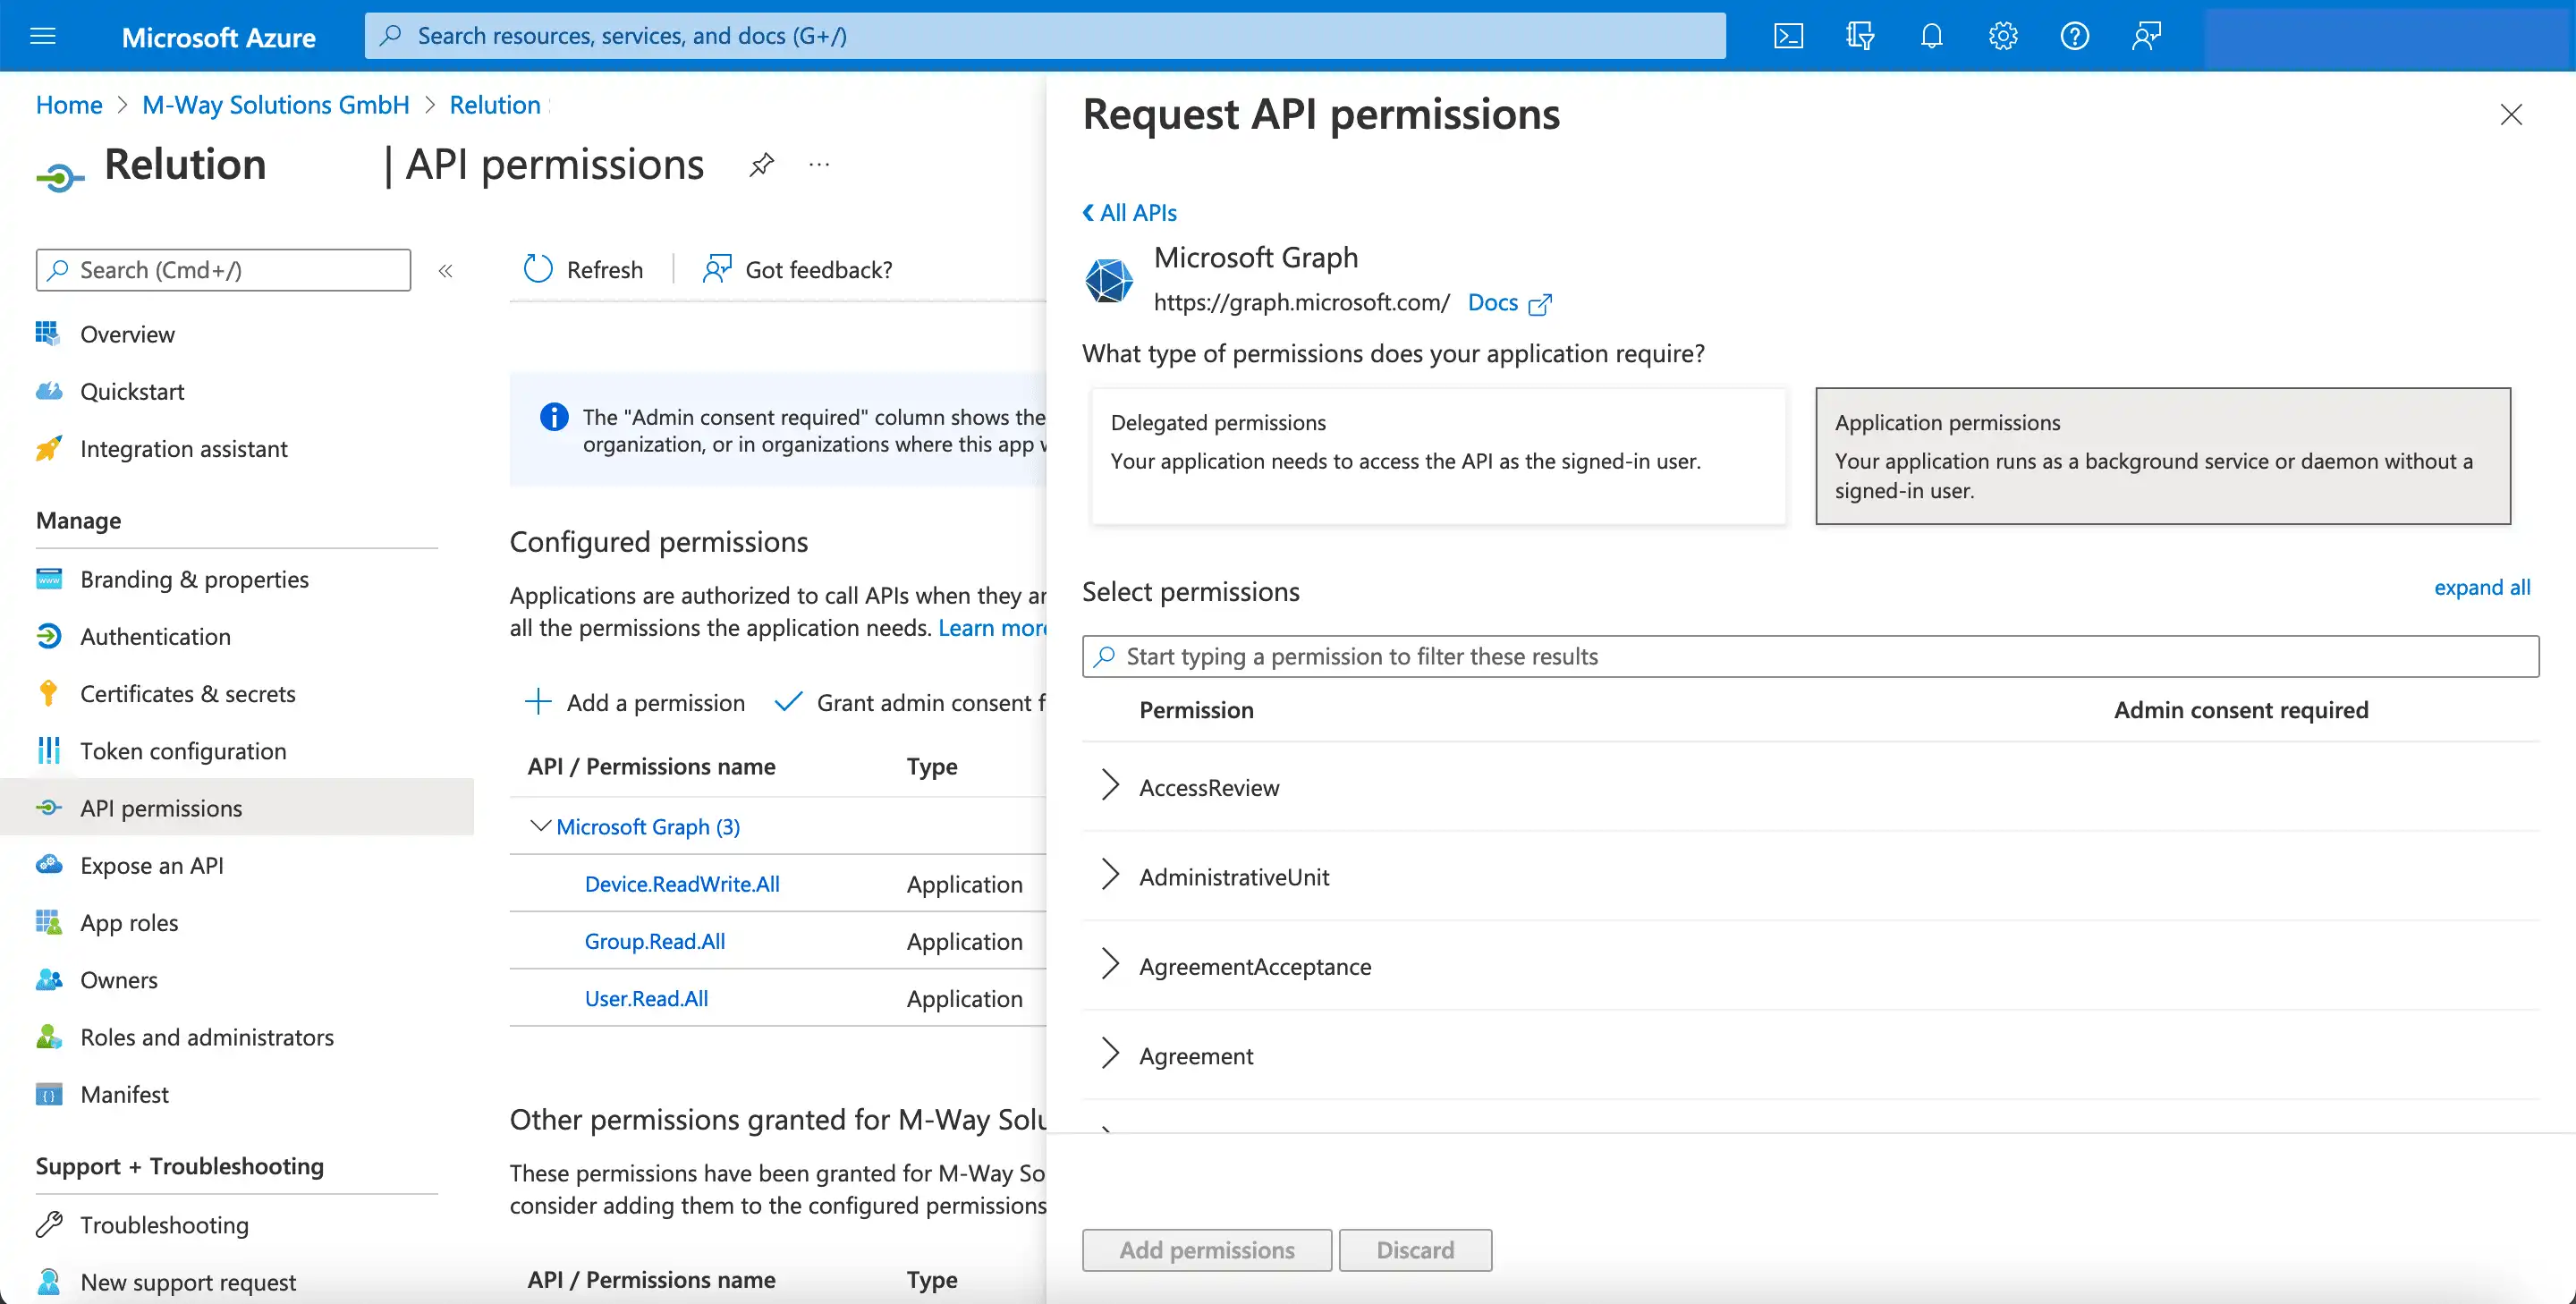
- Click the “application permissions" tile in the dialog box
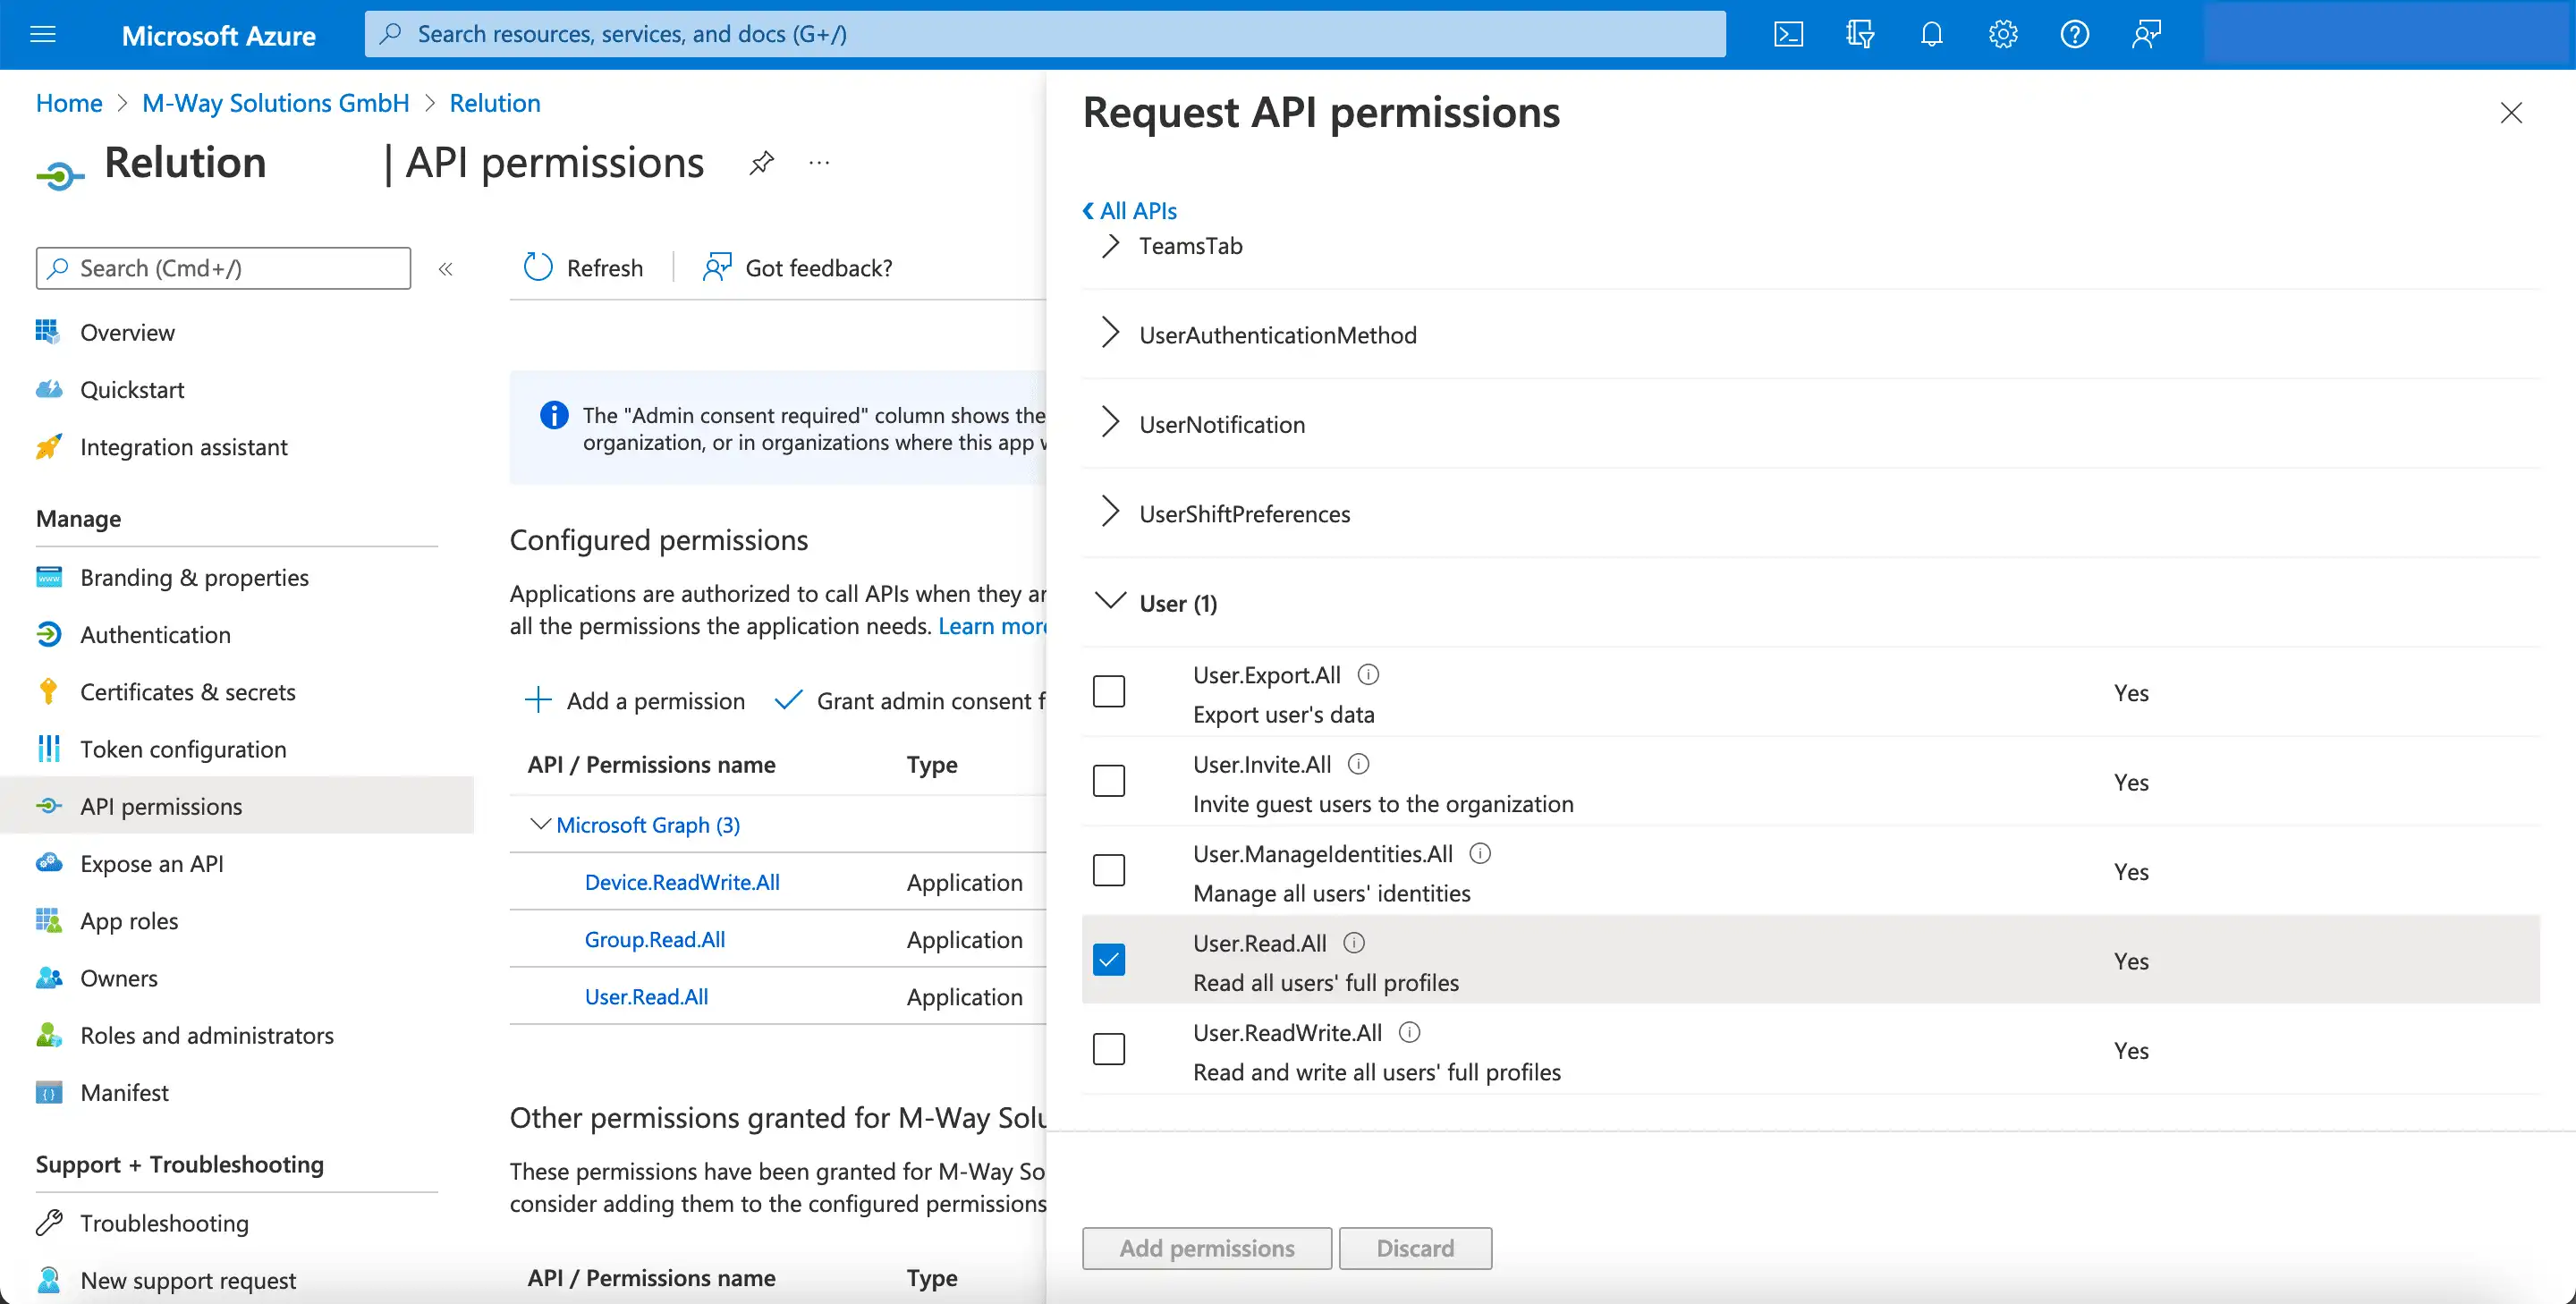
- Under "User" select "User.Read.All"
- Select "Group" under "Group.Read.All"

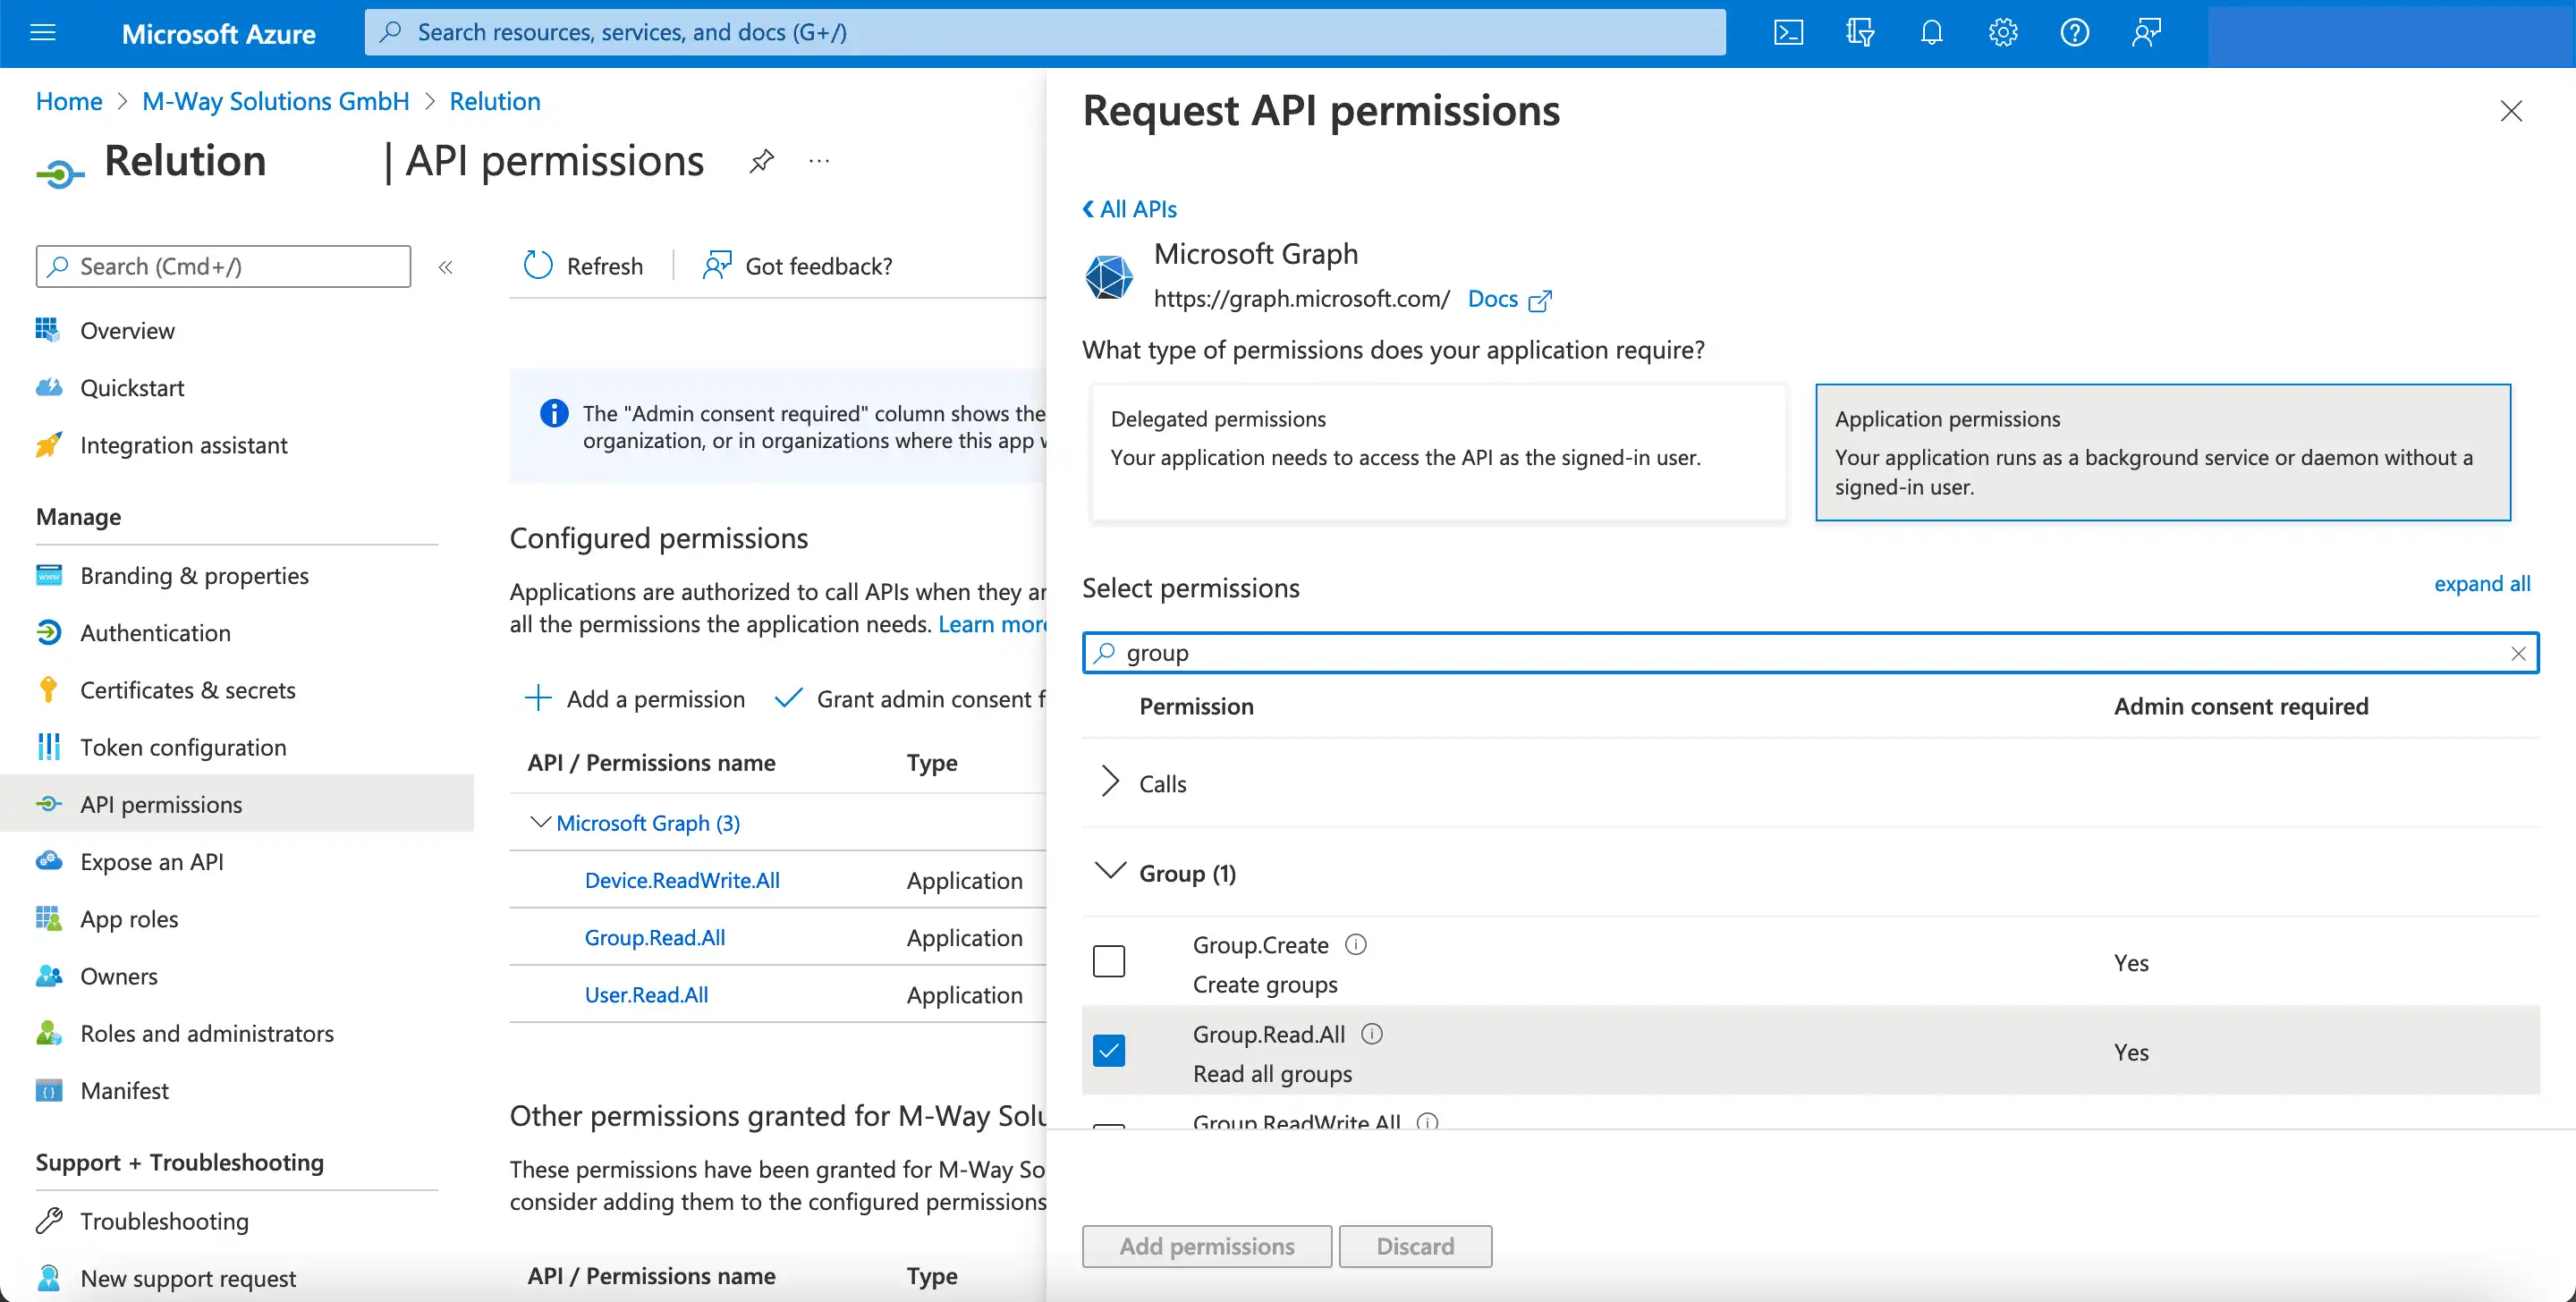
- Under "Device" select "Device.ReadWrite.All".
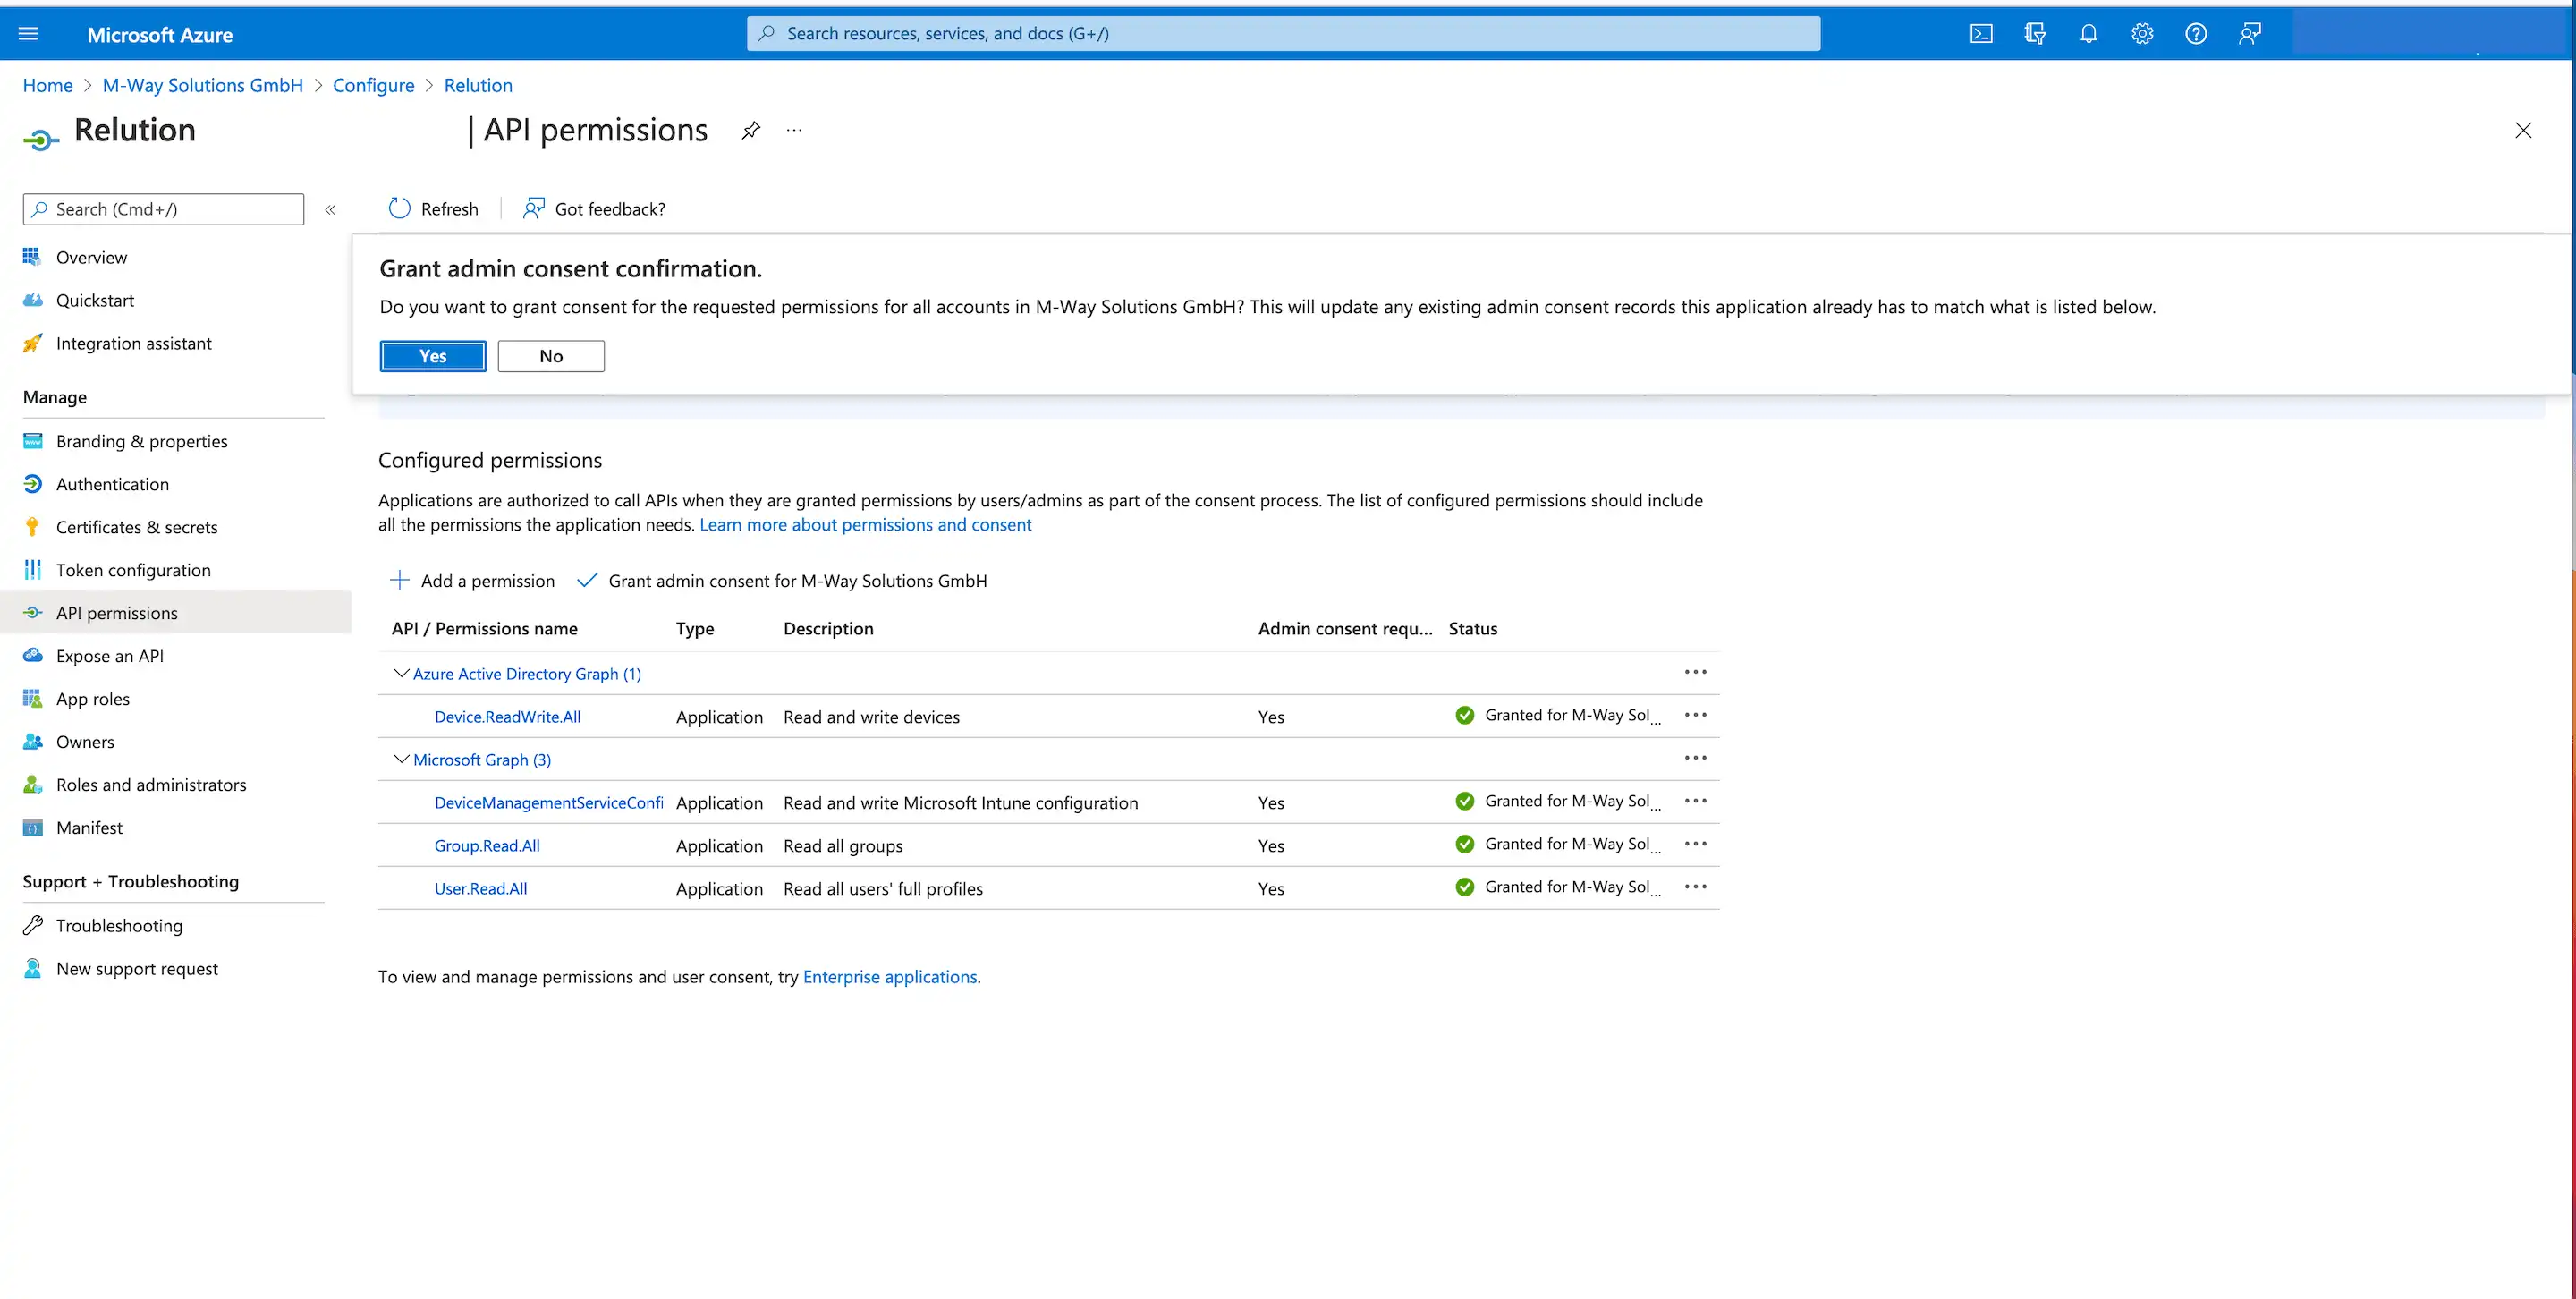
Confirm the selection with "Add permissions".

For the newly added API permissions, an exclamation mark is initially displayed as the status. An administrator must agree once for Microsoft Graph to ultimately grant the permissions. Afterwards, the status is displayed with a green check mark for “Granted” and the permissions are granted:

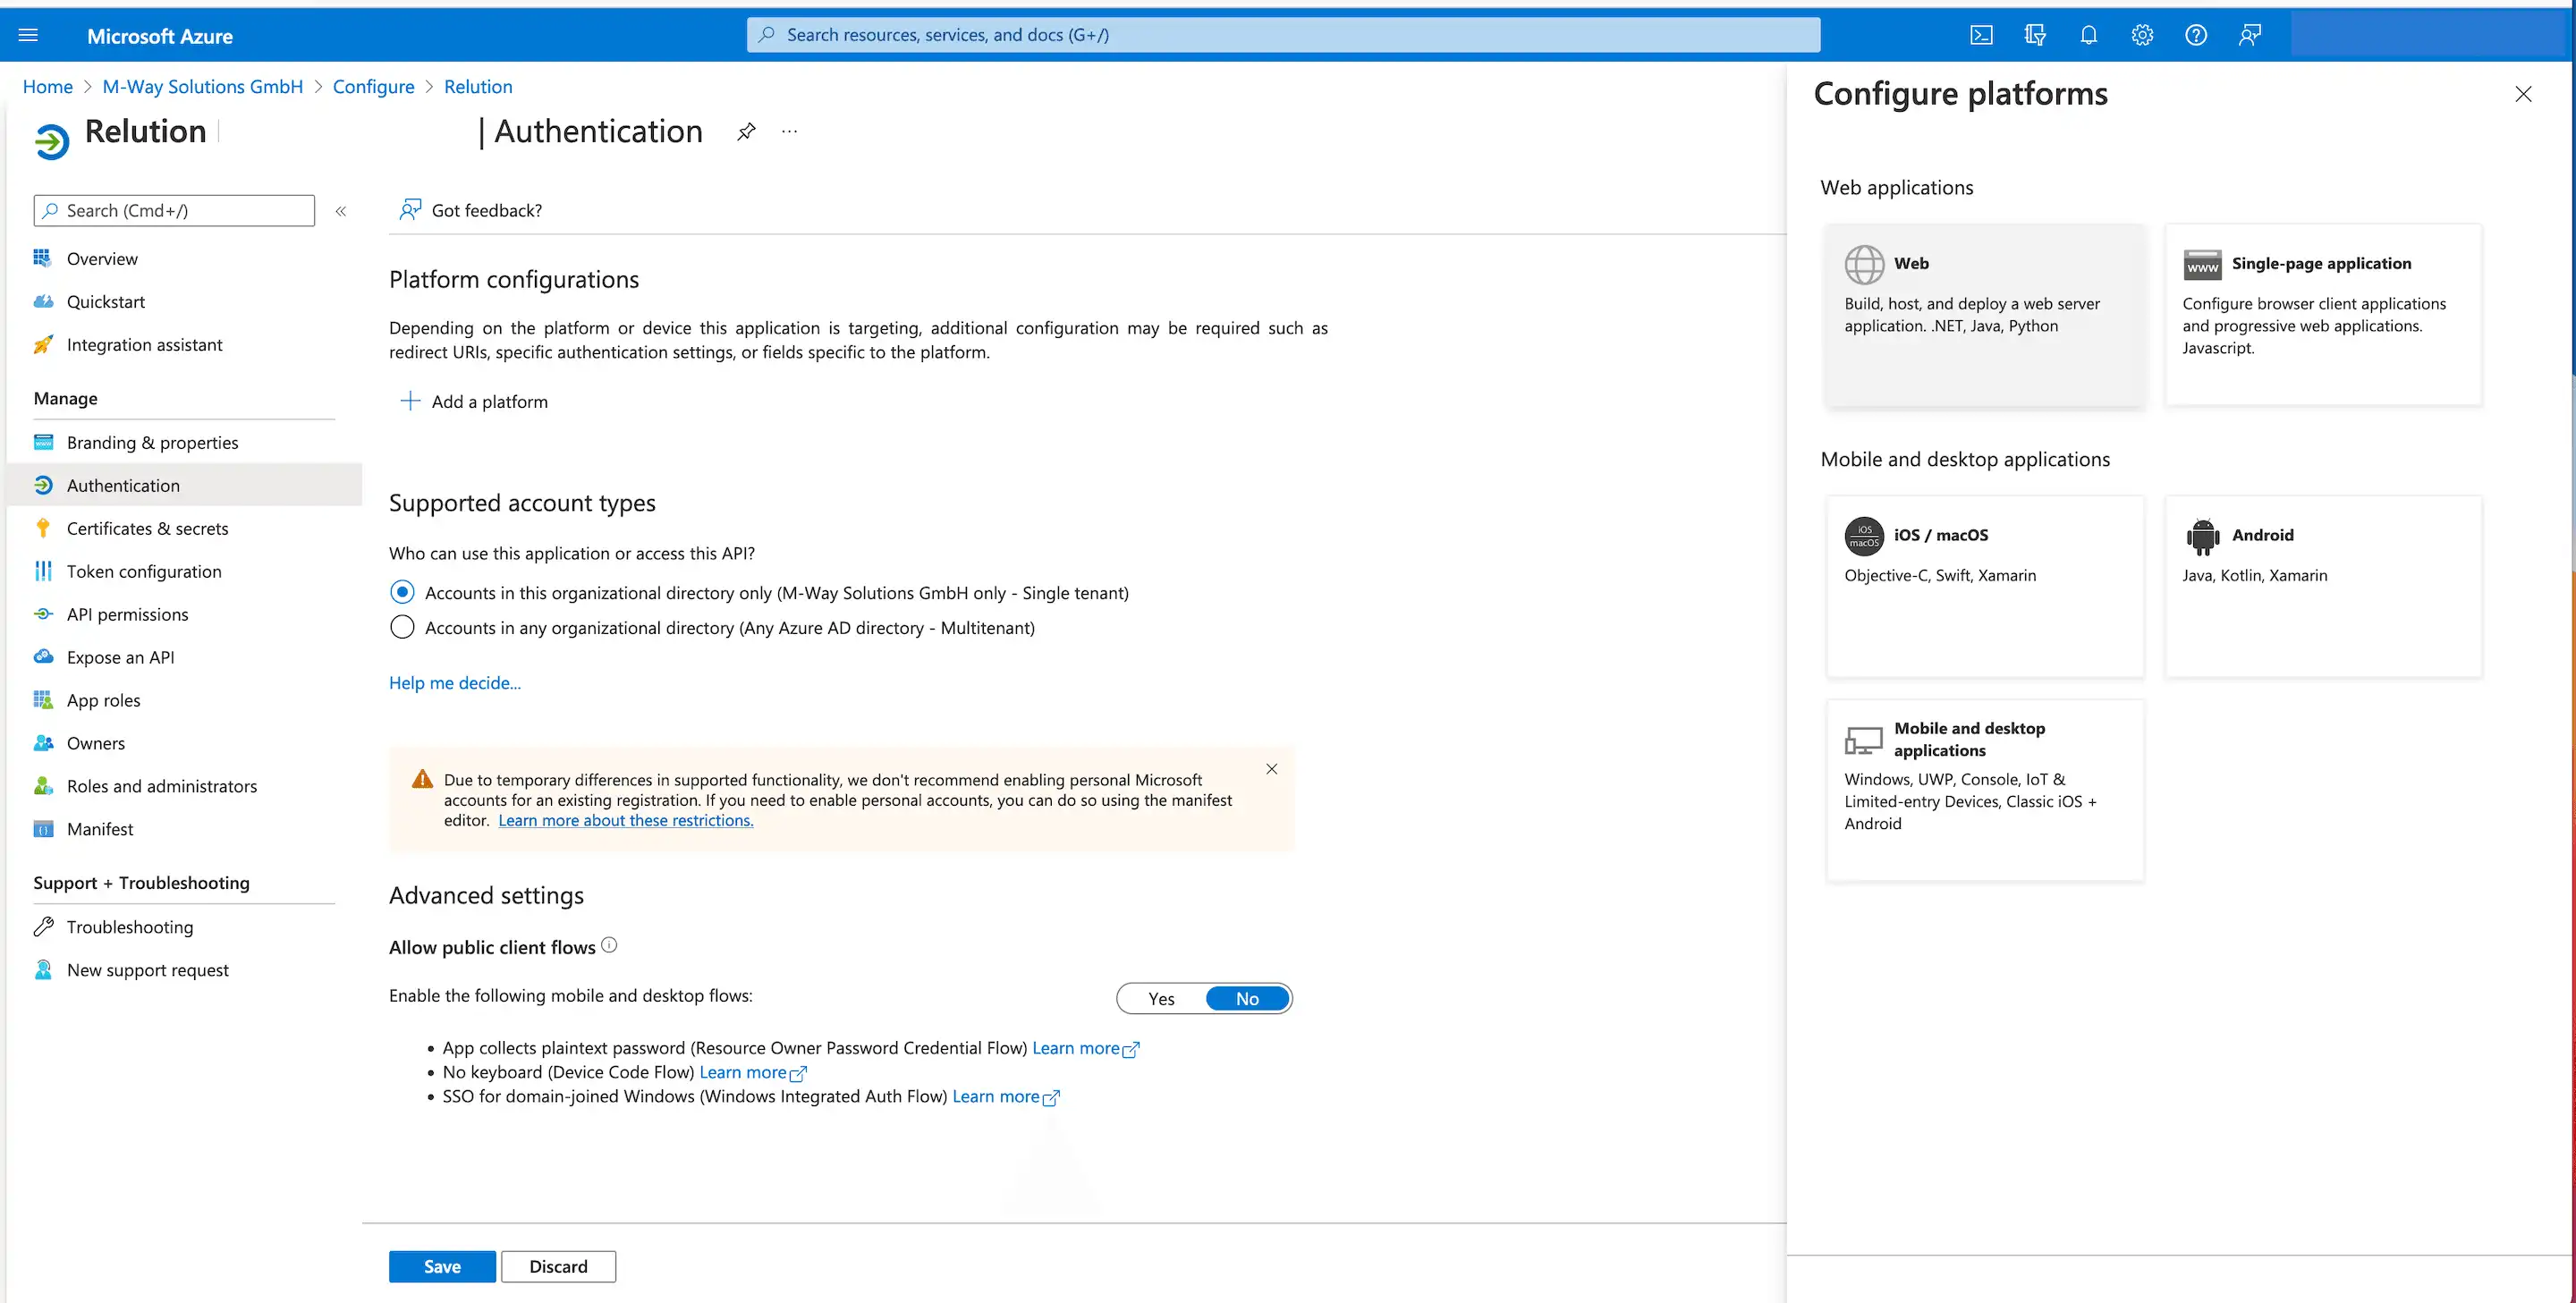
4. Define redirect URI
Step 4 of the Relution guide configures the redirection URI in Azure:

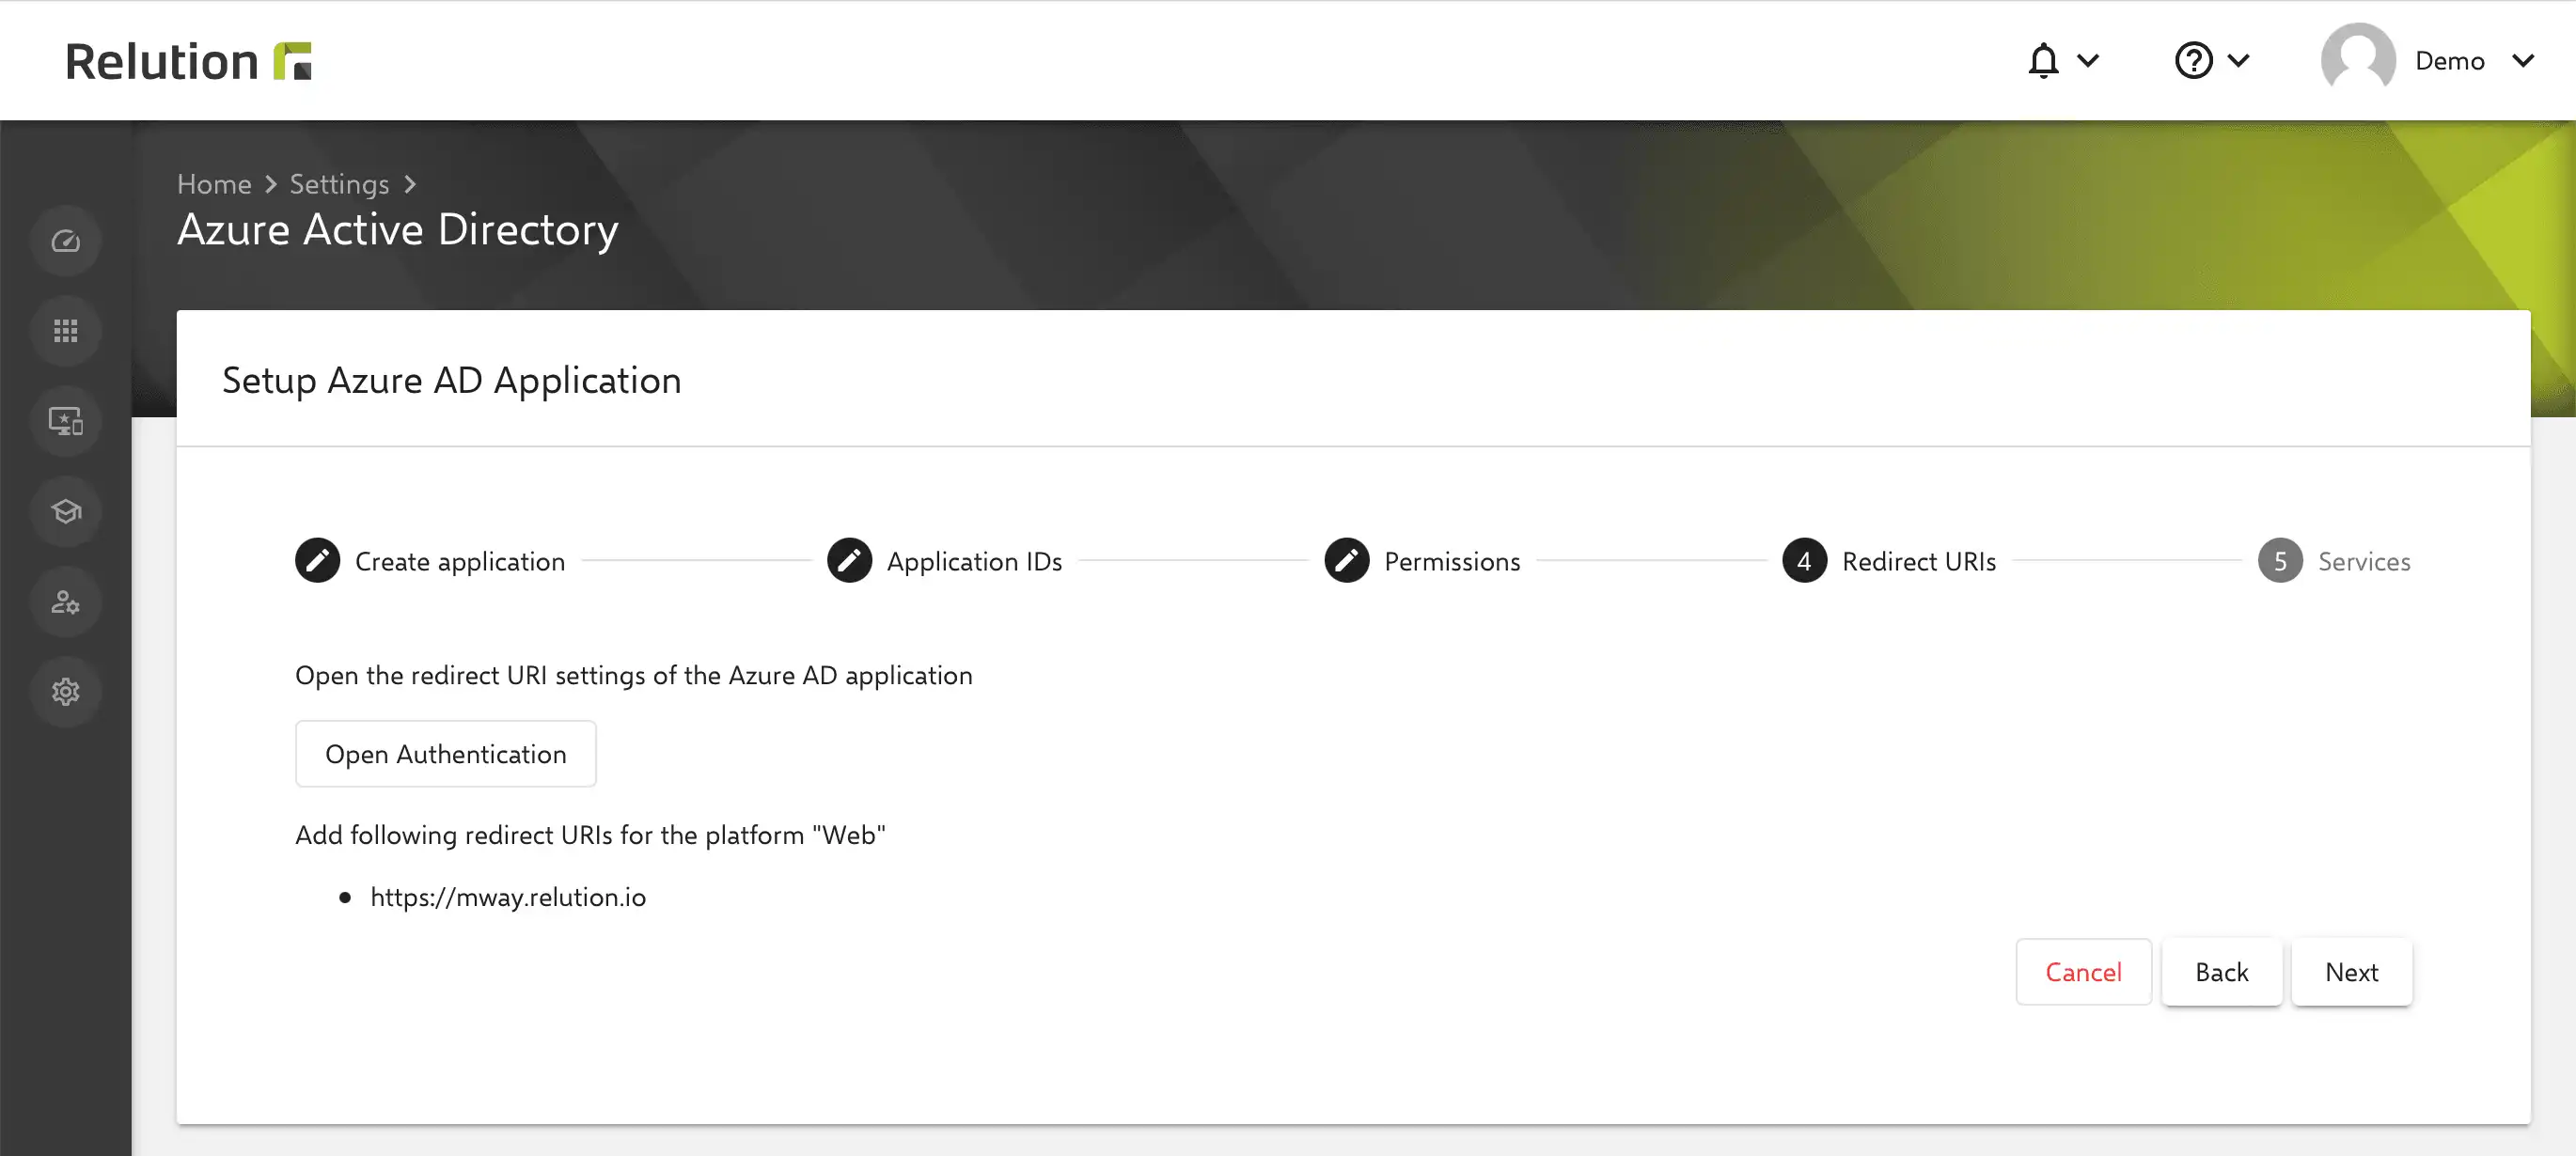
-
Under “Authentication” -> click “Add platform”
-
In the “Configure Platform” dialog box, select the “Web” tile

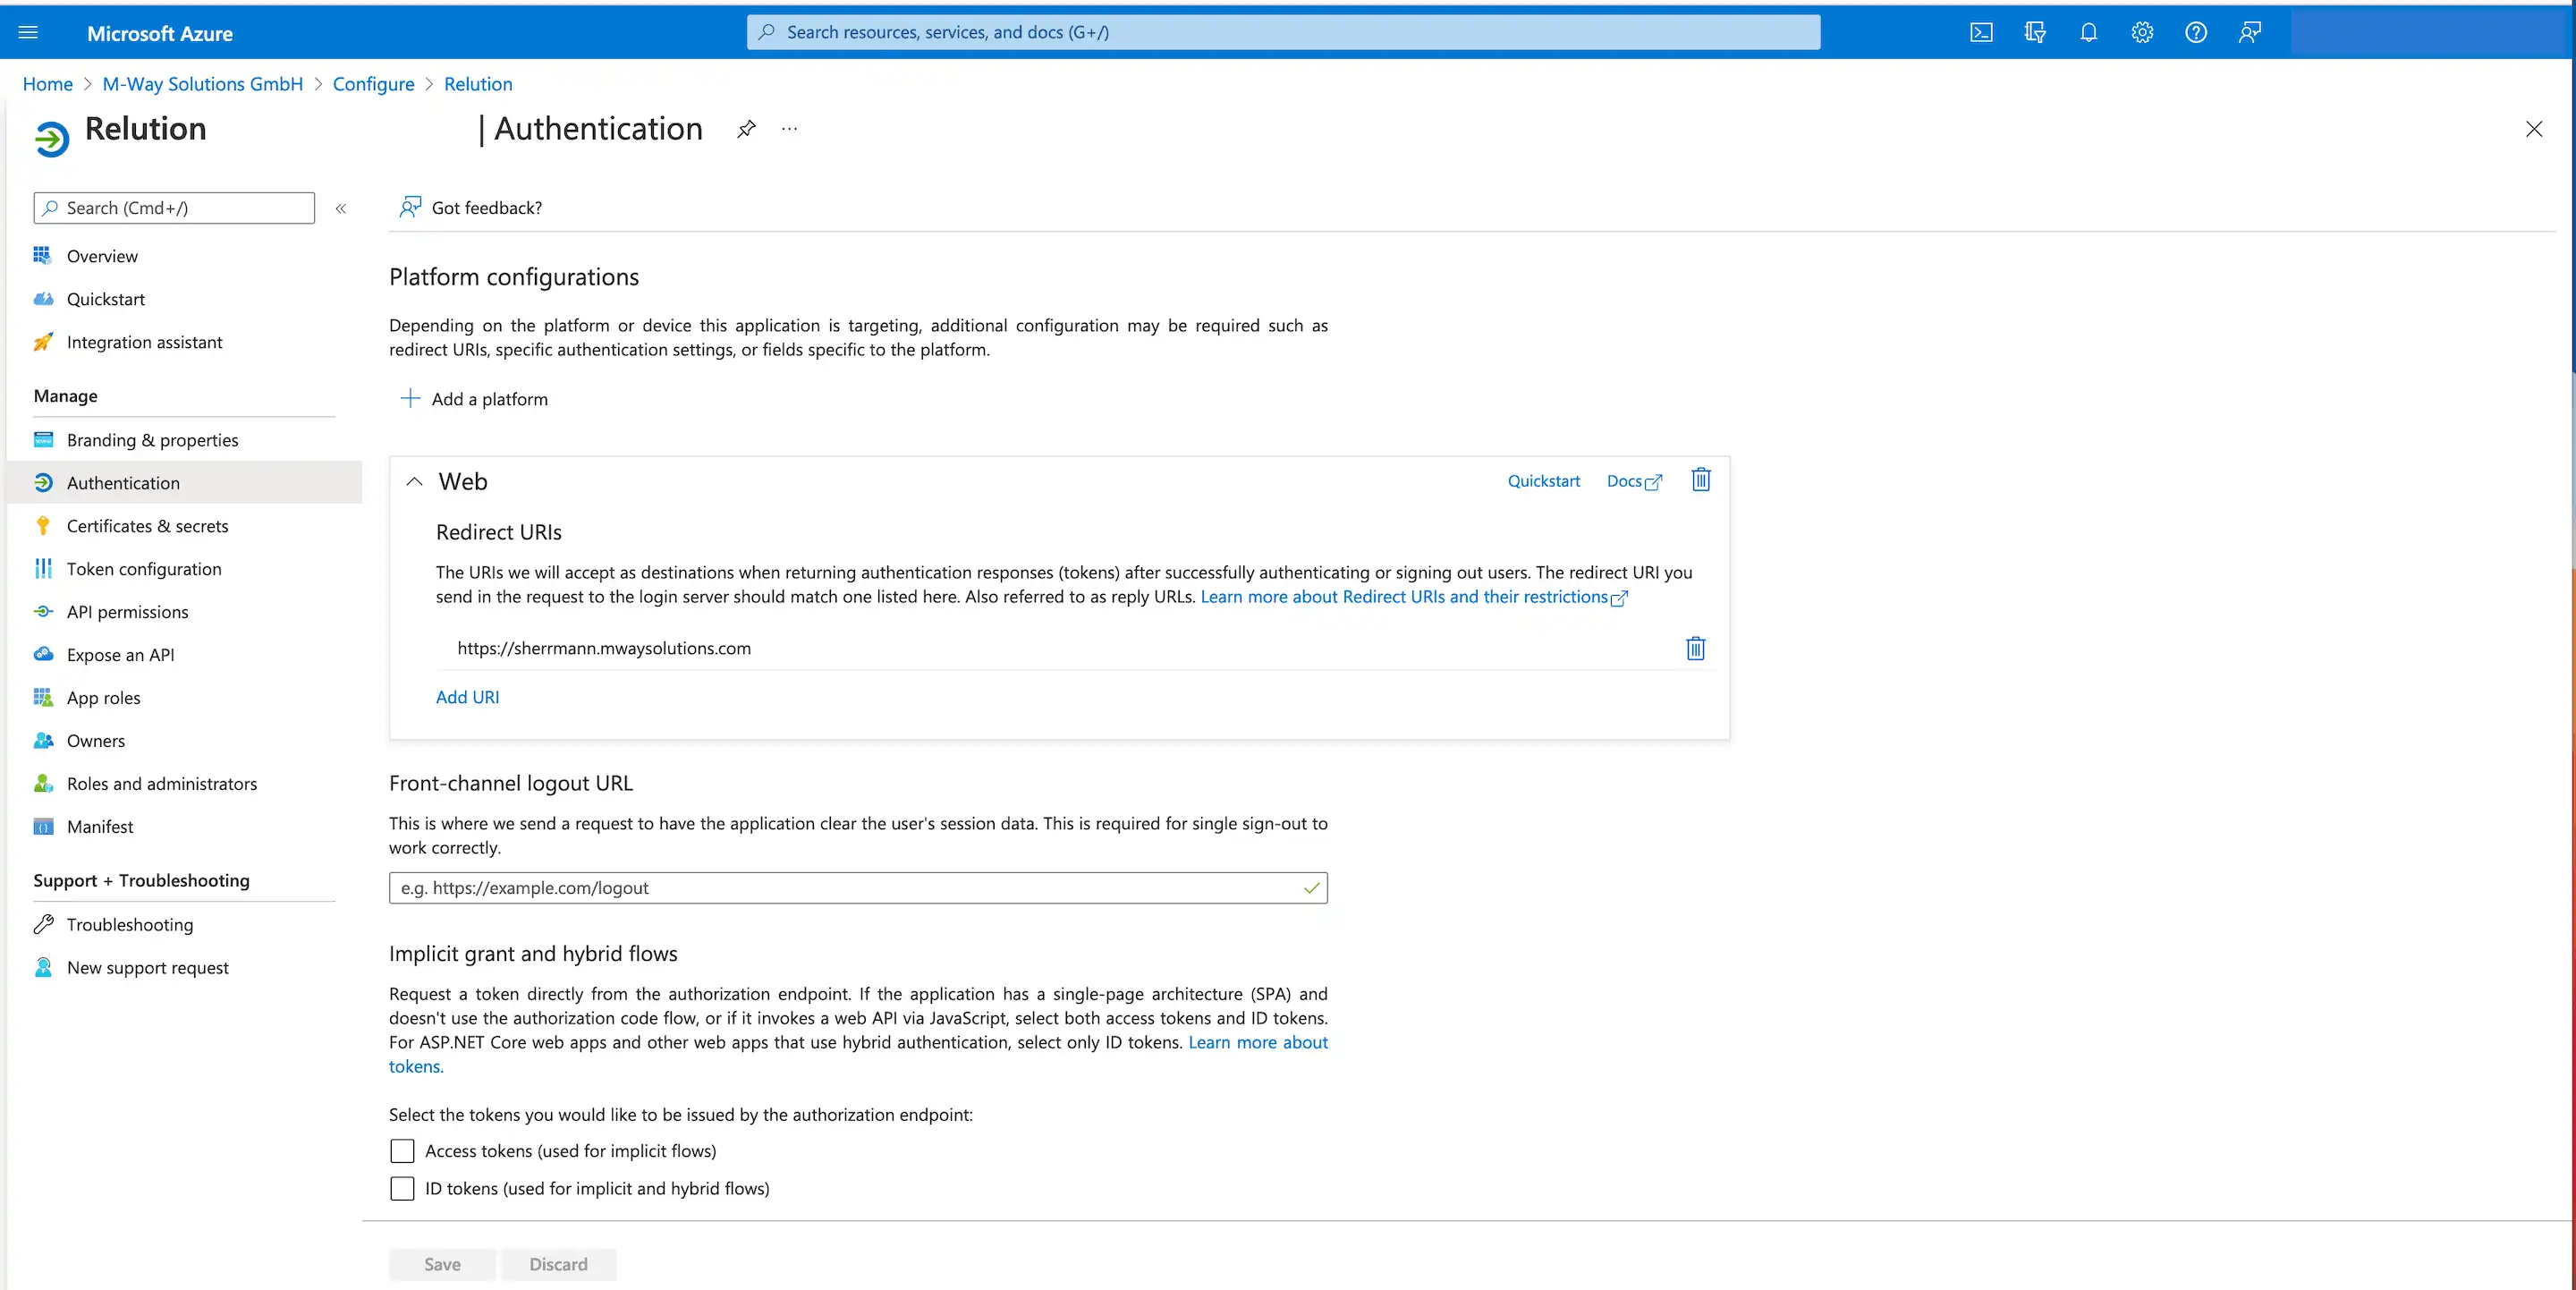
-
On the subpage under “Web” -> “Add redirection URI” enter the server URL
-
Remove the checkbox “ID tokens”
-
Click “Save”
5. Verify Azure default settings and complete setup
The following items must be configured under “Devices” -> “Device settings”:
-
All users are allowed to include devices in Azure AD
-
All users are allowed to register their devices for Azure AD
-
Maximum number of devices per user should be observed
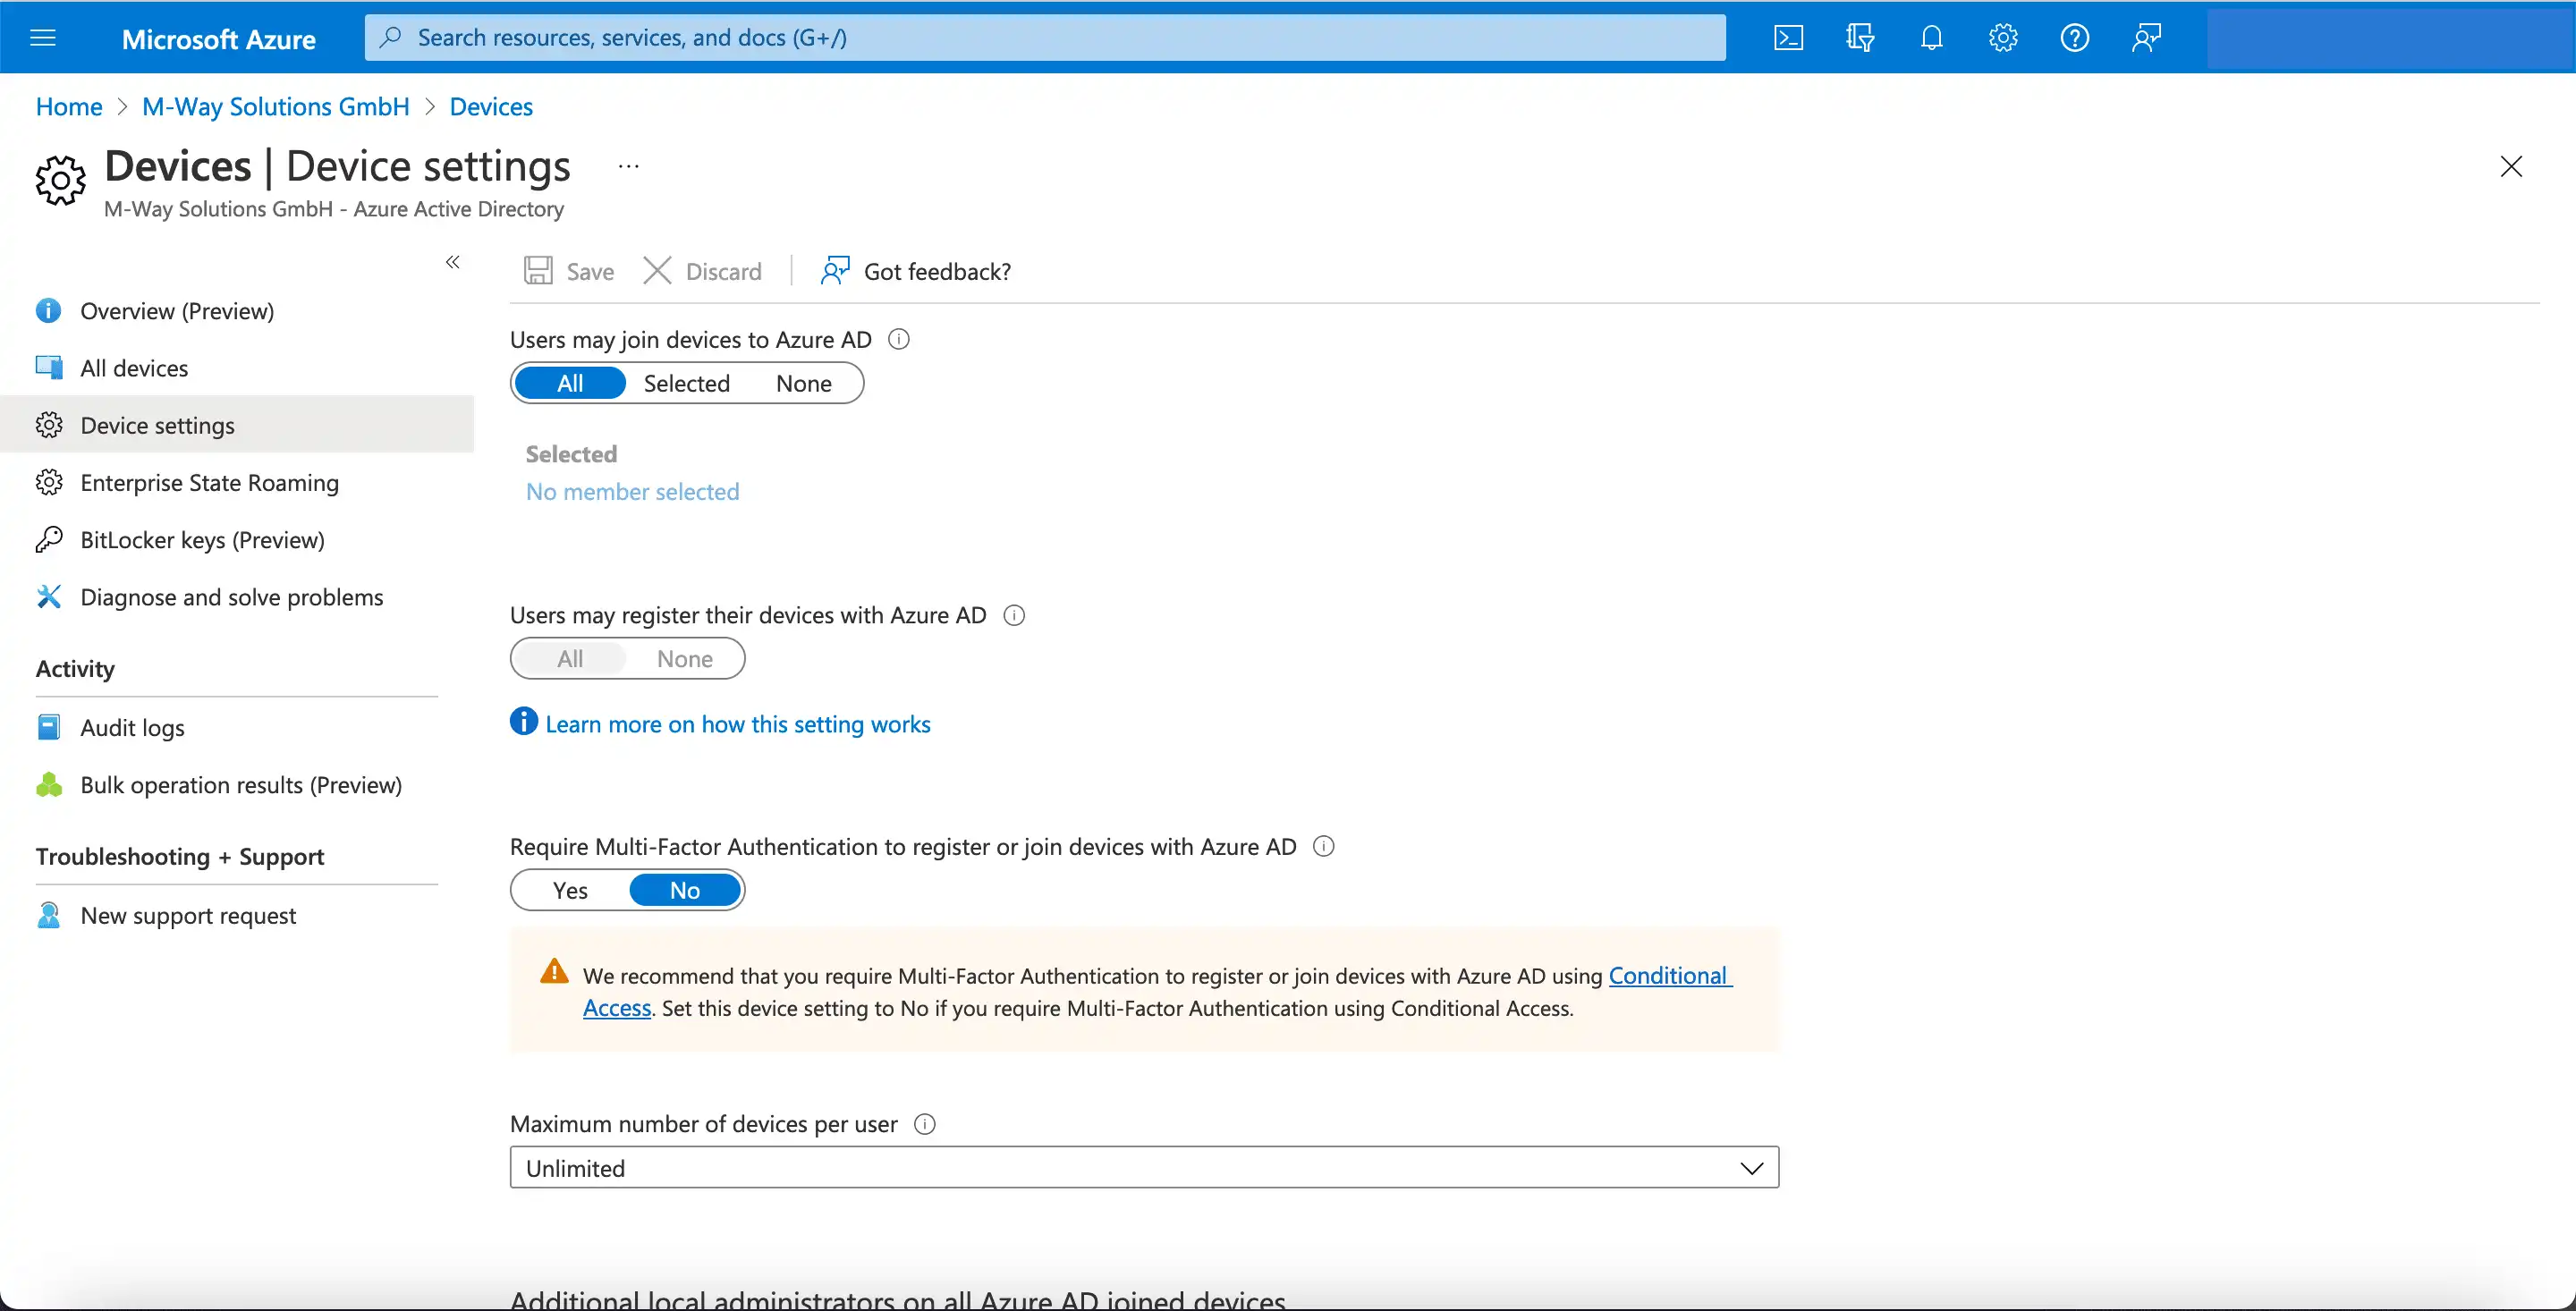
This completes the setup in Azure.
6. Select Relution service options and complete setup
In step 5 of the Relution instructions, you can optionally choose whether Azure AD users and Azure AD groups should be synchronized with Relution:

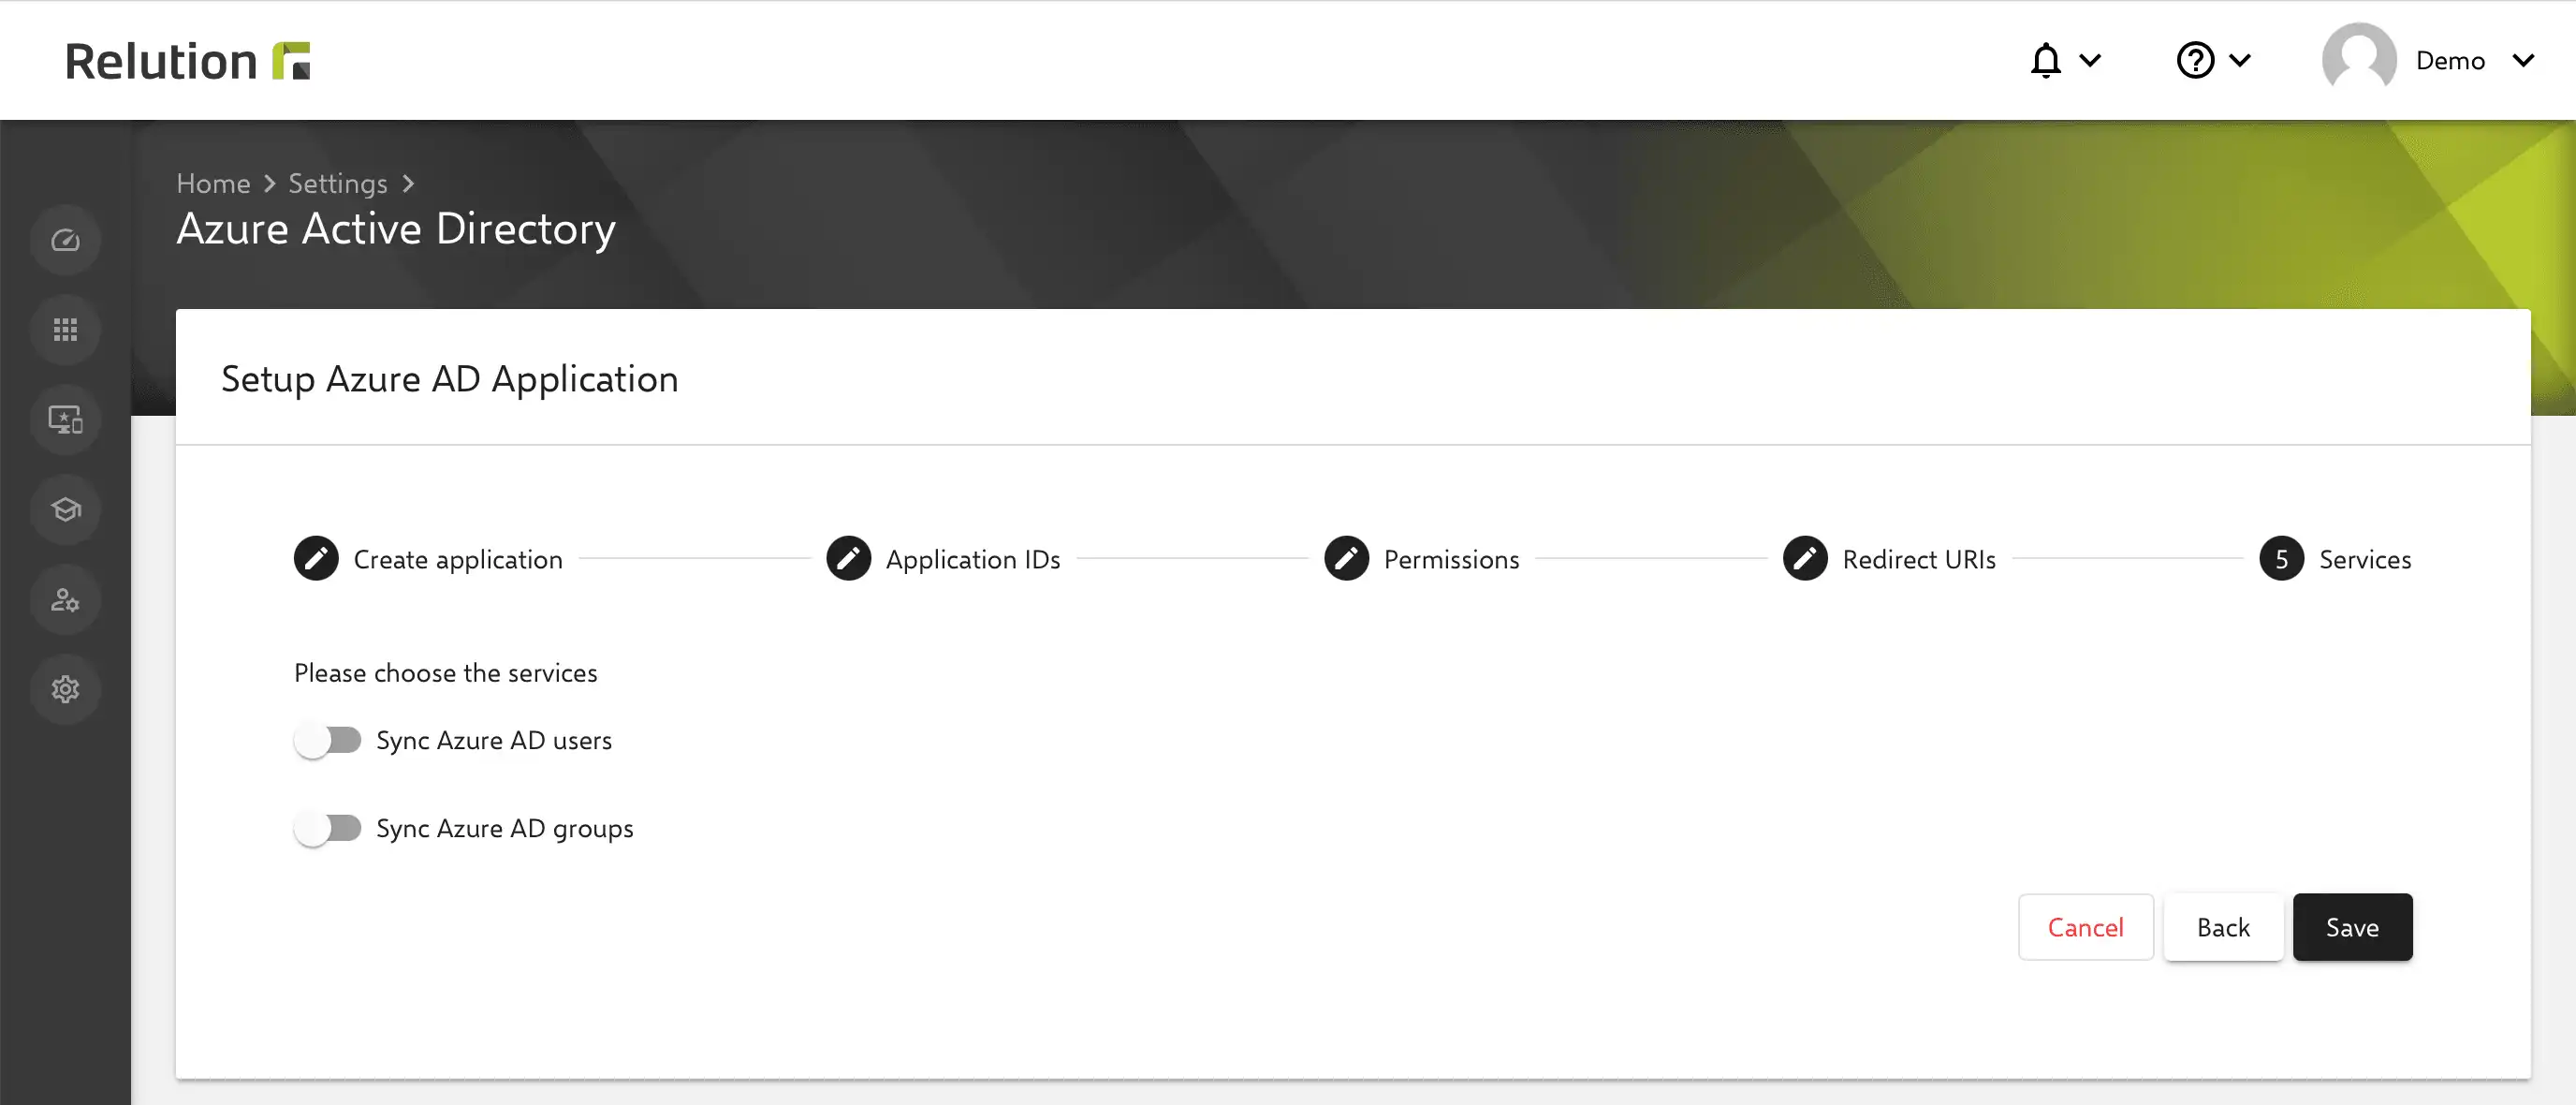
With “Save” completes the setup and linking of Azure AD in Relution.
How to add Windows 10/11 devices to Microsoft Store for Business and Azure AD?
To use the Microsoft Store for Business, an account is required.
Note: The Microsoft Store for Business will be switched off in the first quarter of 2023. Relution will provide its own solution for this in the future.
New devices can be procured and registered through a partner can be procured and registered. This way, the devices are automatically deposited in the Microsoft Store for Business and in Azure AD and do not have to be entered manually.
However, devices that have already been put into operation can also be added manually. This requires a CSV file that is created on the device via Powershell Script. The CSV file is then uploaded via “Add Devices” and the added devices must be reset.
The devices will then appear in the device list and must be associated with a configured profile.
Which settings are required in advance for an Out-of-the-Box-Experience (OOBE) at Microsoft?
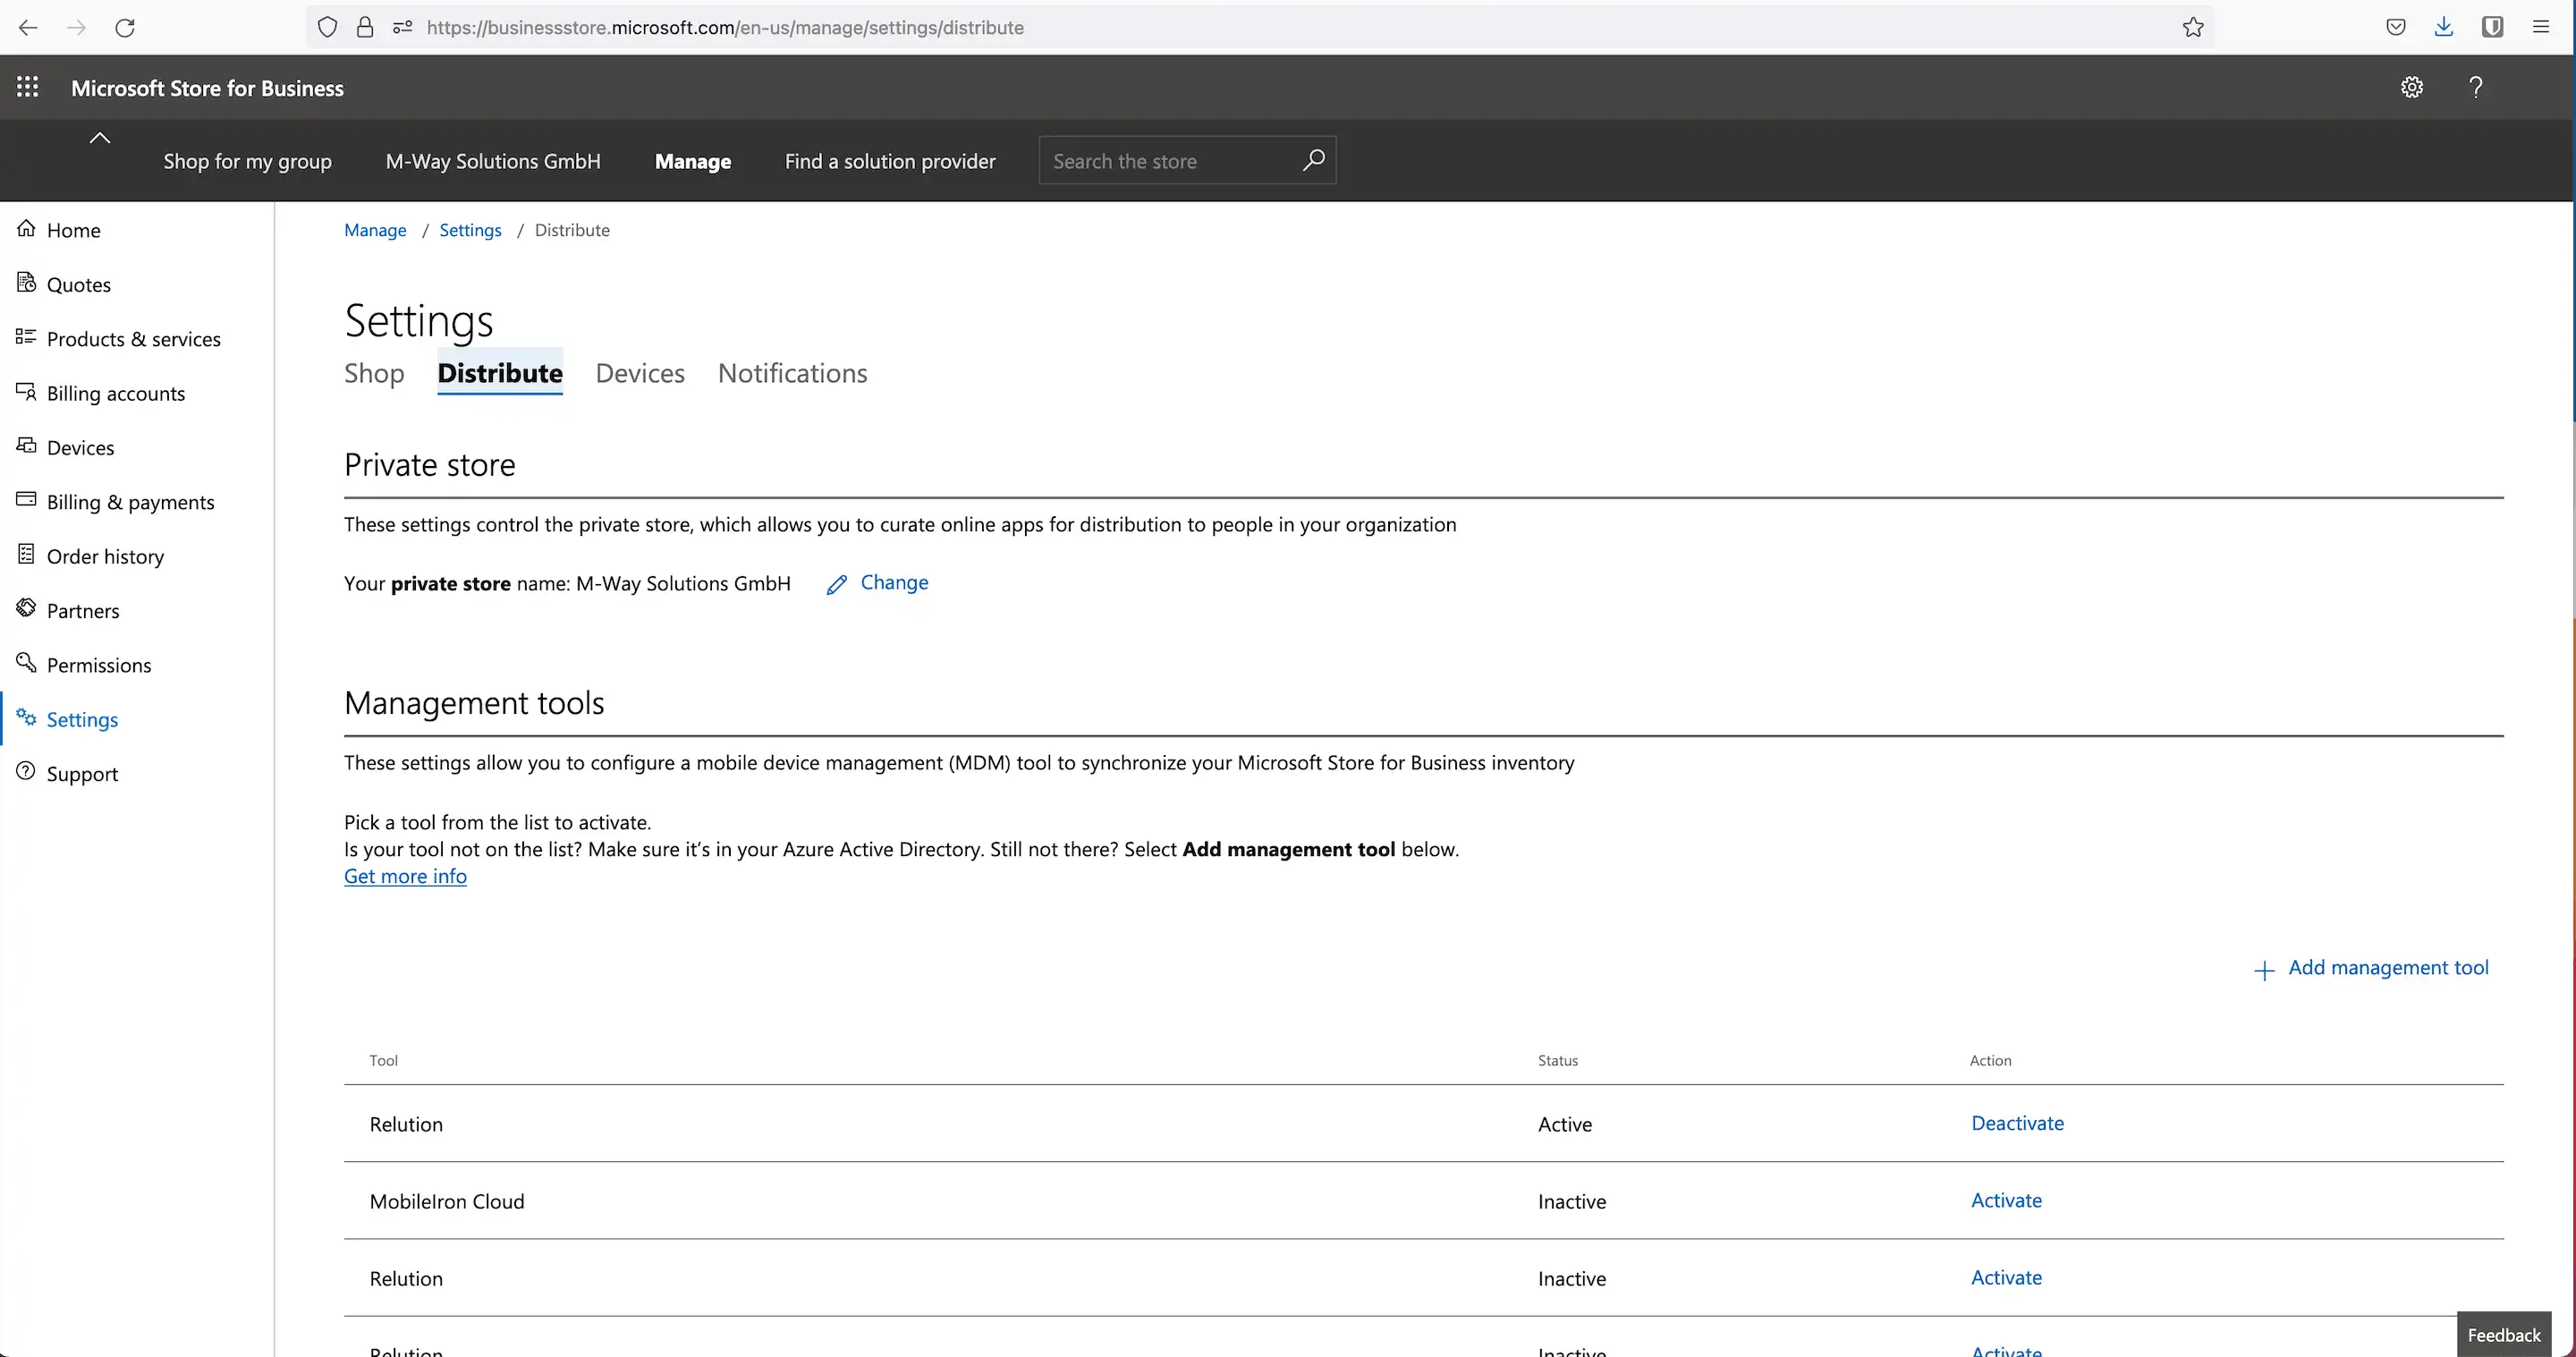
In Microsoft Store for Business, profiles can now be applied to added devices.
-
Under “Settings” -> “Distribute” tab -> click “Add management tool” and select the MDM application by name
-
„Click “Activate” (if not already activated)
-
Note: If there are other applications in the list, they must be disabled.

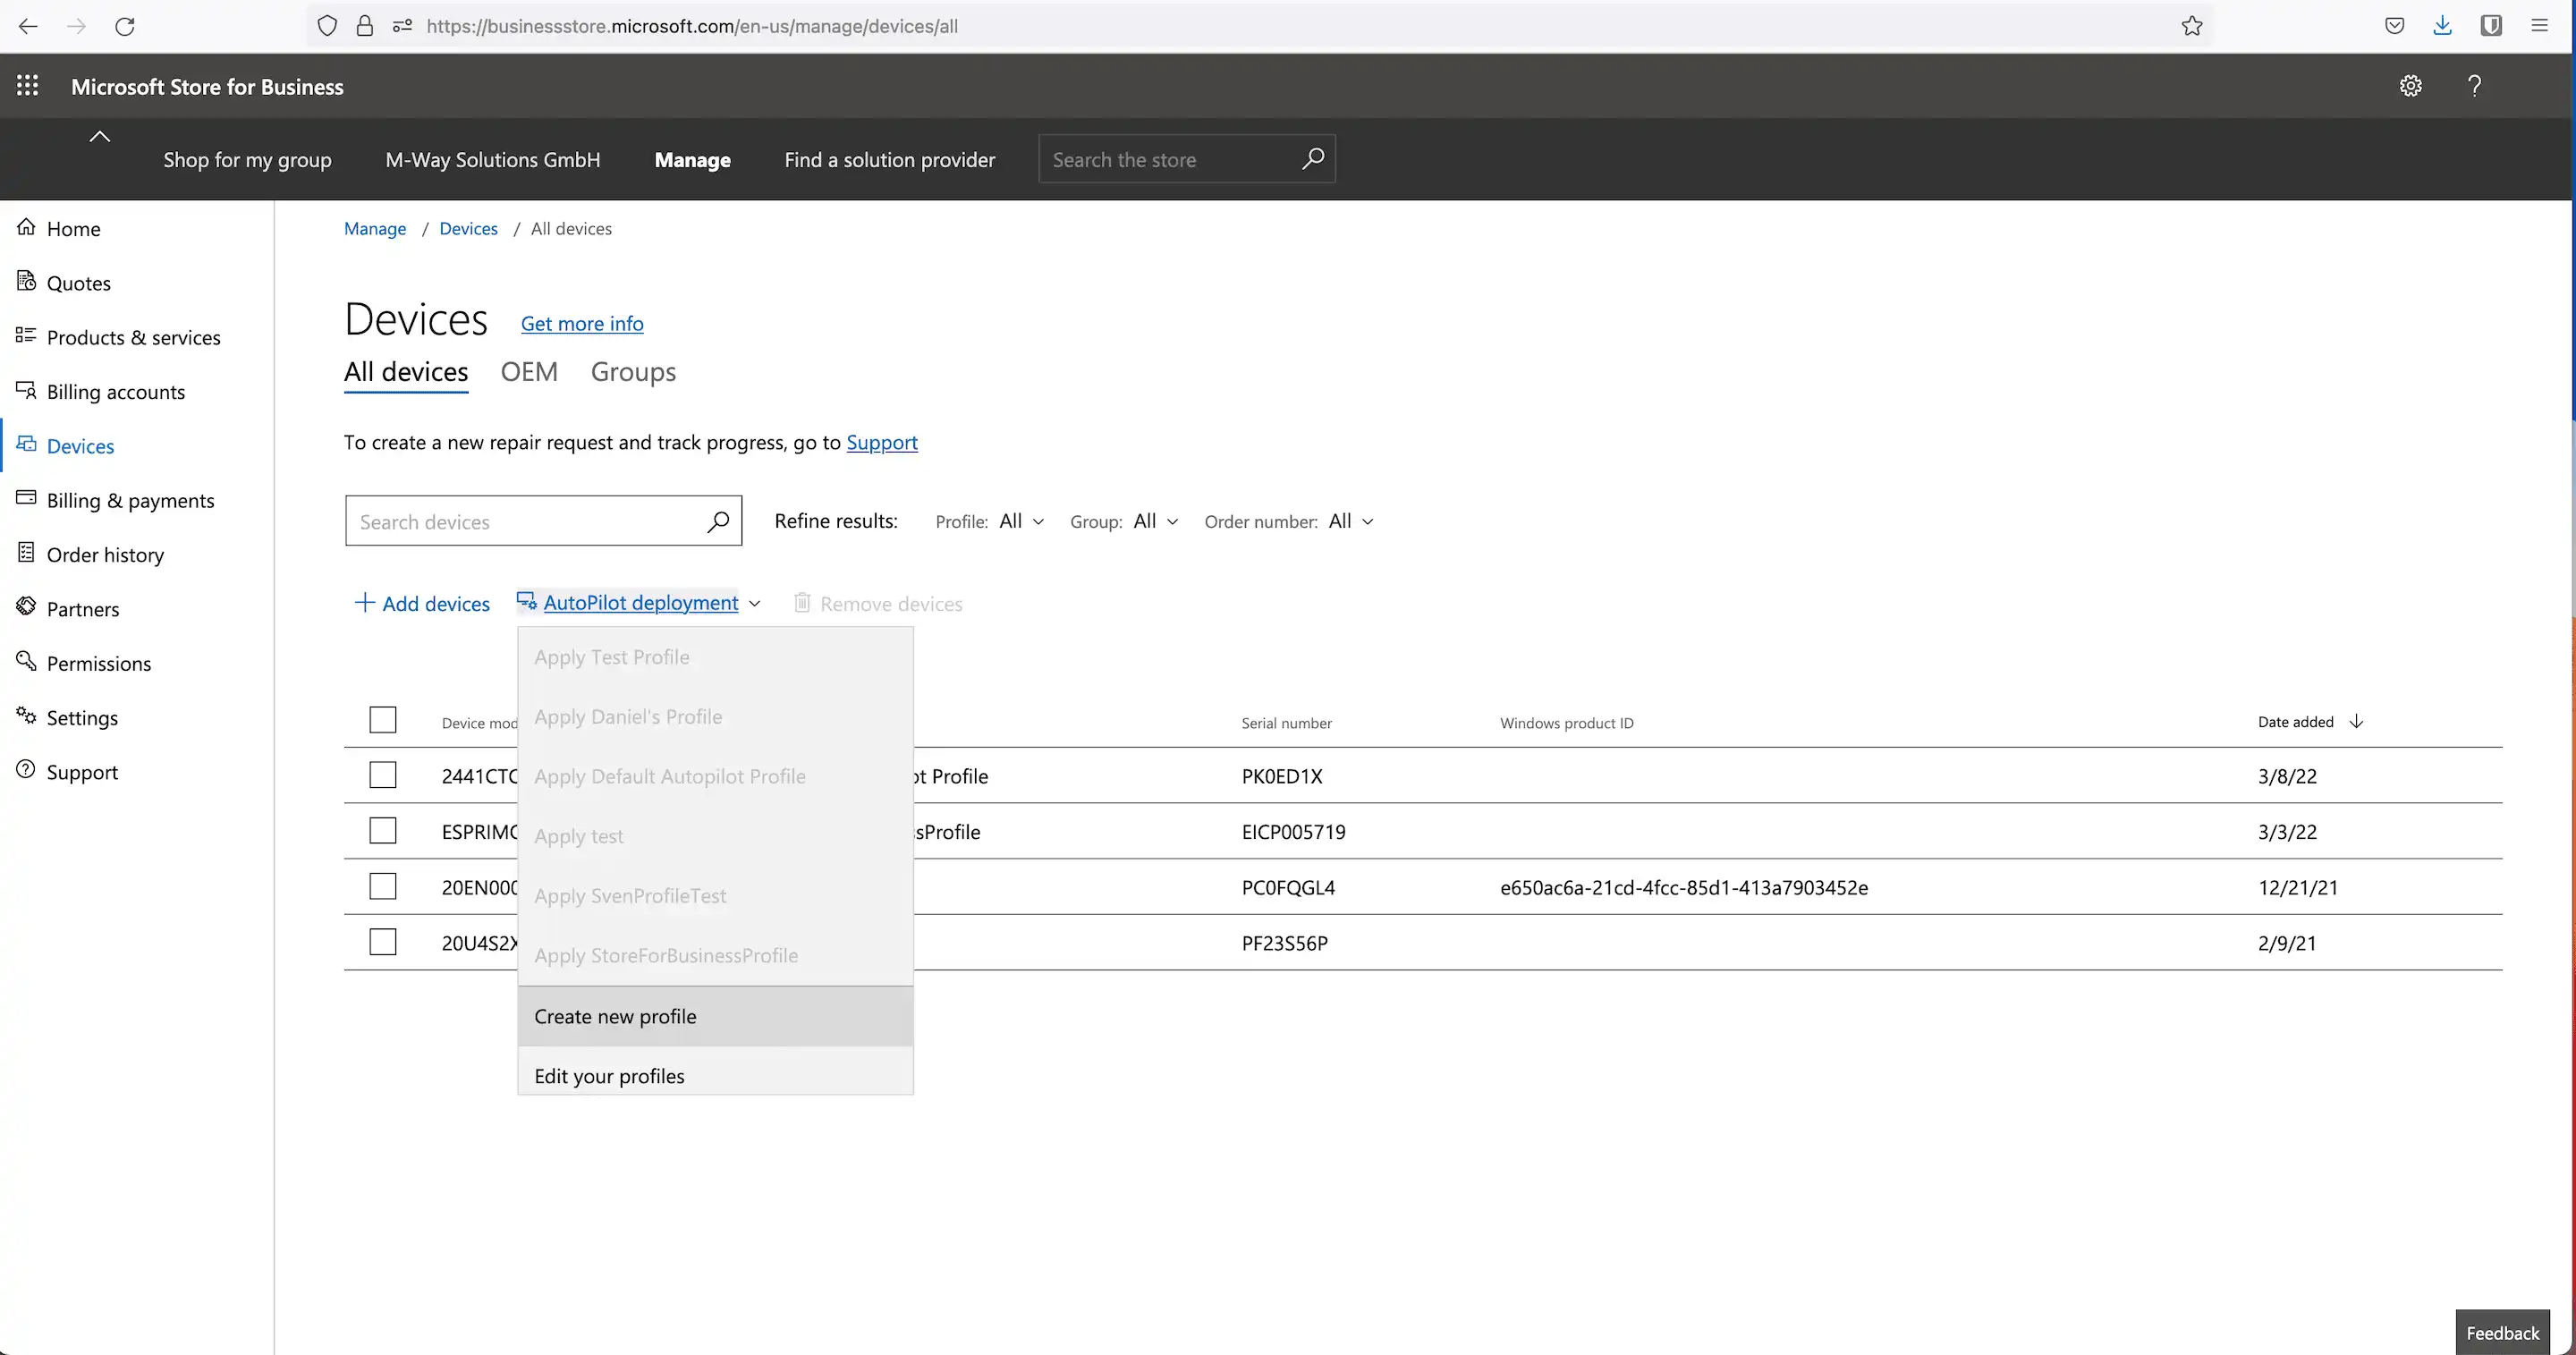
Then select “Devices” -> “Autopilot deployment” -> “Create new profile”:

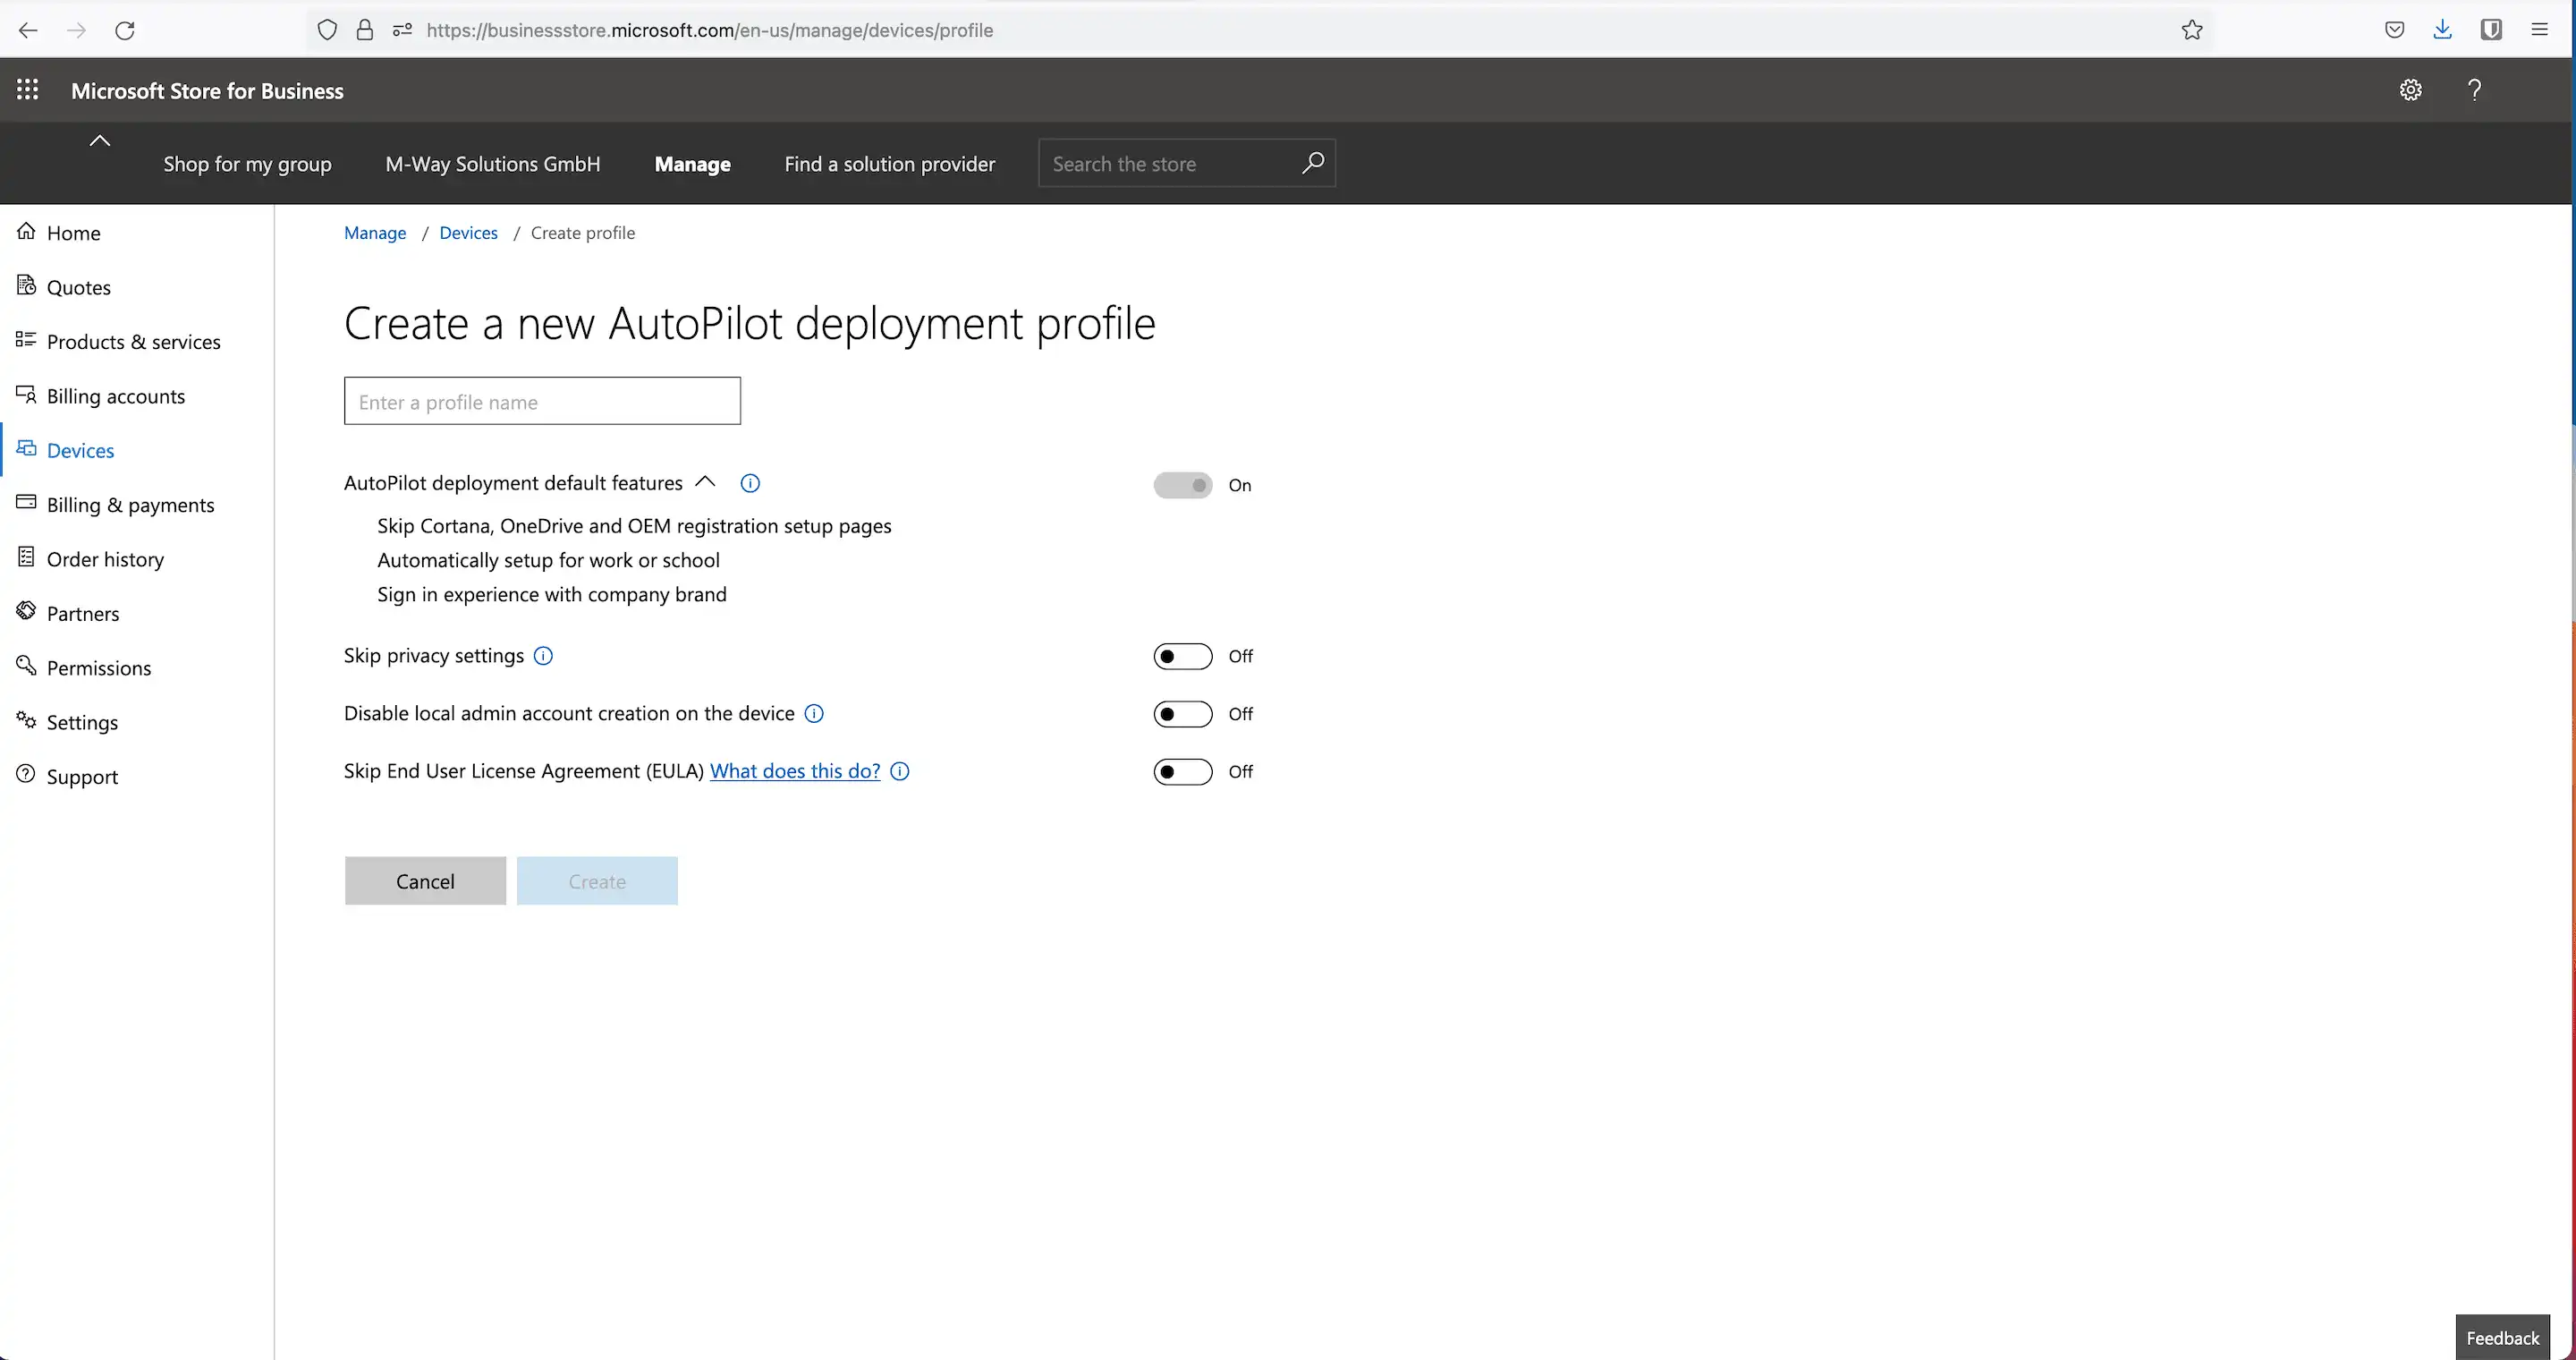
Now the following information must be provided for the new Autopilot deployment profile:
-
Assign names
-
Skip privacy settings: optional
-
Disable creation of local administrator account on the device: optional (if the checkbox is selected, a standard user account will be created, otherwise an administrator account).
-
Skip Microsoft Software license terms: optional
-
Confirm inputs with “Create”

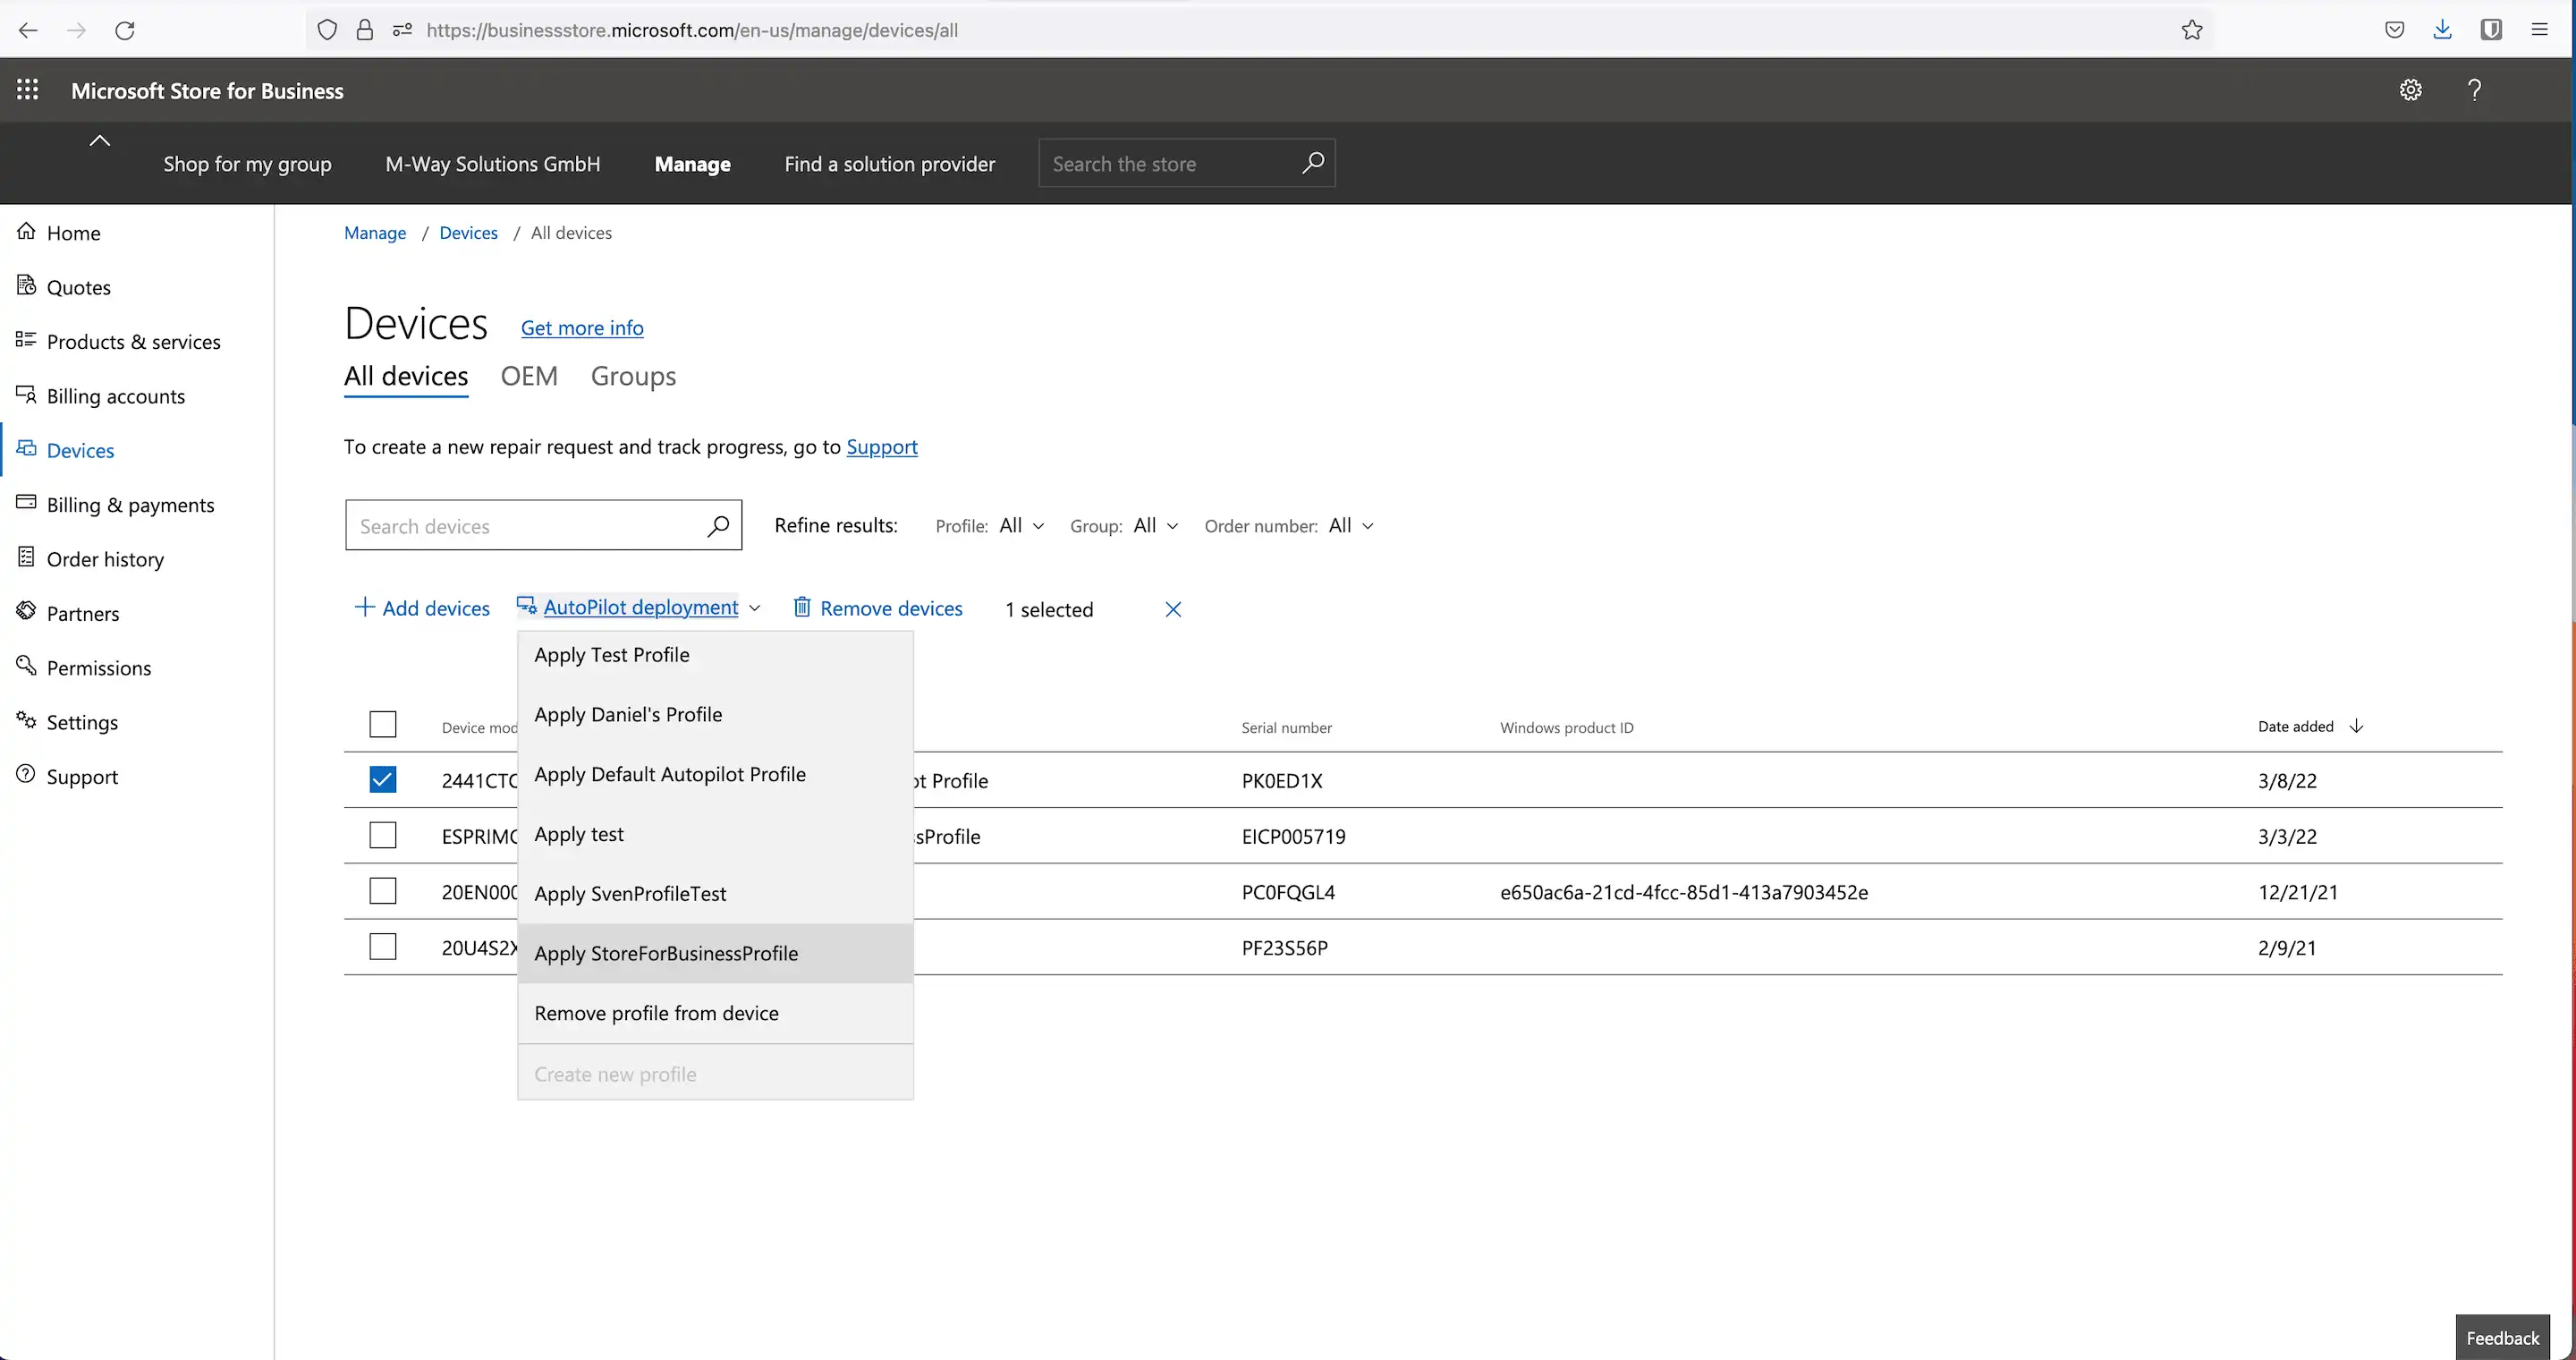
Now created profiles can be applied to devices:
How are stored Windows 10/11 devices synchronized in Relution for further management and configuration?
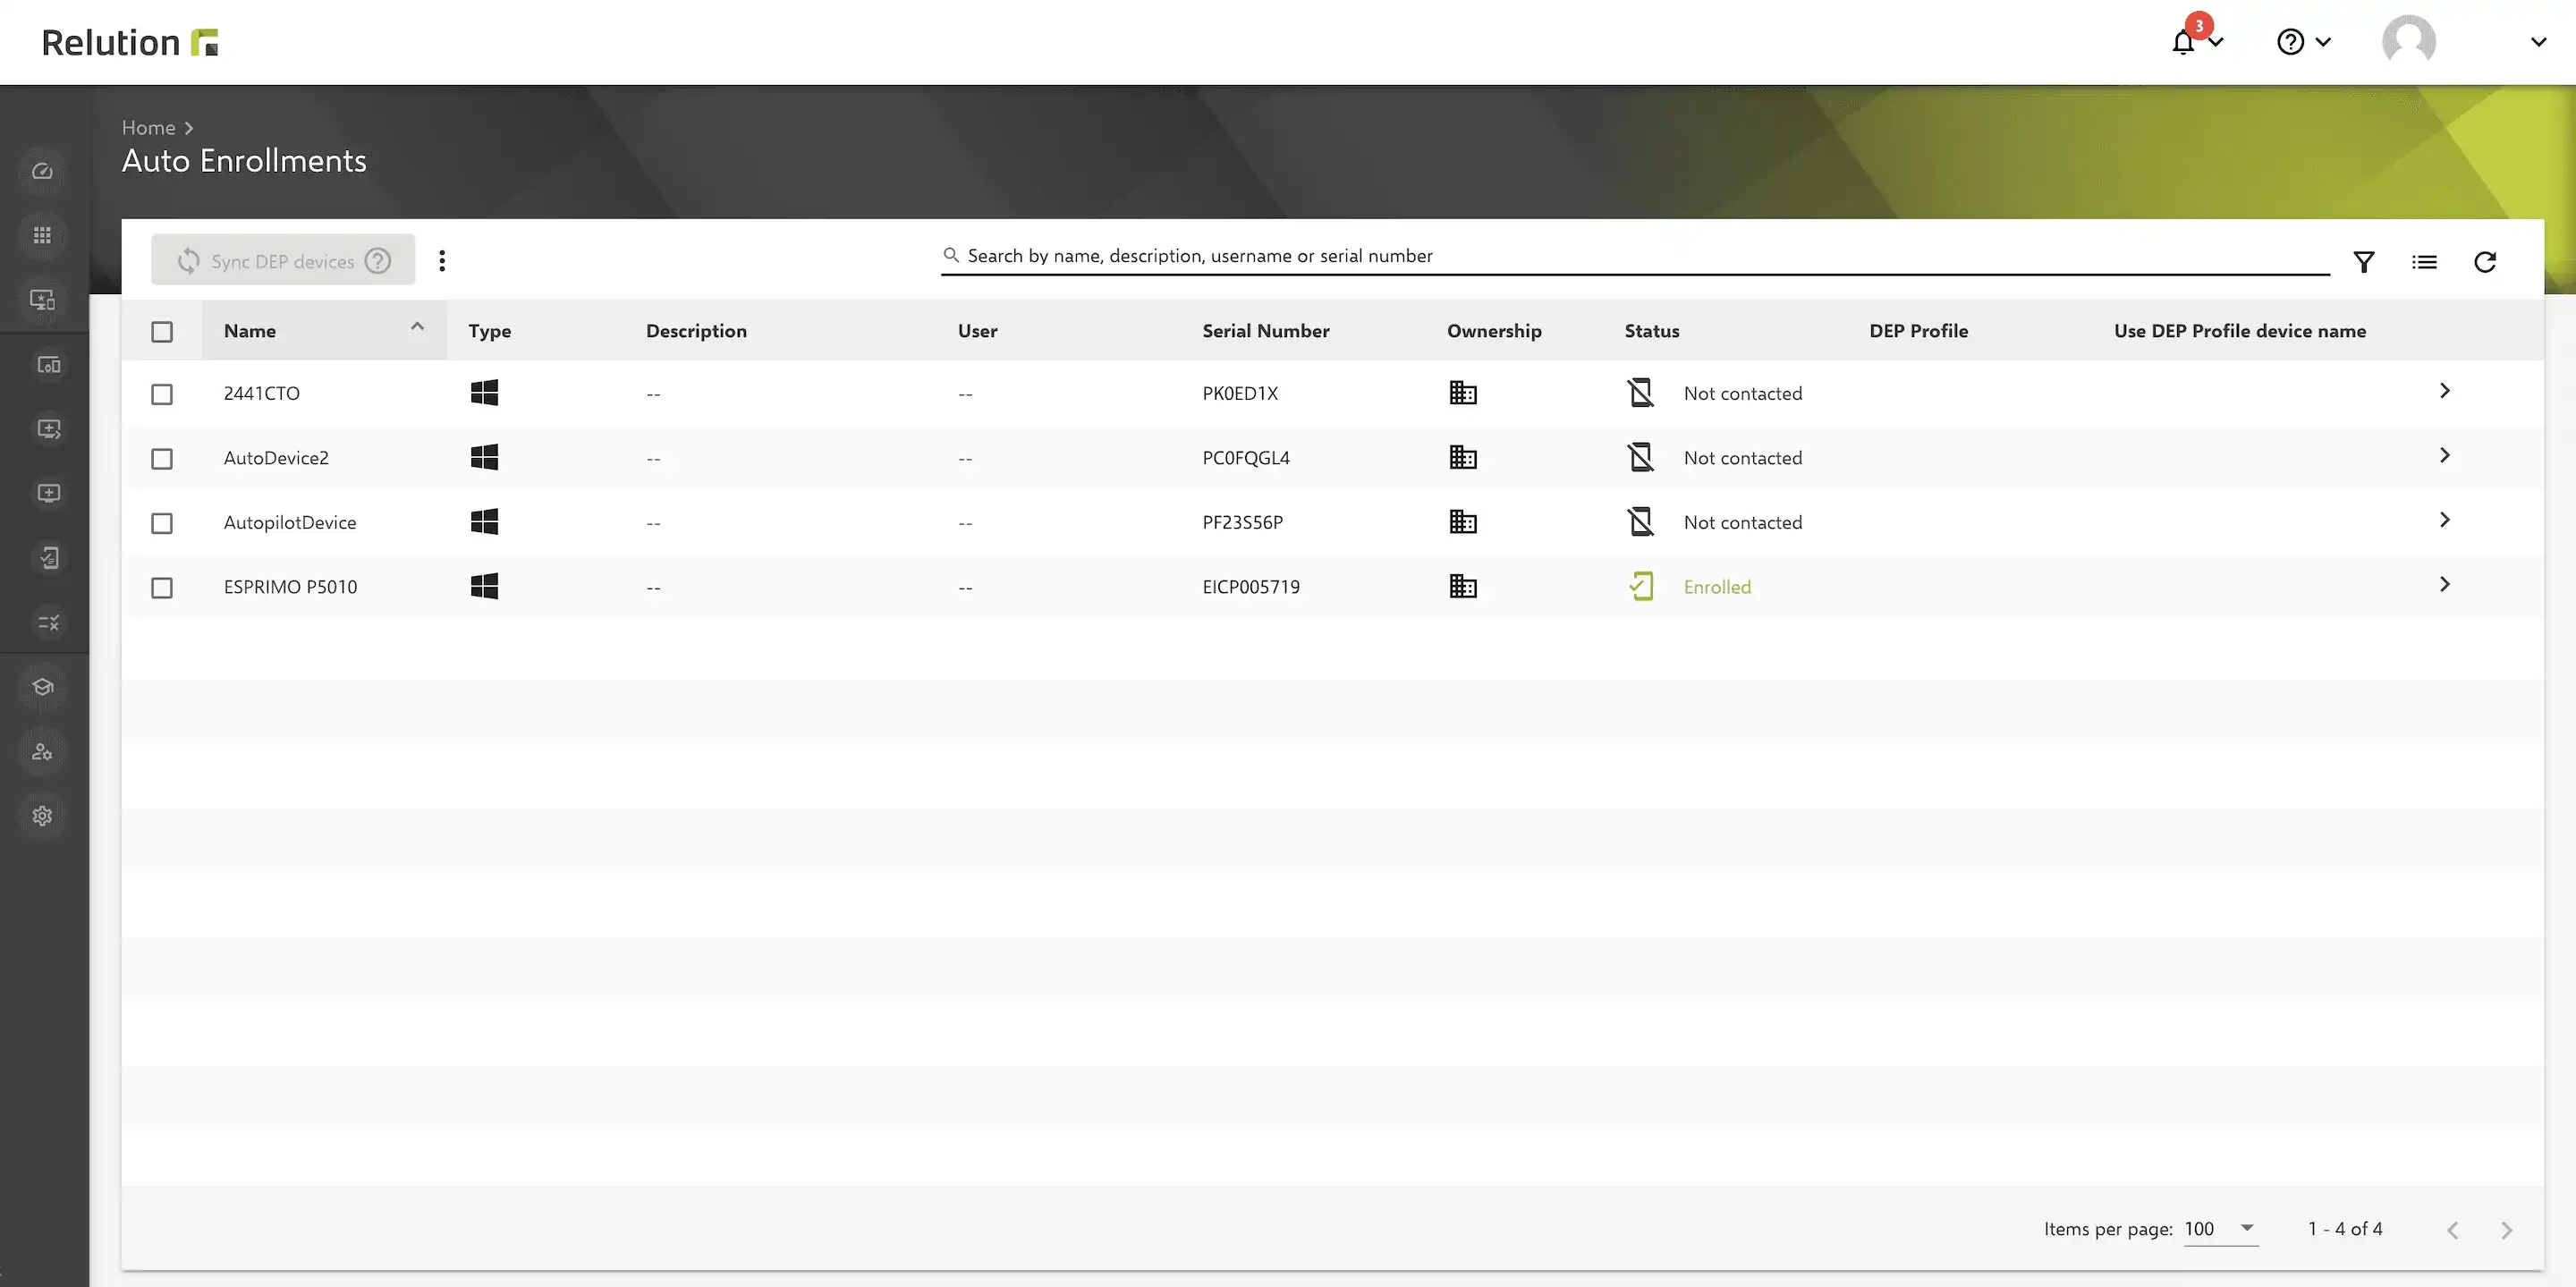
Under “Auto enrollment”, the Windows 10/11 devices are added via the “Synchronize” button in Relution. A device must not be enrolled at this time.
Note: only when a Windows 10/11 device appears in the list, an automatic enrollment via Windows Autopilot can be performed with it.

How does a Windows 10/11 device automatically enroll in Relution afterwards?
After resetting the device or during initial startup, the network connection is established in the OOBE. Once this is done, the device communicates with Azure and downloads the Autopilot profile. The login screen for the Microsoft account will then appear.
After the user enters in their credentials, communication with Relution takes place. The usage condition endpoint is called first, and then enrollment in Relution takes place.
If the user is deposited in Relution and an auto-enrollment exists for the device, the enrollment is executed. Then, the Windows 10/11 device appears in the appropriate organization’s device inventory in Relution and can be further configured via Windows policies.